![]()
This is where it all began. We took the inspiration for our name from The Original Little Bass Head™ who we witnessed getting low at the Eastlake Music Festival 05/17/17.
—
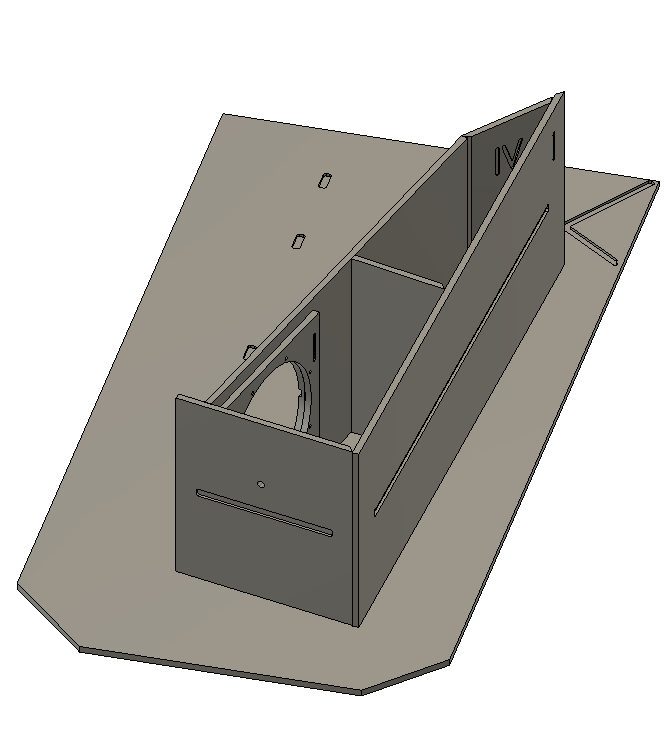
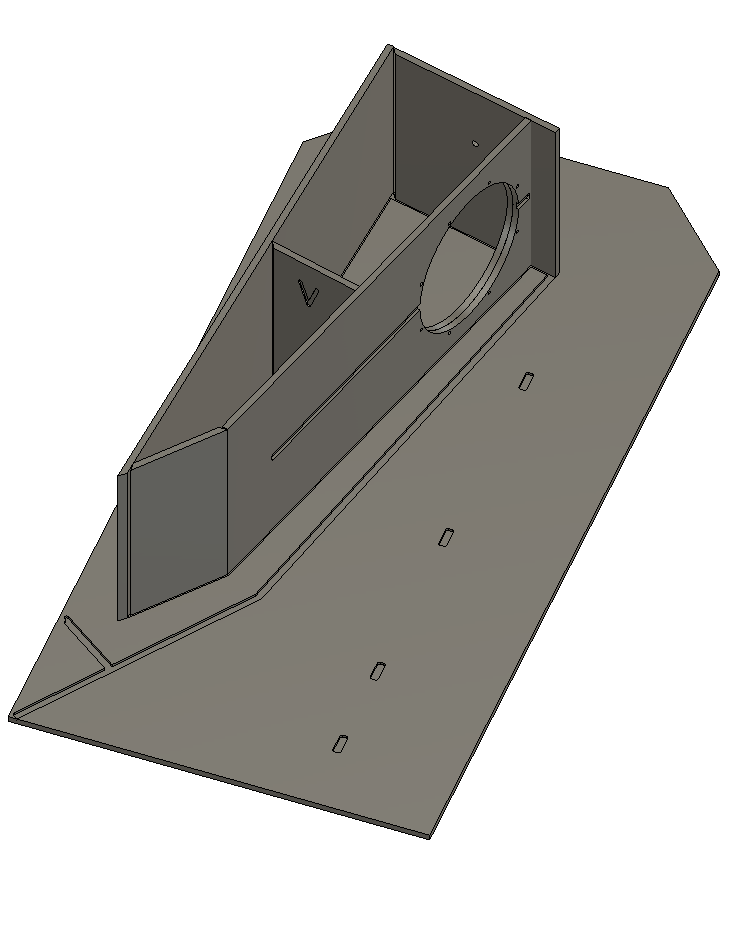
We have been building the Bill Fitzmaurice Tuba 60 folded horns since 2015. We have now created a viable Open Source version designed in Fusion 360 to be cut by any CNC table able to handle 4×8 sheets of 1/2″ plywood. We have iterated well over a dozen times and believe we finally have a version worthy of showing the world. Below you will find the files along with instructions on how to assemble them.
Have fun. Get Low™
—
File: 01-28-20 Tuba 60
Supplies/Tools you are going to need:
| (1) | Eminence Lab-12C |
| (6 feet) | Speaker Wire |
| (1) | Terminal Cup |
| (2) | NL-8 Chassis Mount |
| (1 pack) | 3/4″ Brad nail |
| (28 oz) | Loctite Premium Adhesive |
| (8) | 10-32 Socket Head Screws |
| (8) | #10 Washer |
| (2) | 80 grit sand paper |
| (1) | Chisel |
| (1) | 4″ textured foam roller |
| (1/2 gal) | Primer |
| (1/2 gal) | Acry-Tech DuraTex Black 1 Gallon Roller Grade Speaker Cabinet Coating |
—
—
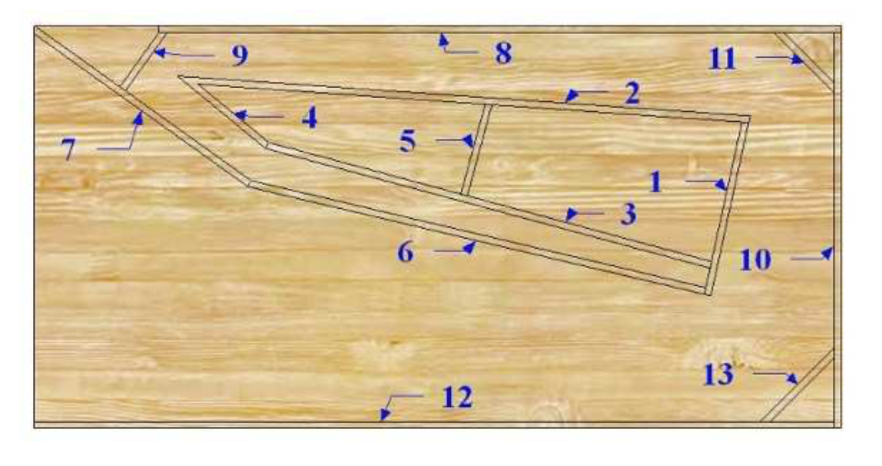
I have kept the same parts numbering scheme. Braces are numbered using the parts they connect (for example: brace-6-12 connects Part 6 and Part 12). Additionally, for parts that have questionable orientation, I have added registration marks. In the text I capitalize and bold the part numbers. Not sure why, but it seems like the right thing to do.
—
—
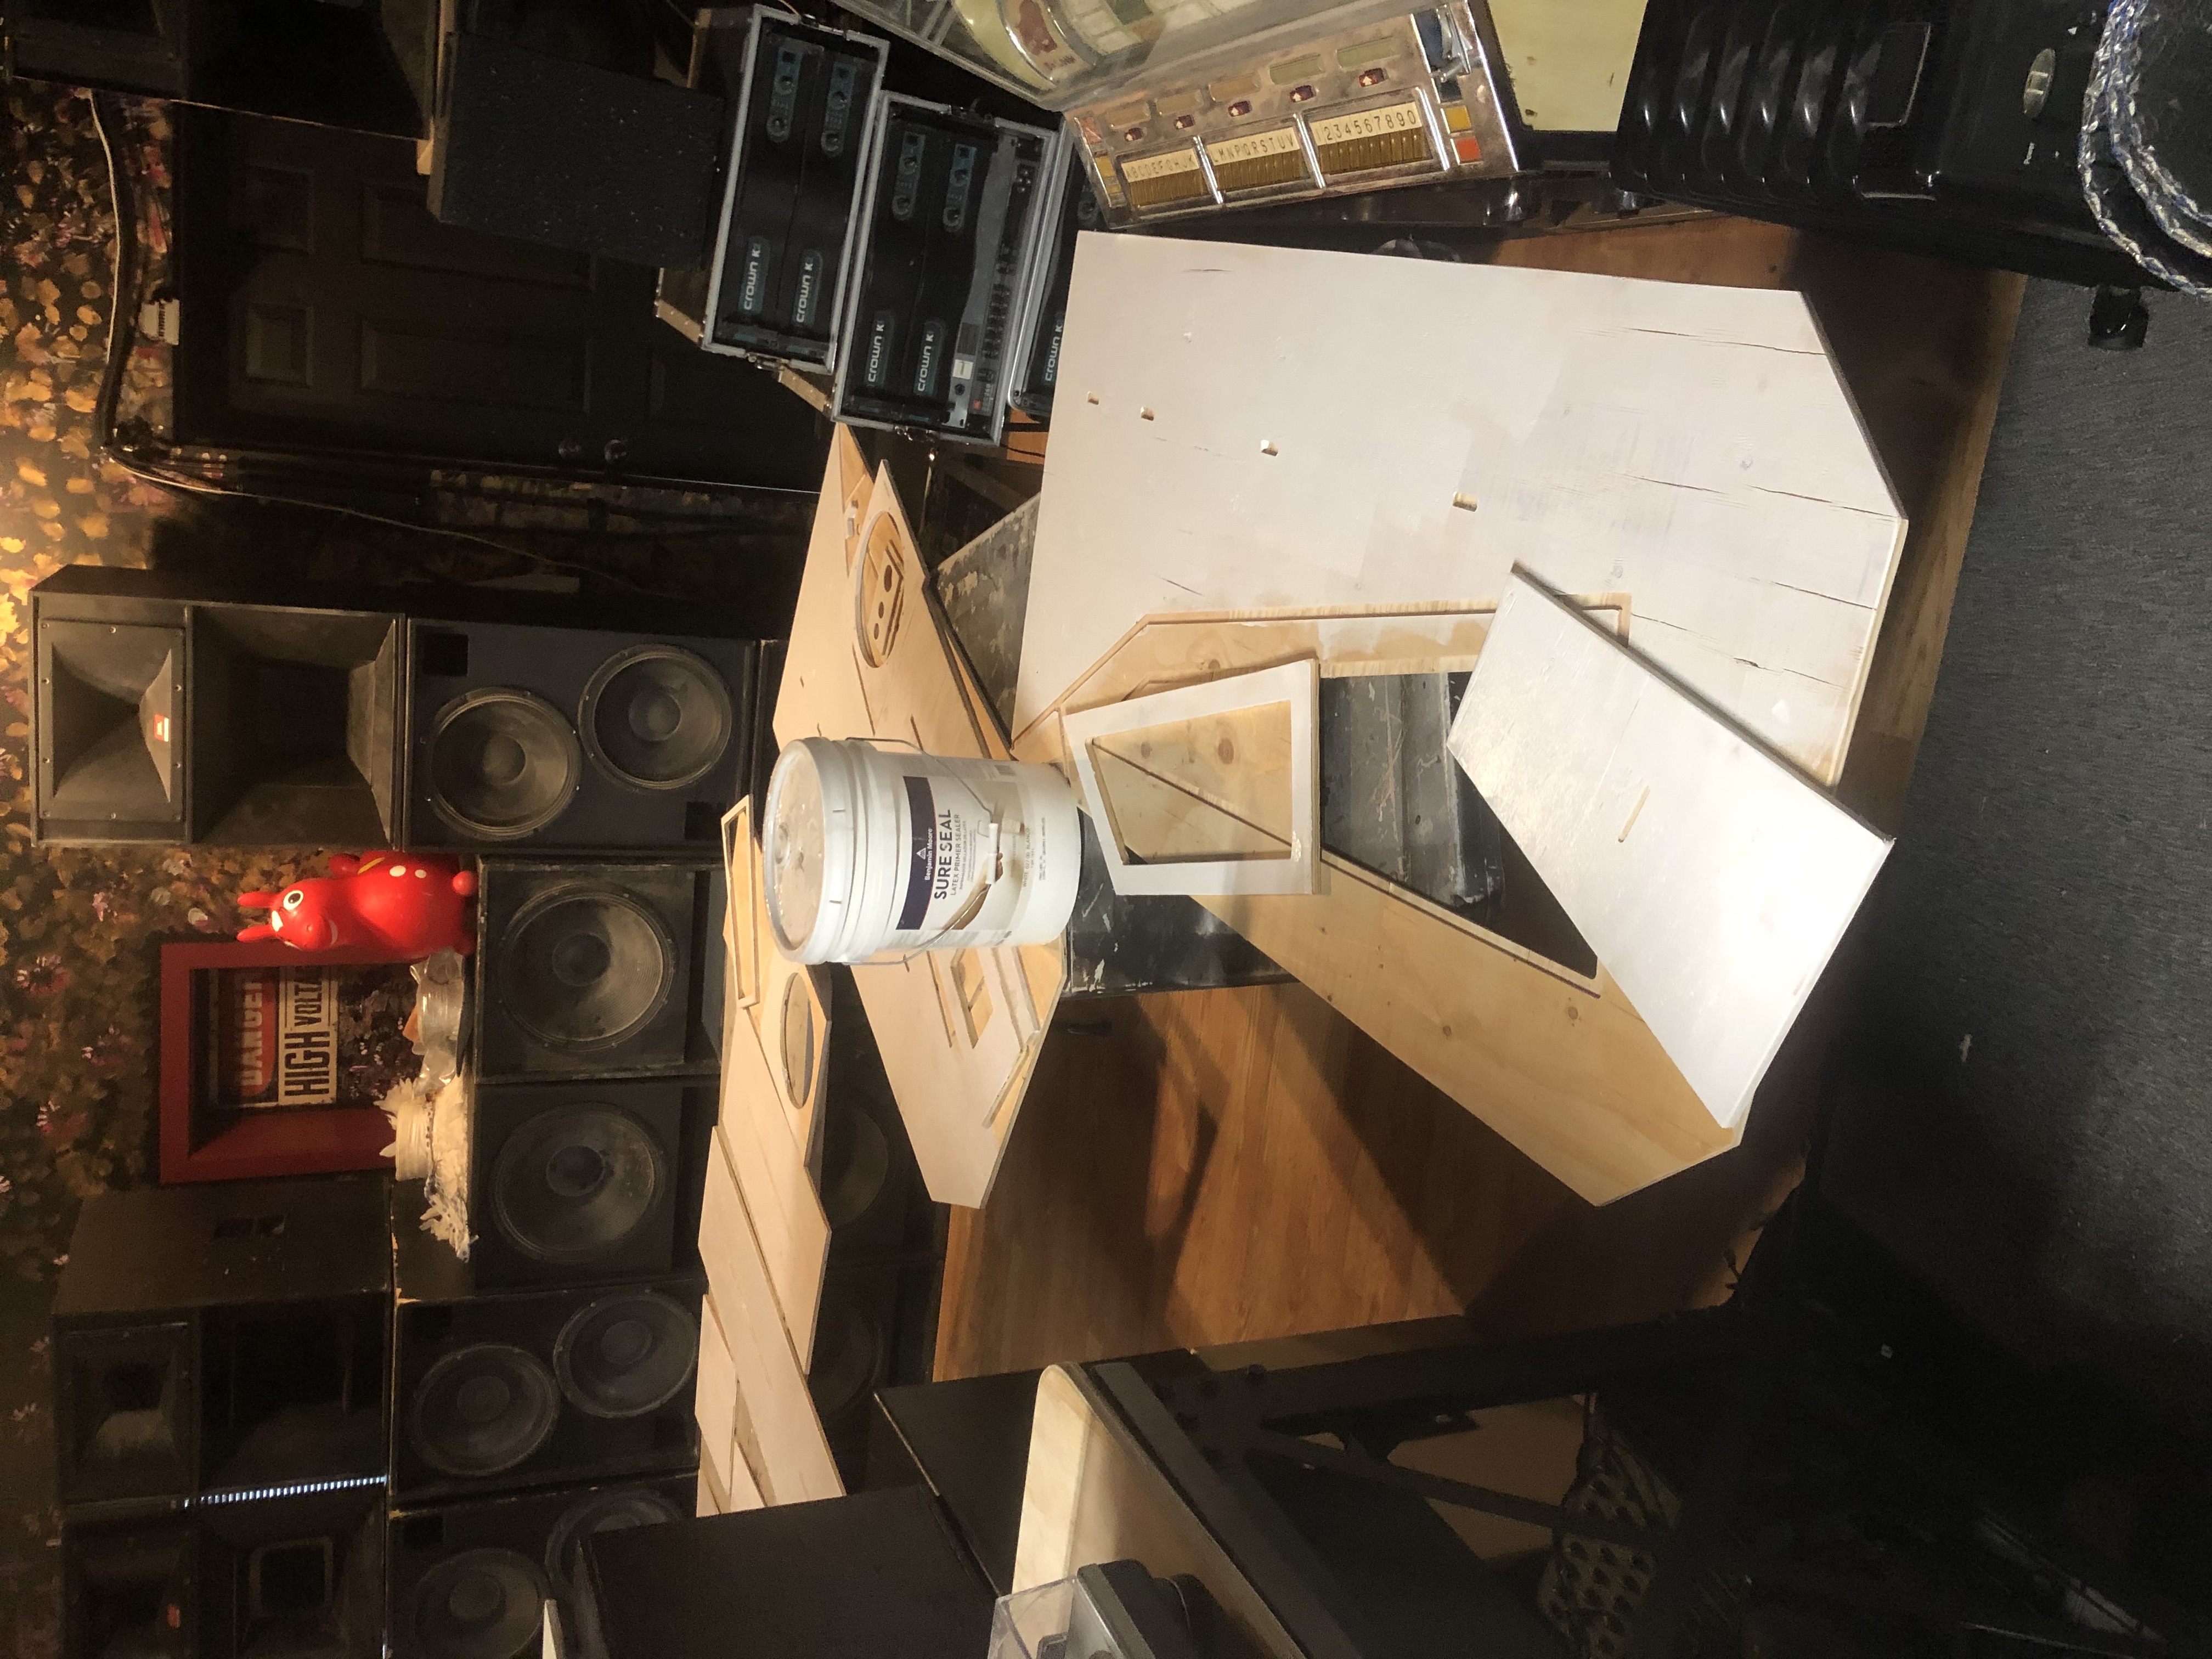
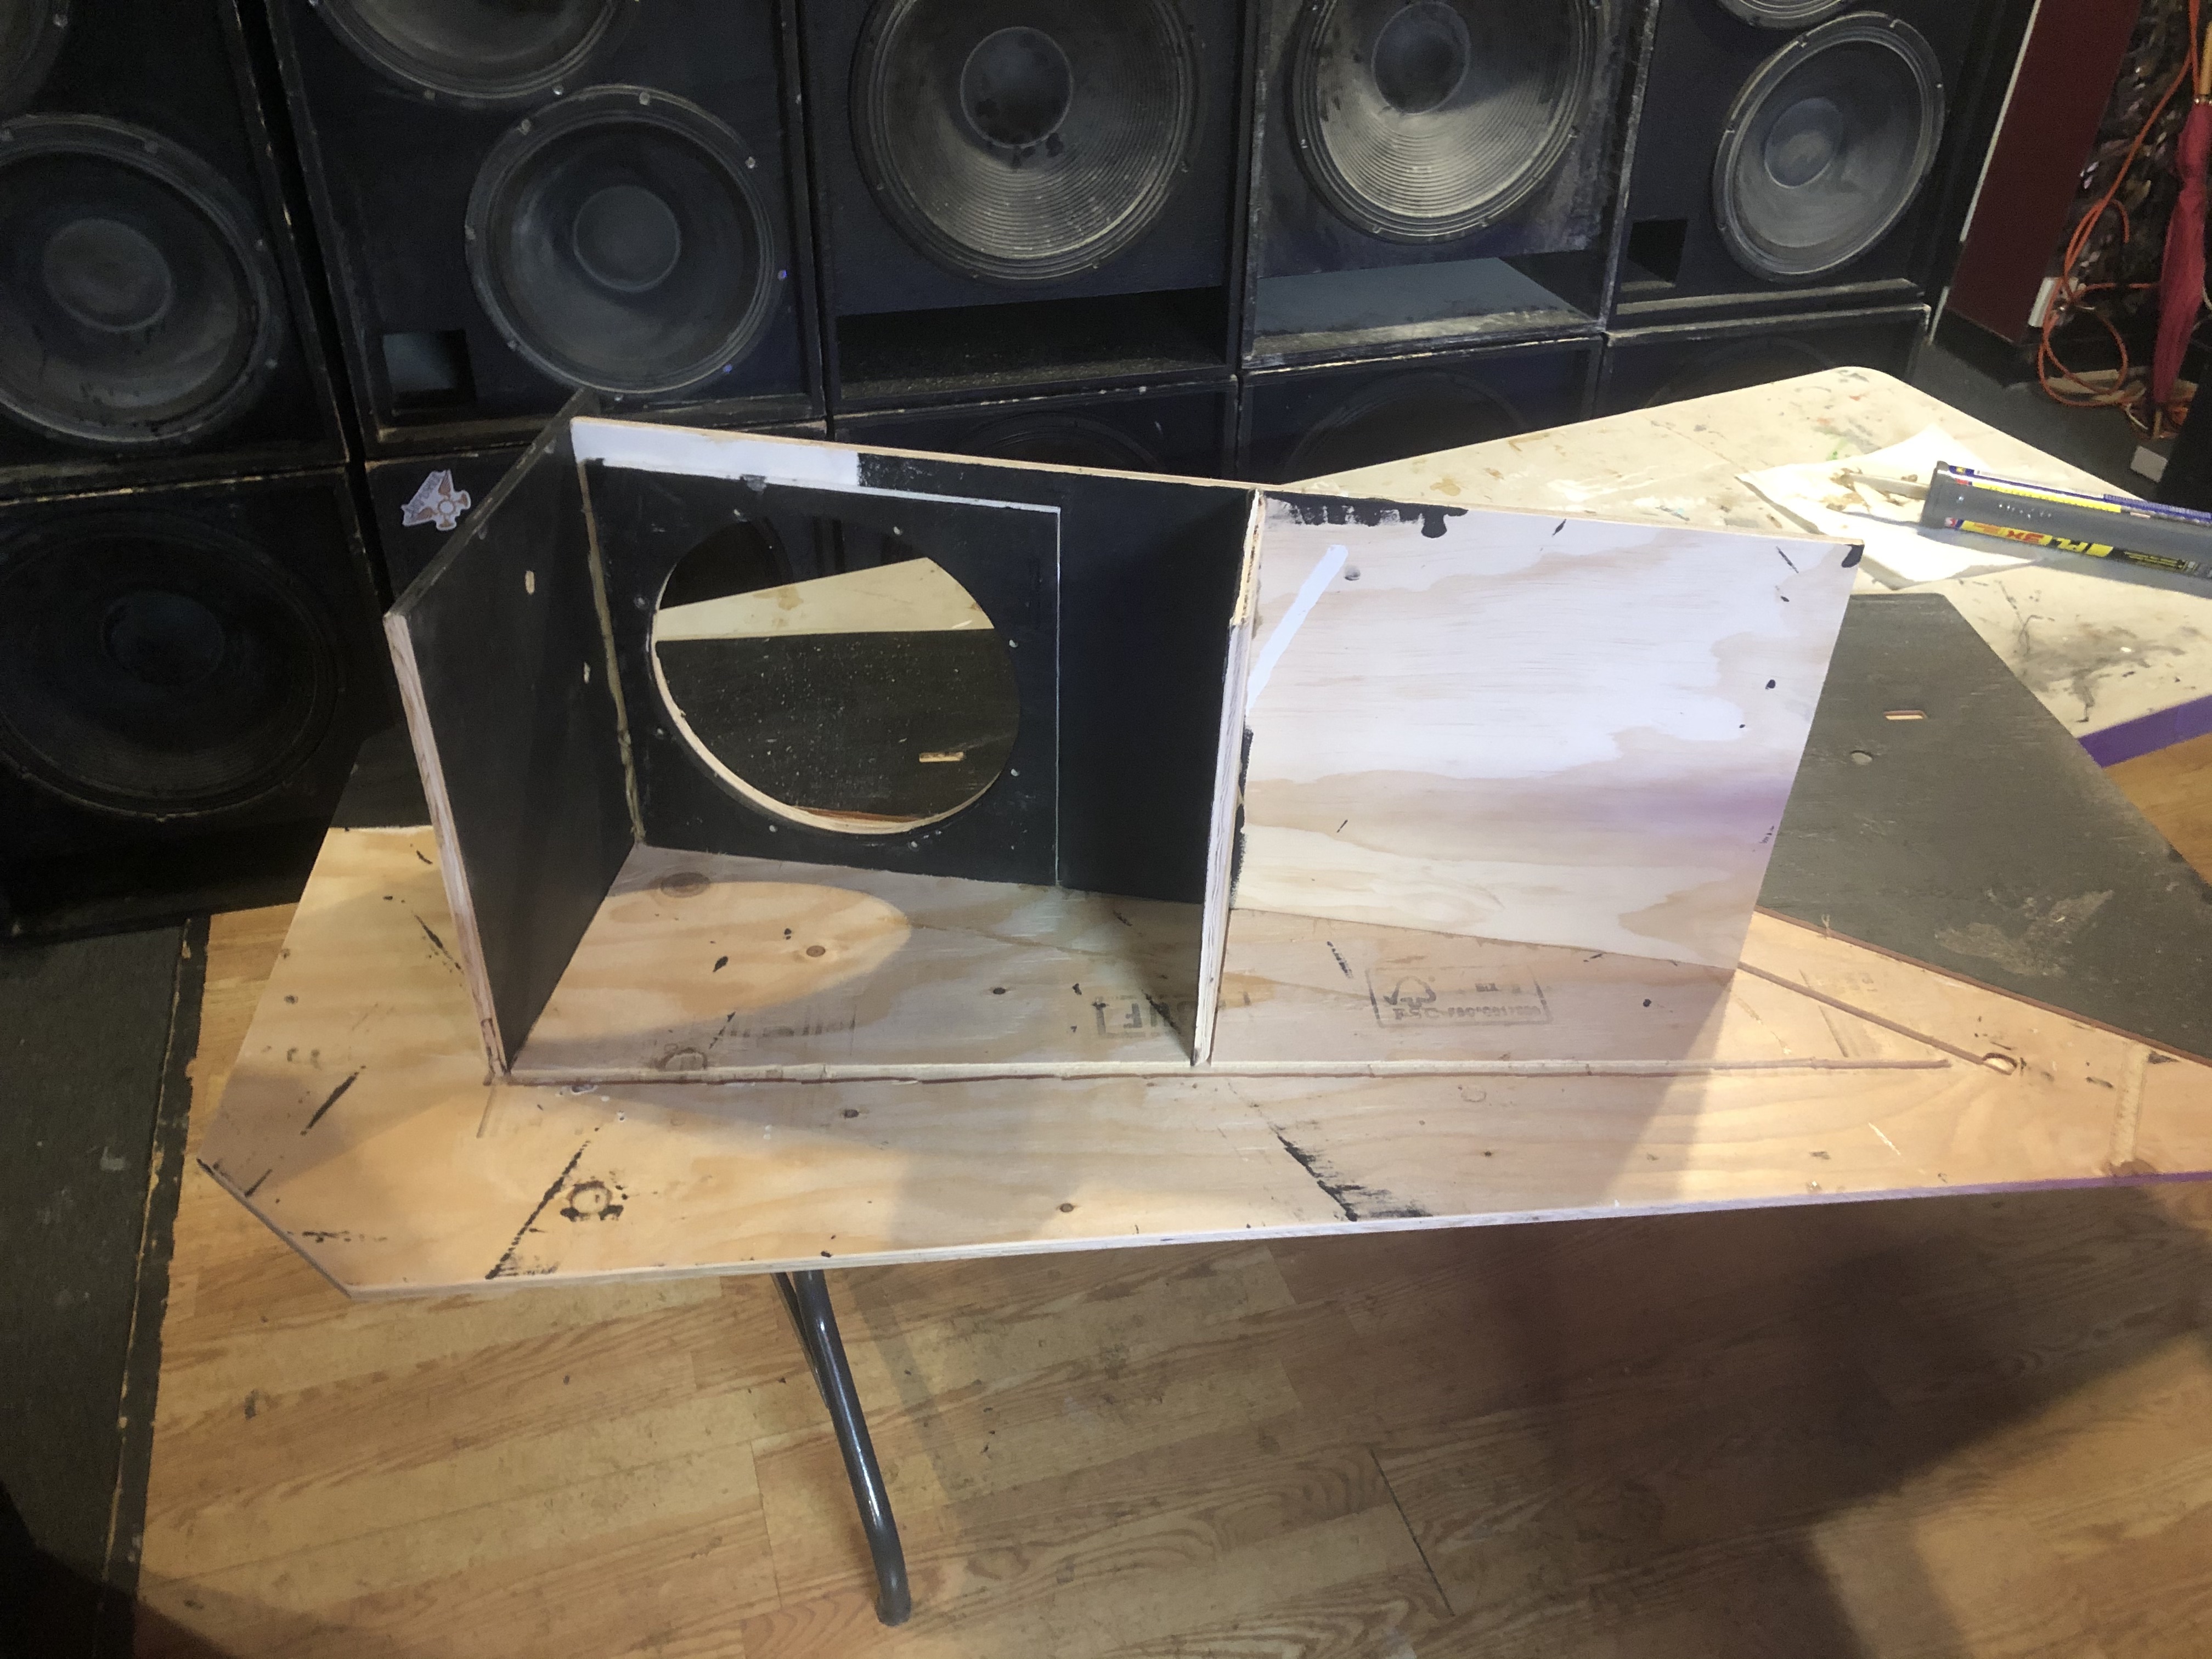
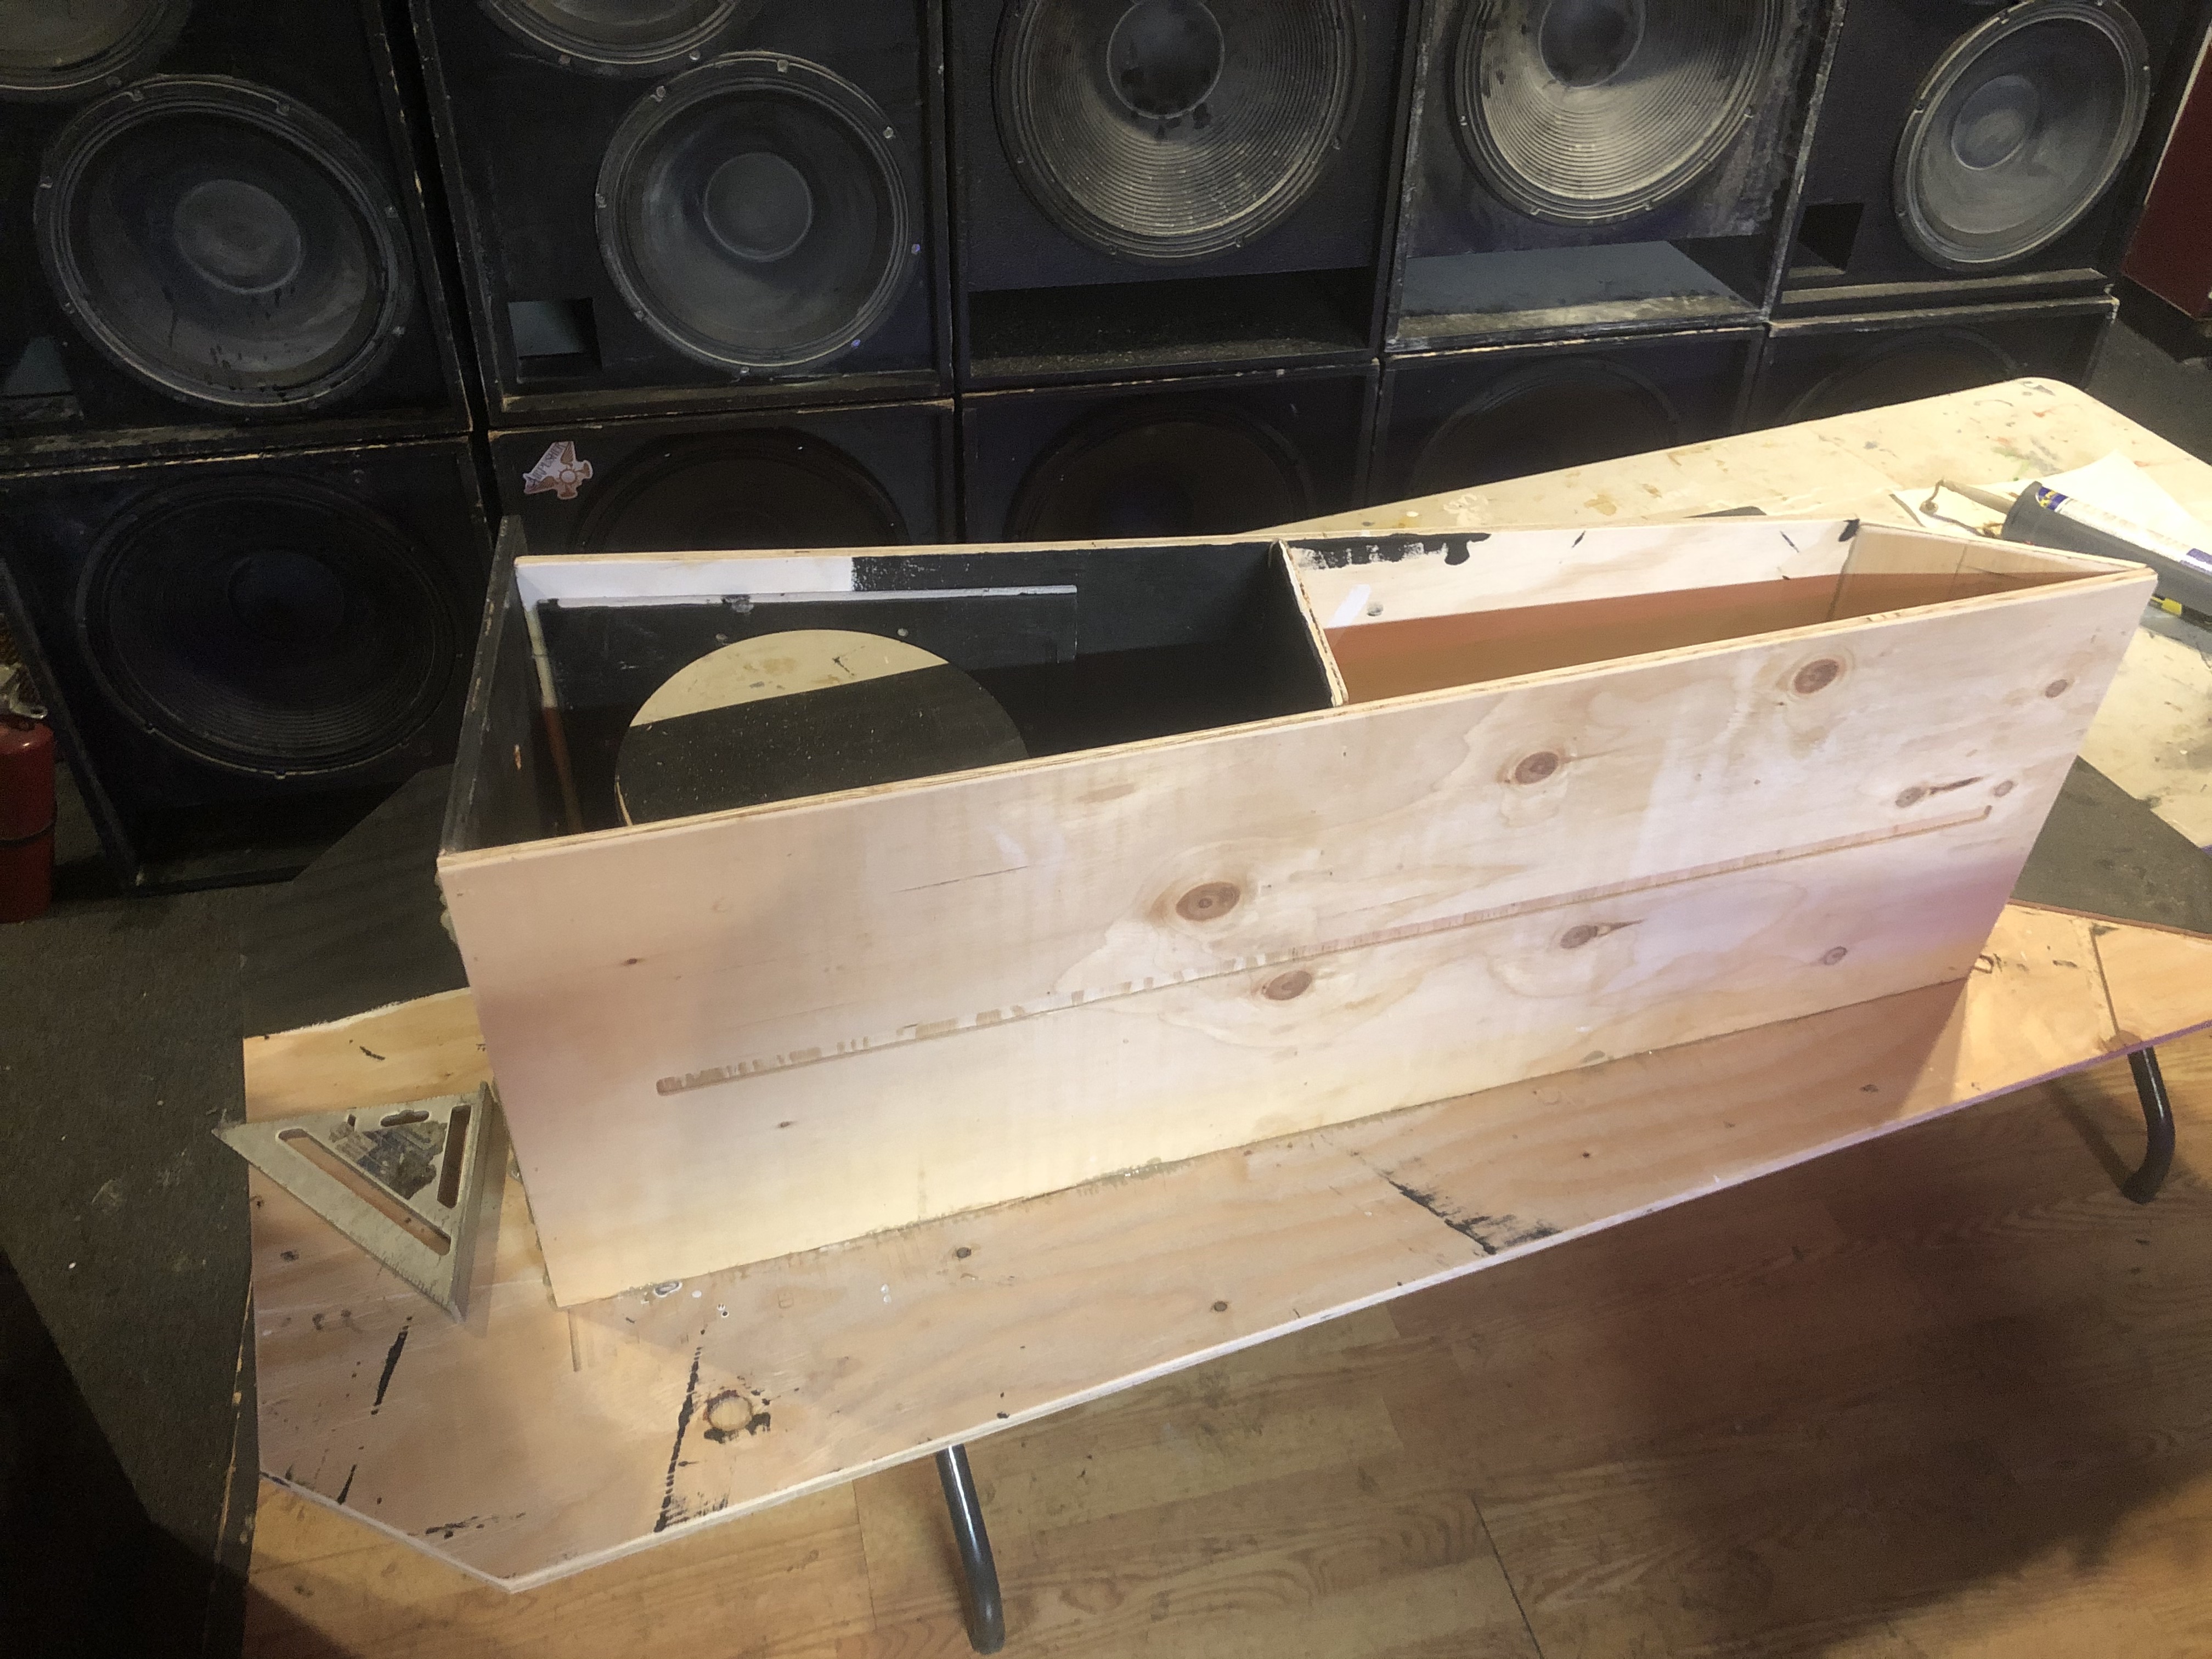
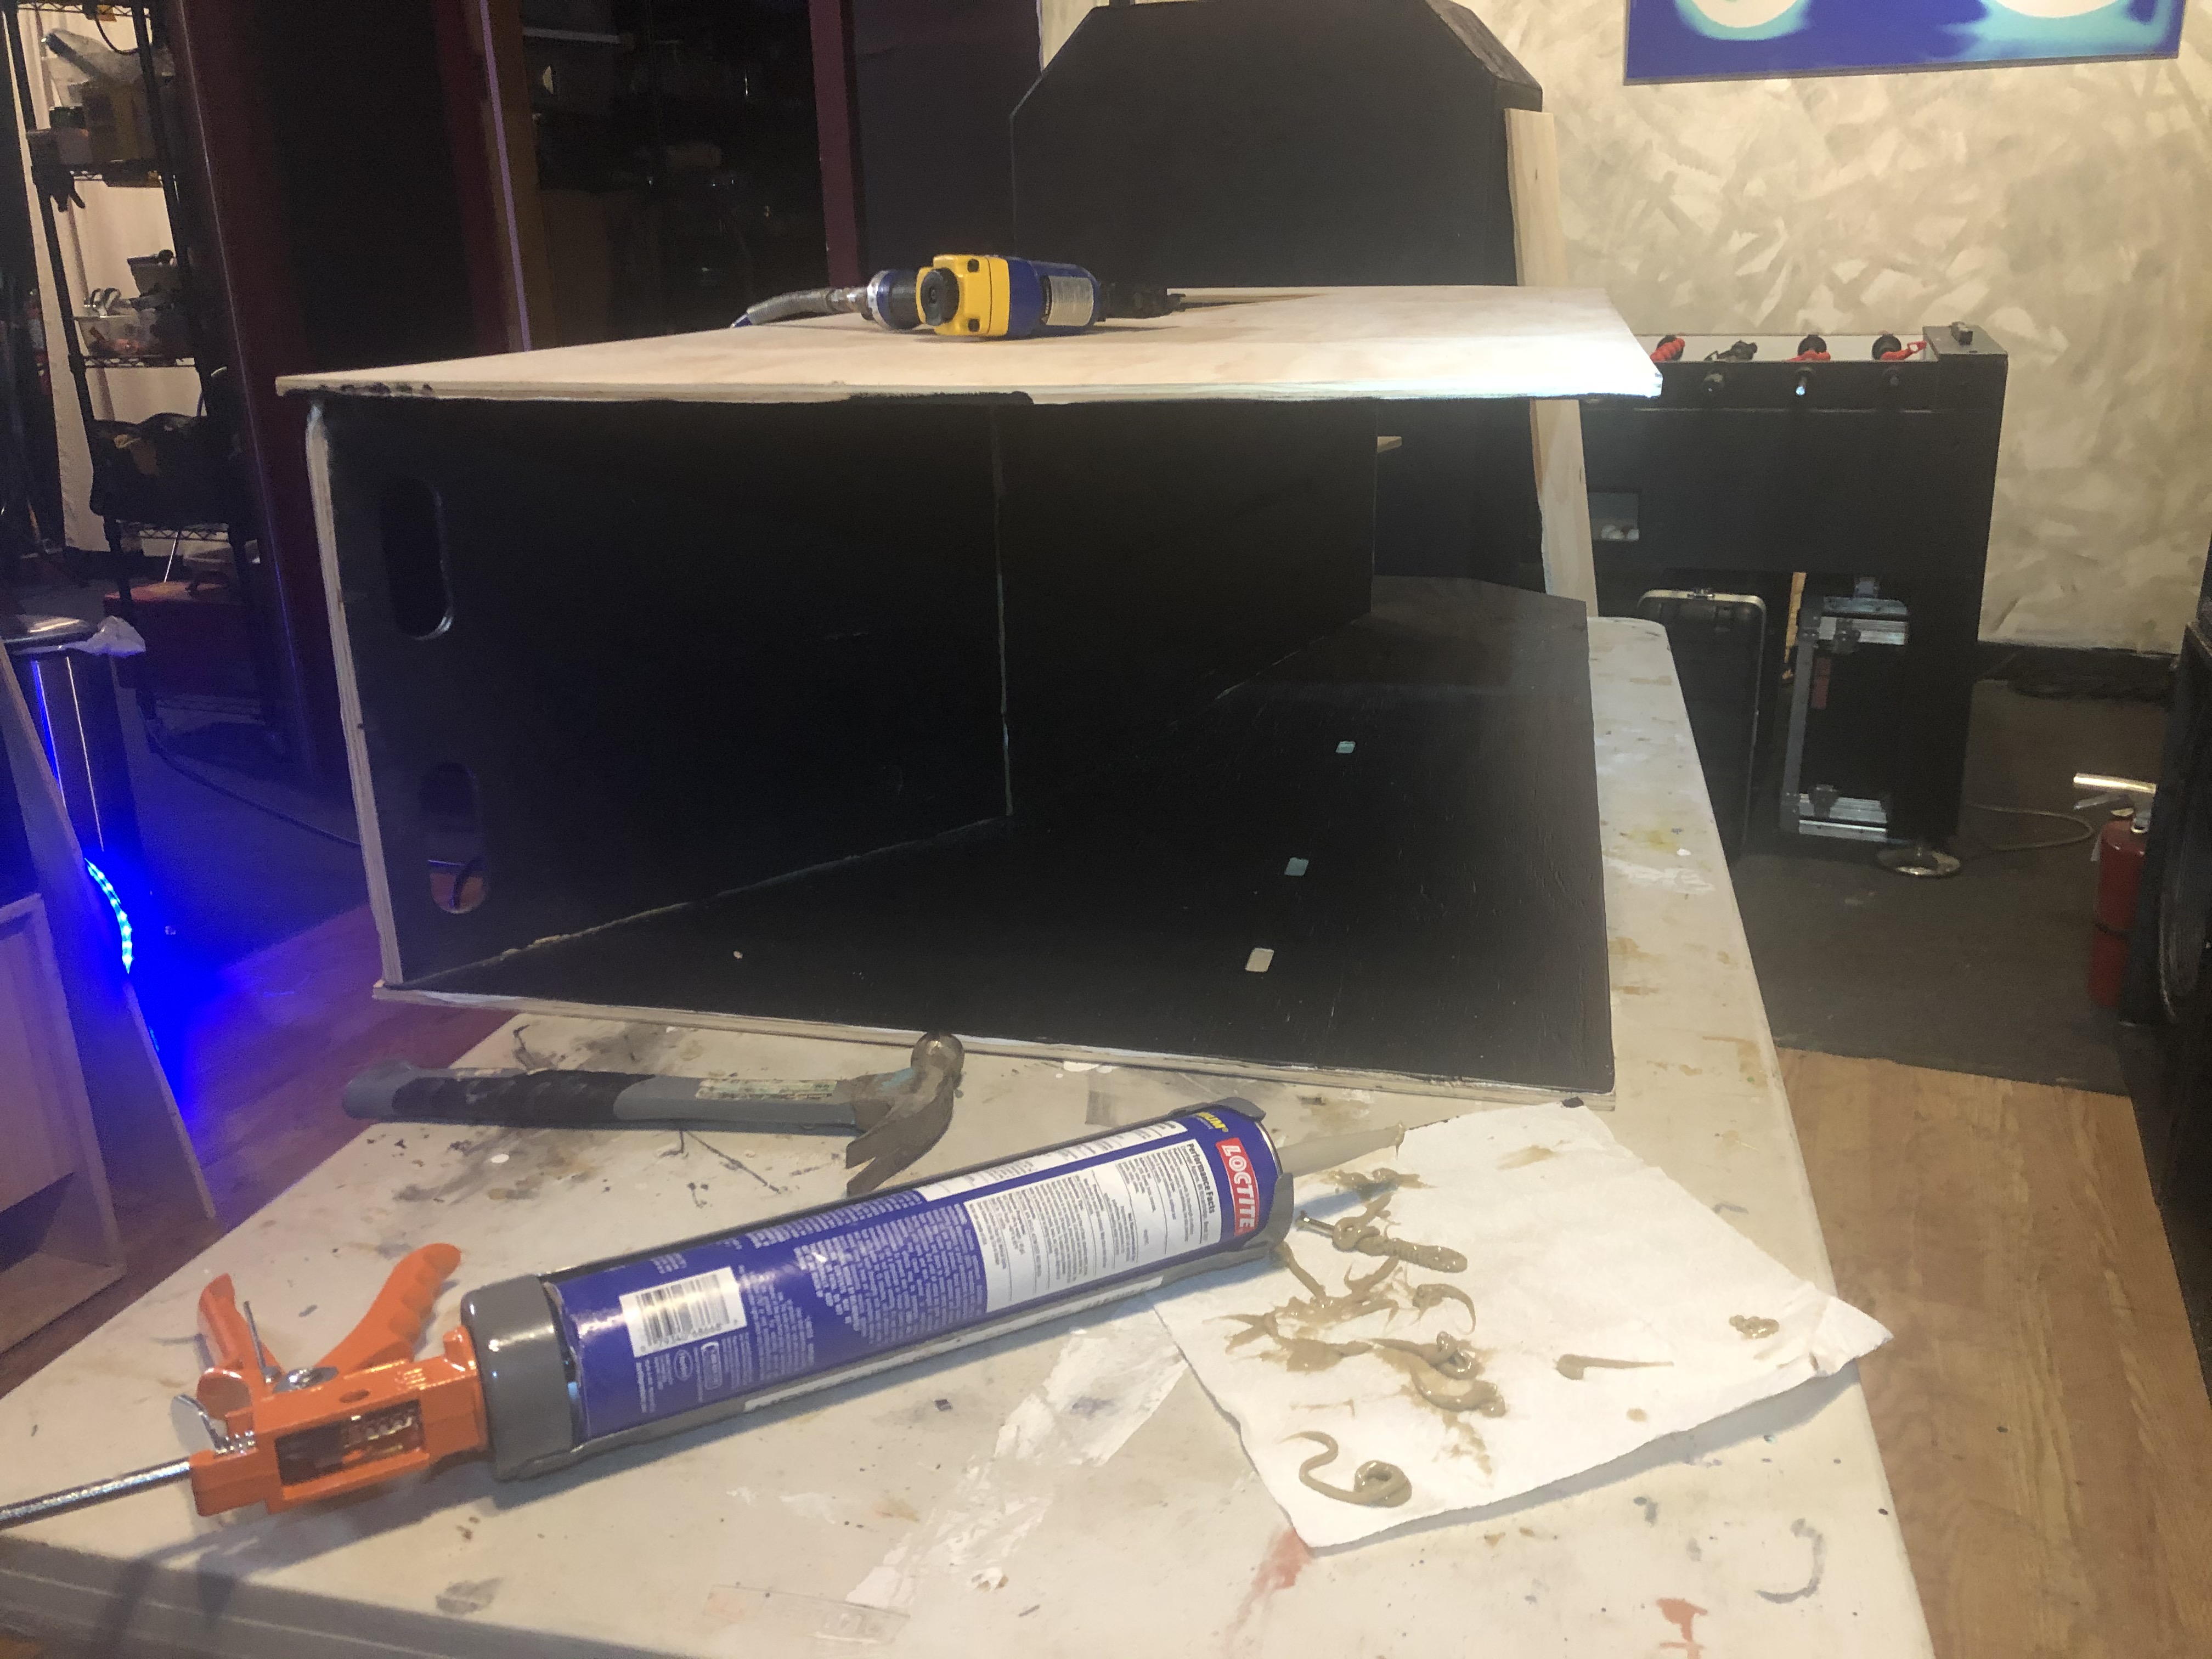
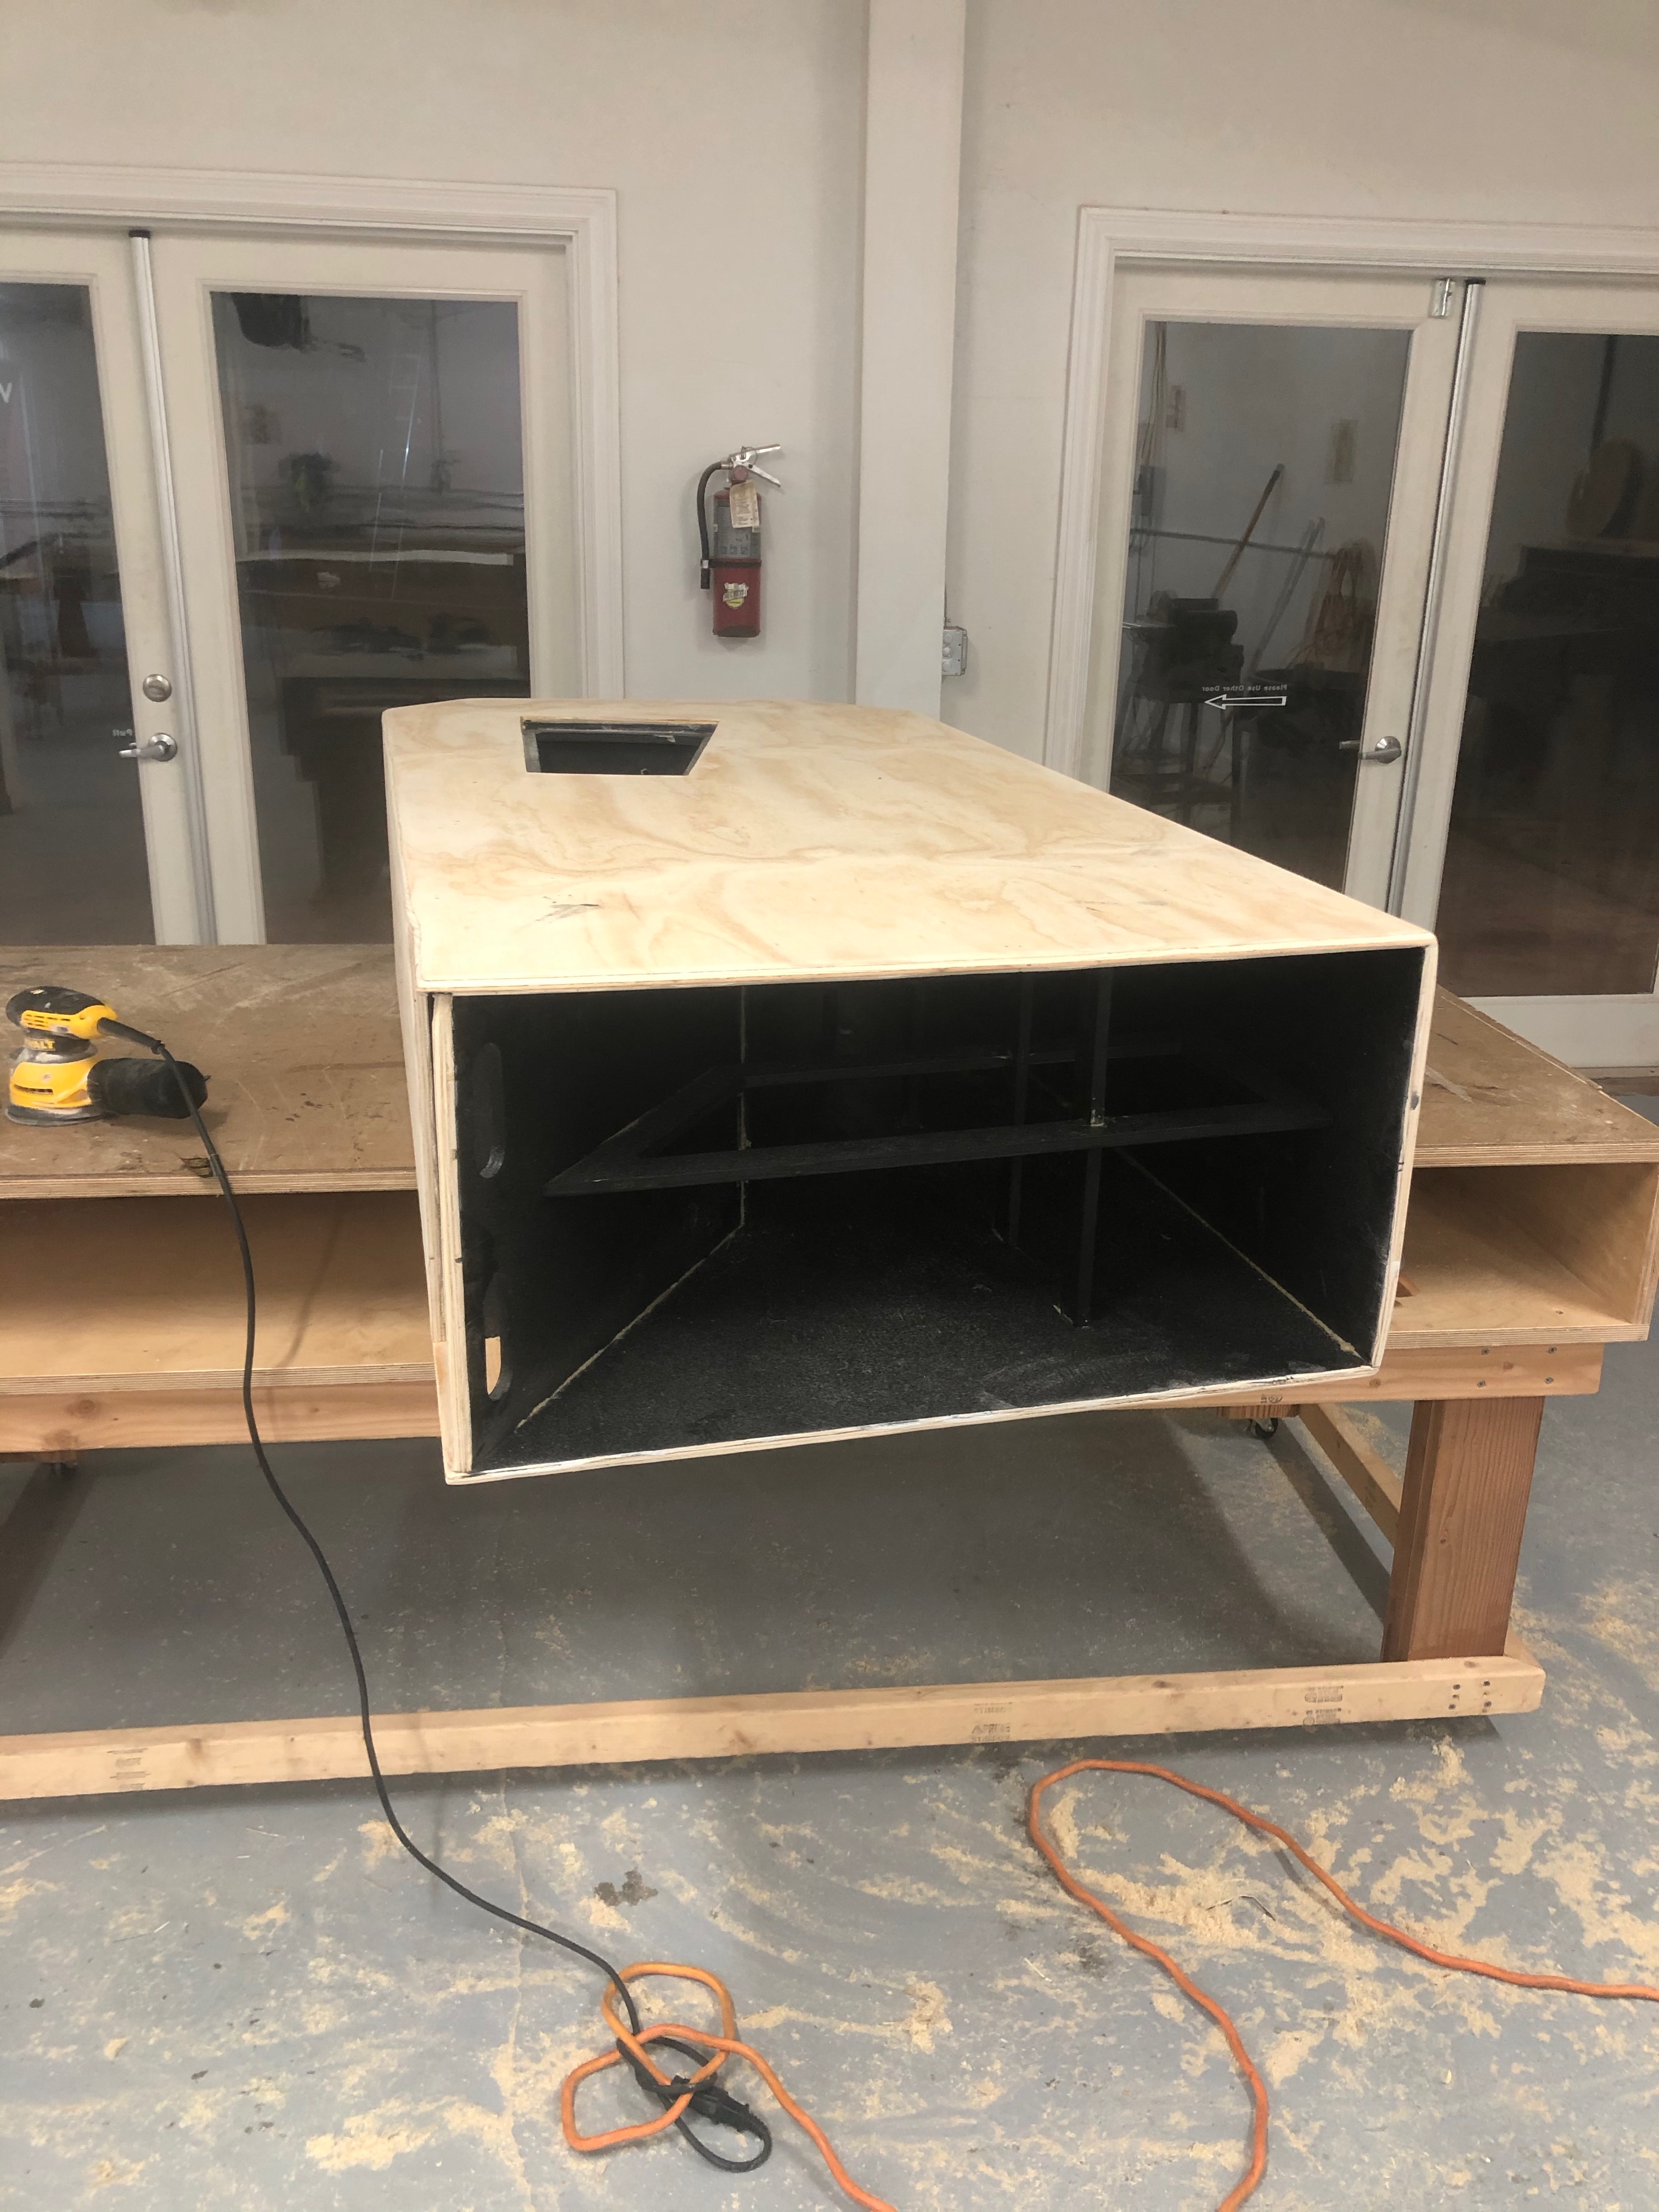
Step 1: Cut the parts and inspect for integrity.
We normally prototype with exceptionally poor quality plywood so we are not throwing away money on cabinets that no one will ever use. It is important that you inspect all parts after they come off the table and make sure they have been cut properly.
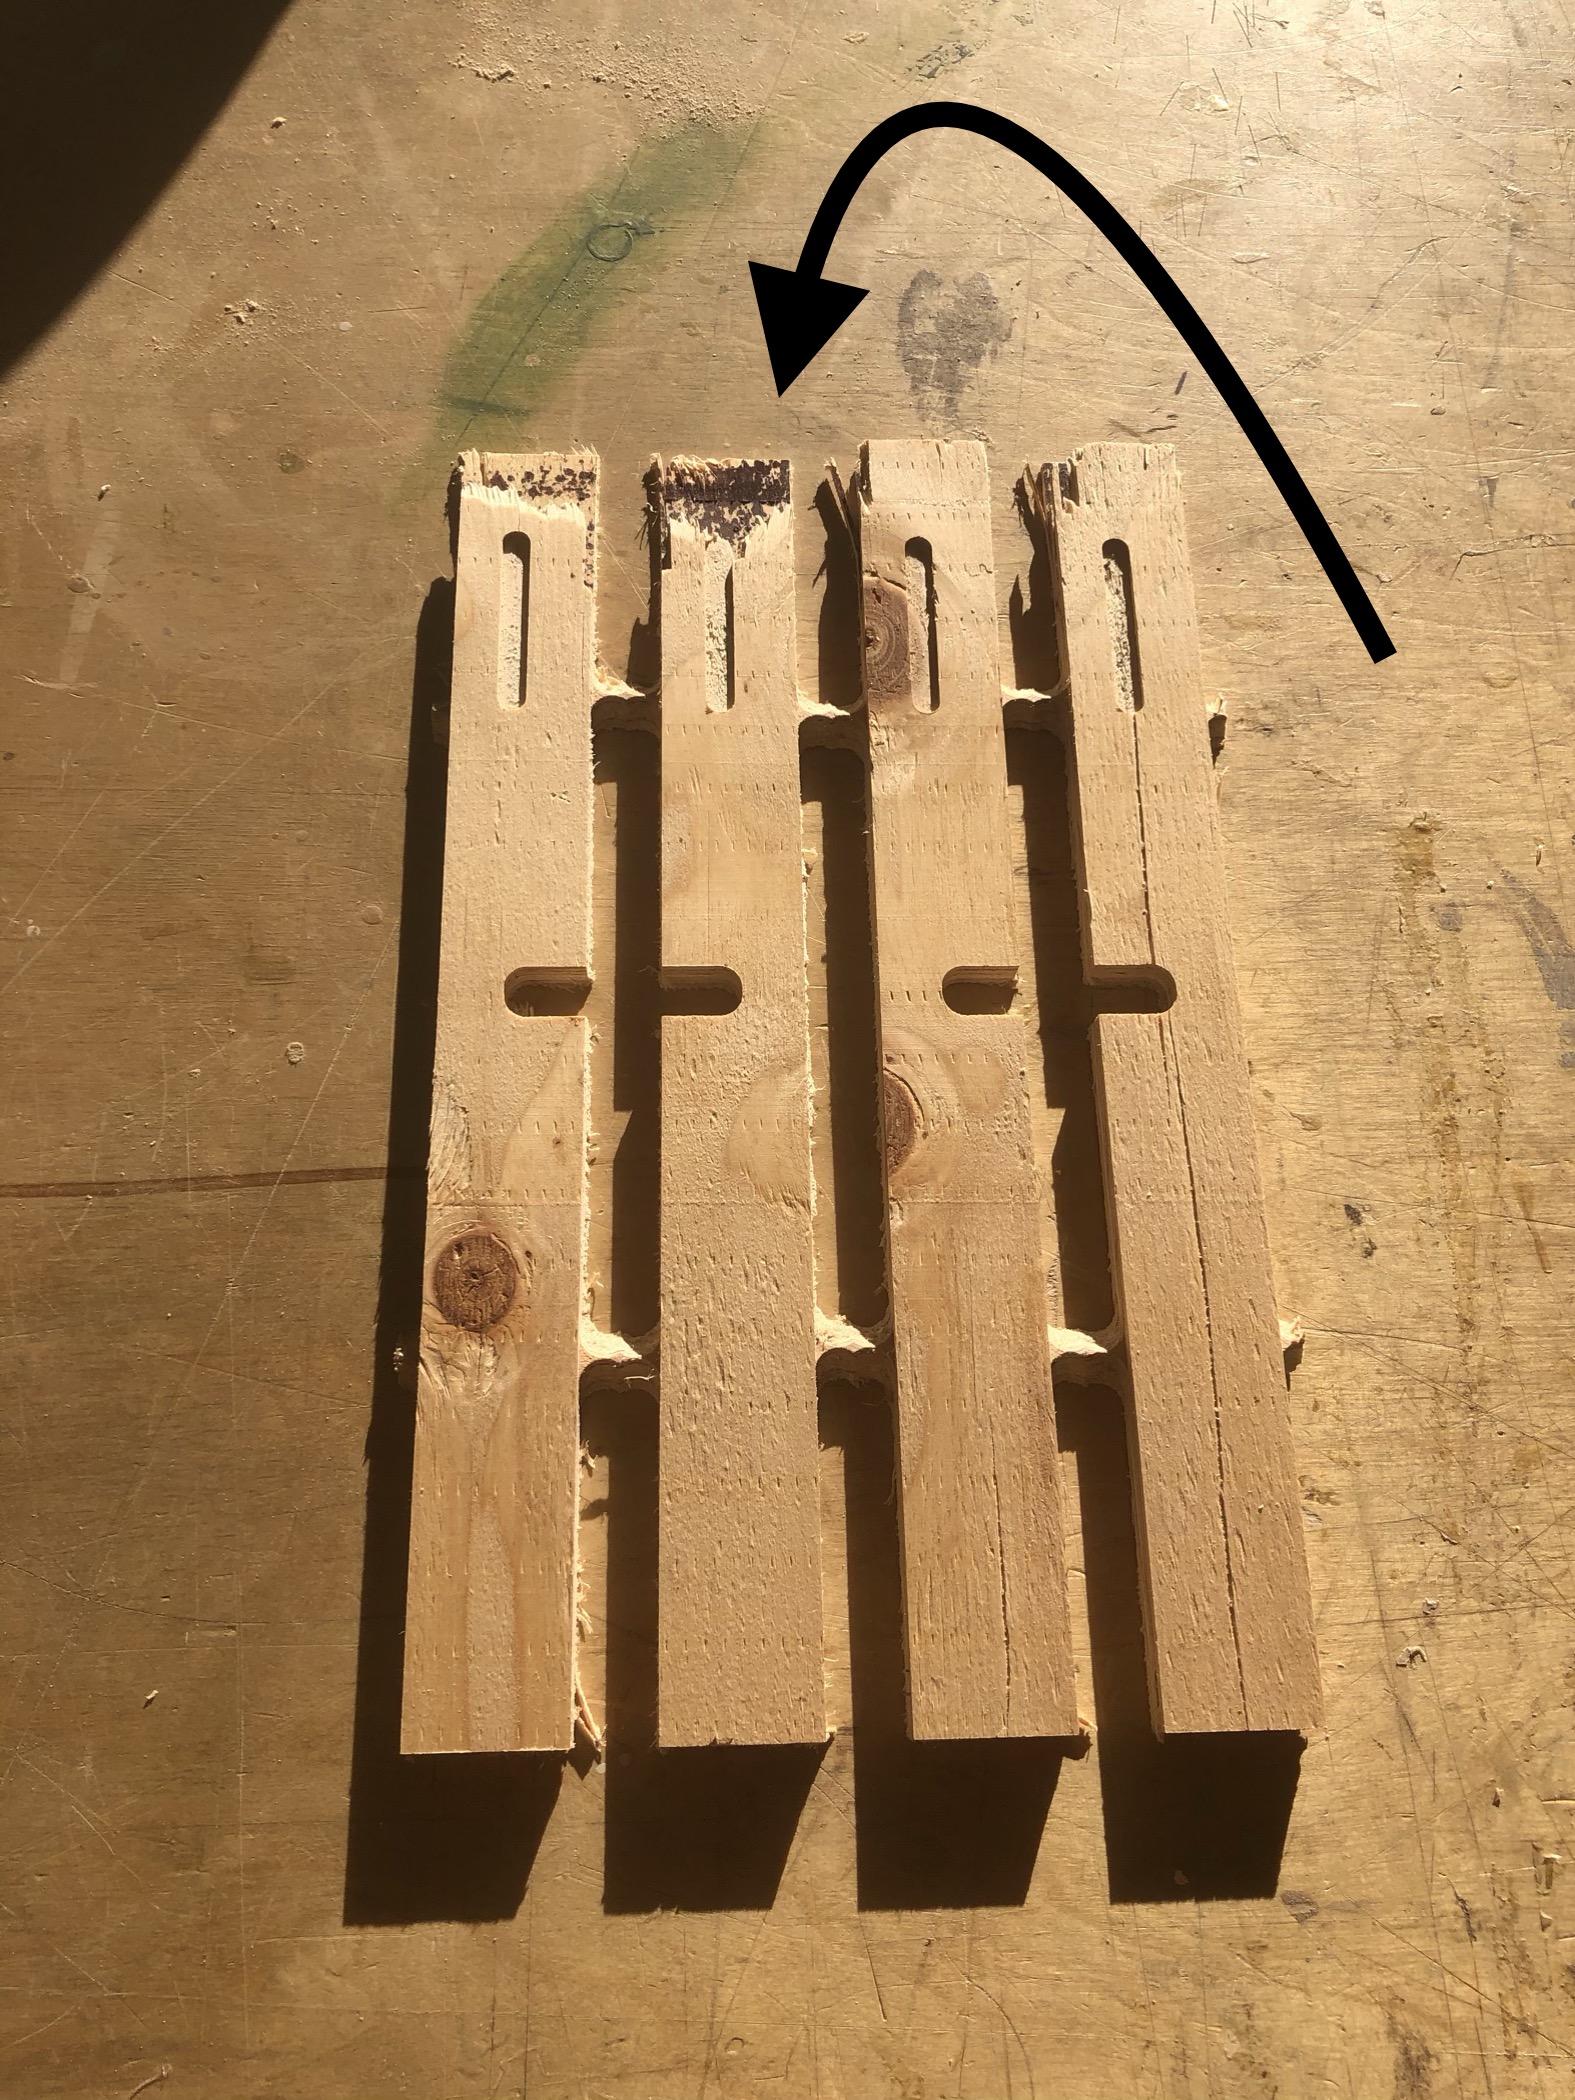
Step 2: Sand all edges.
While this is not required, I find that handling smooth edges is more enjoyable. You will be happy that you spent the hour sanding all the parts. I was easily able to take off all the rough edges of one sheet of parts while the next sheet was cutting. I used this step to familiarize myself with the part numbers and orientation (there are quite a lot of them to get straight the first time).
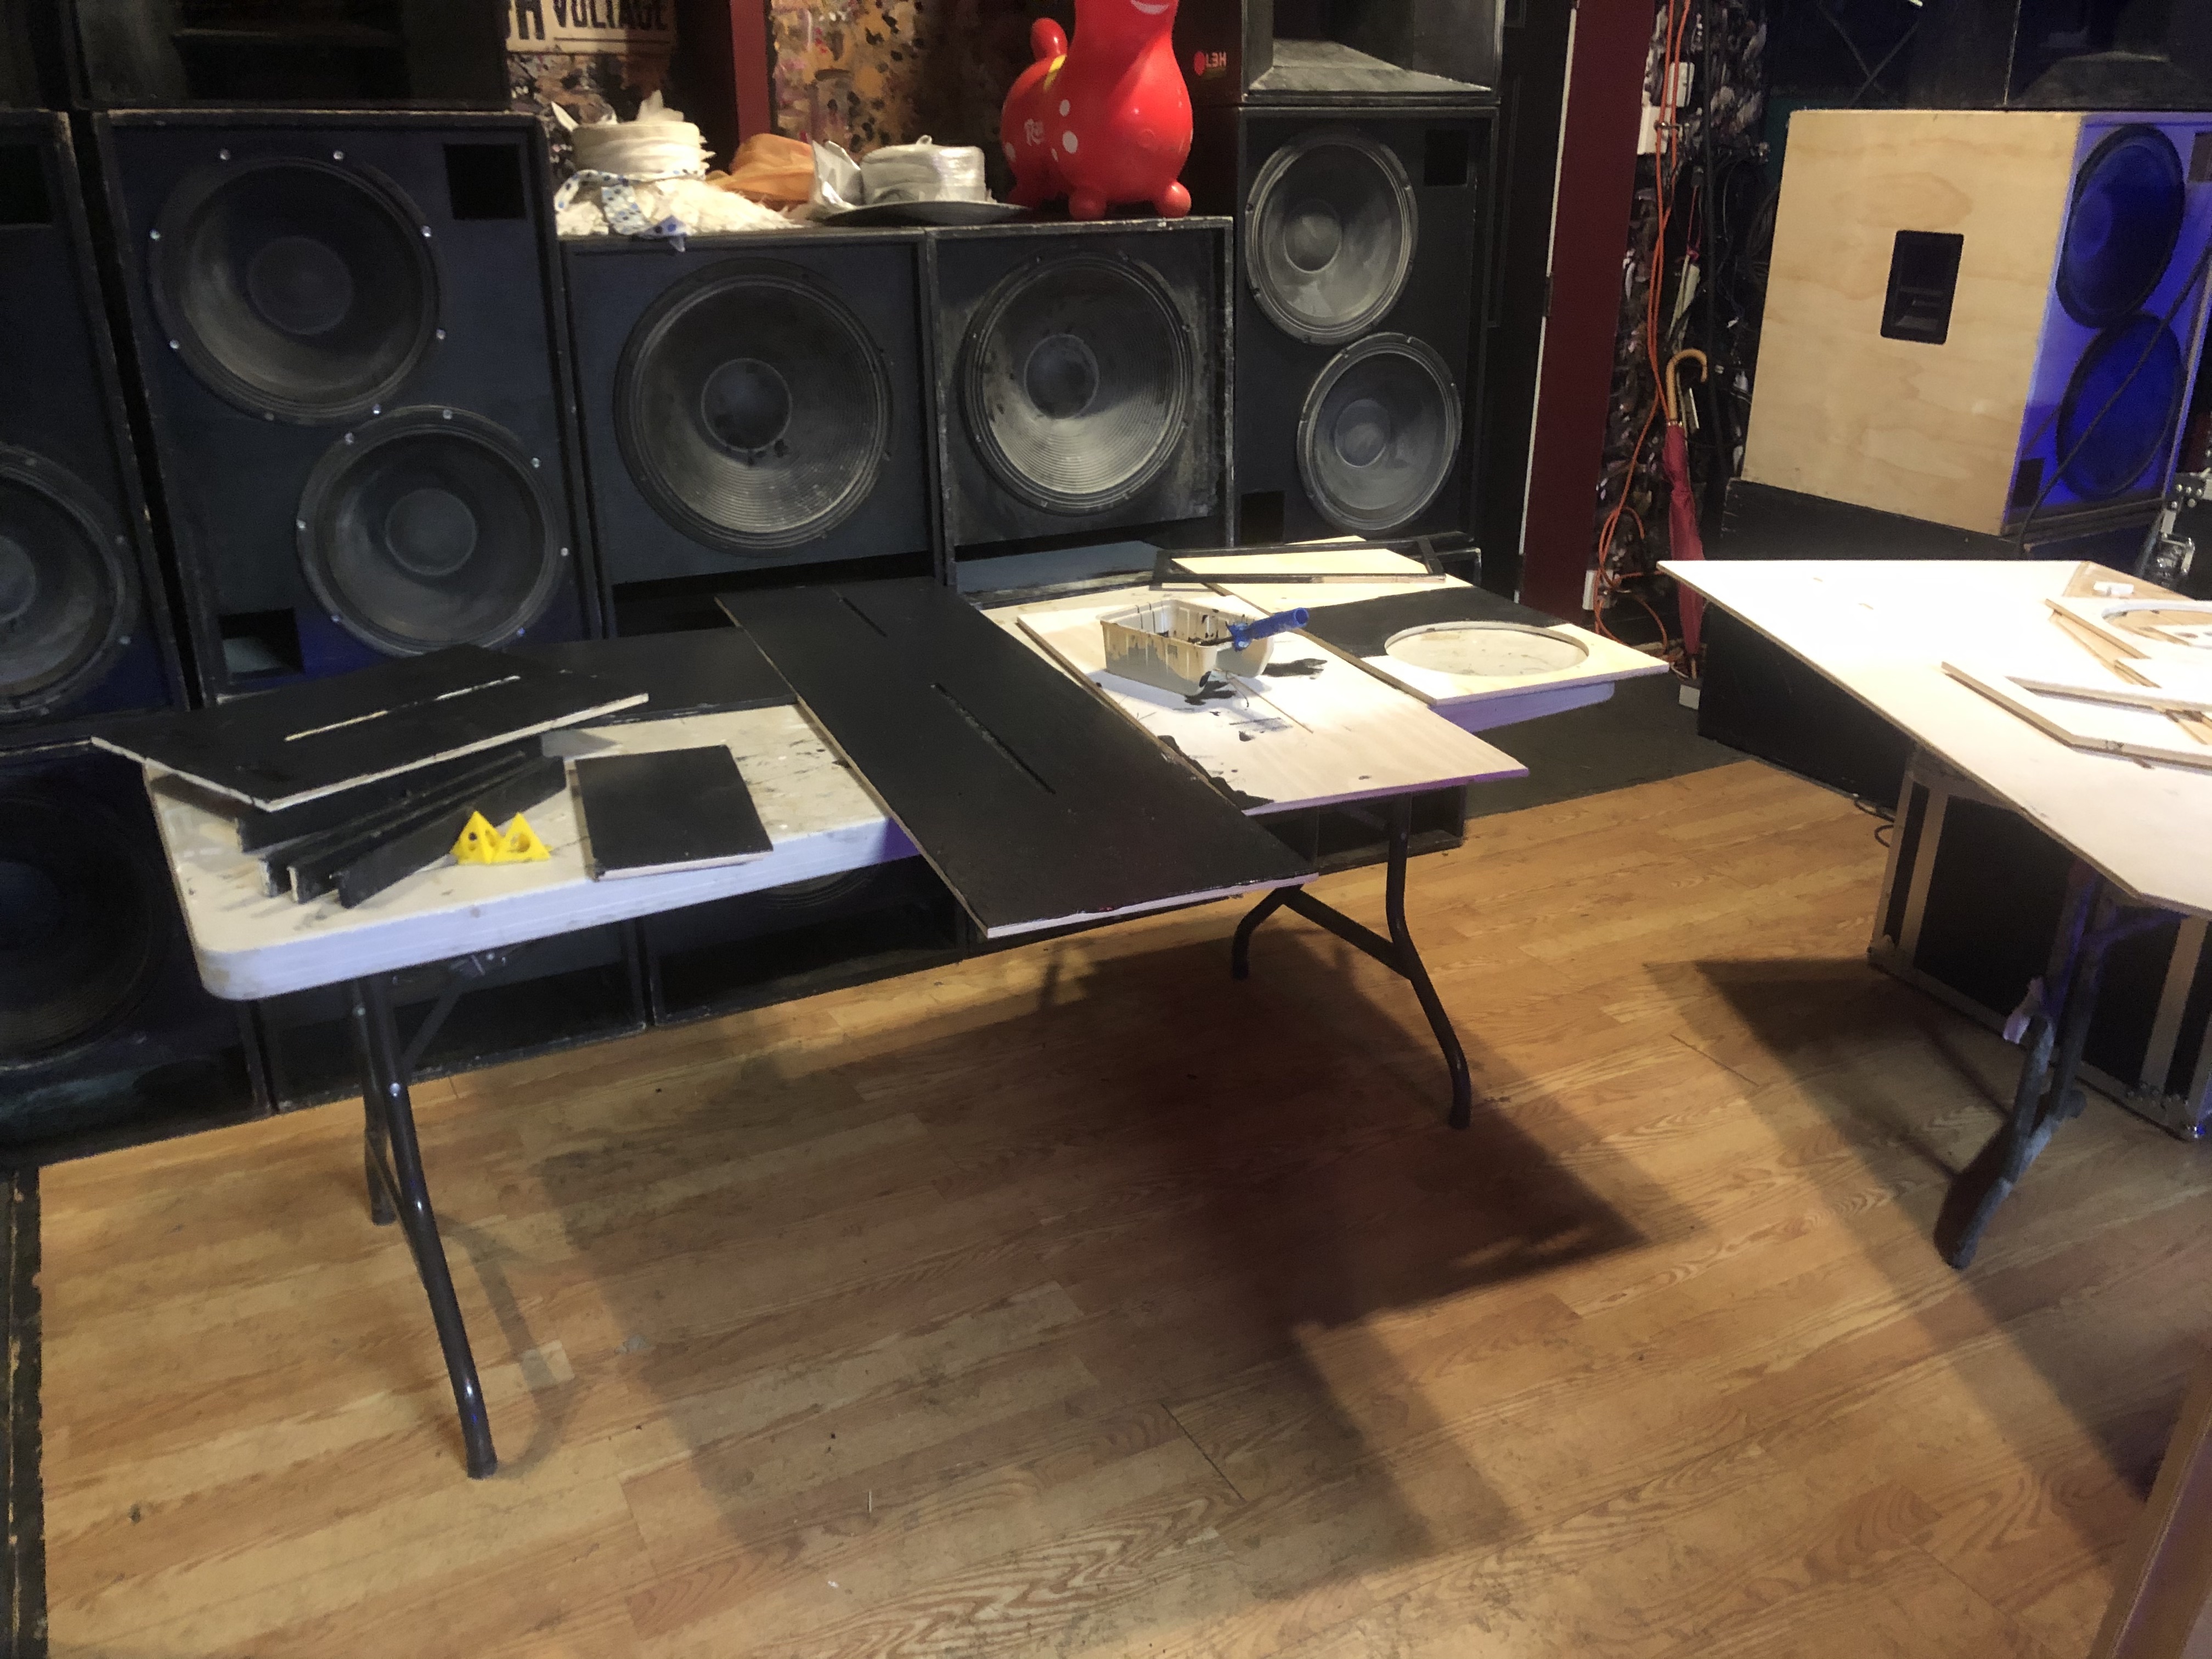
Step 3: Paint the inside pieces that will be seen
All or part of the following pieces need to be painted black (or whatever you are using as your cabinet color – no judgment here 😉 ) as they are difficult to paint once they are in place.
1, 2, 3, 5, 6, 7, 9, 10, 12, 13, Top, Bottom, Jack Plate, Door, Door Brace, Brace 6-12, Brace 7-12 and all four vertical braces.
Truthfully, it’s easiest to just cover all of the parts with primer and a single coat of black (or whatever color) paint. It’s won’t hurt and your cabinet will hold up better. Seriously… just spend two to three hours painting both sides of all the parts with primer and then, once the primer is dry, a single coat of paint. I’ve tried it without and and tried it with. You will be happier with.
But this is not required so maybe you will just paint all the parts of the second tuba you make and shake your head in disbelief that you thought that not painting everything was going to save you time. That’s what I did the first time. I now prime and paint everything inside the cabinet. 🤷🏾♂️
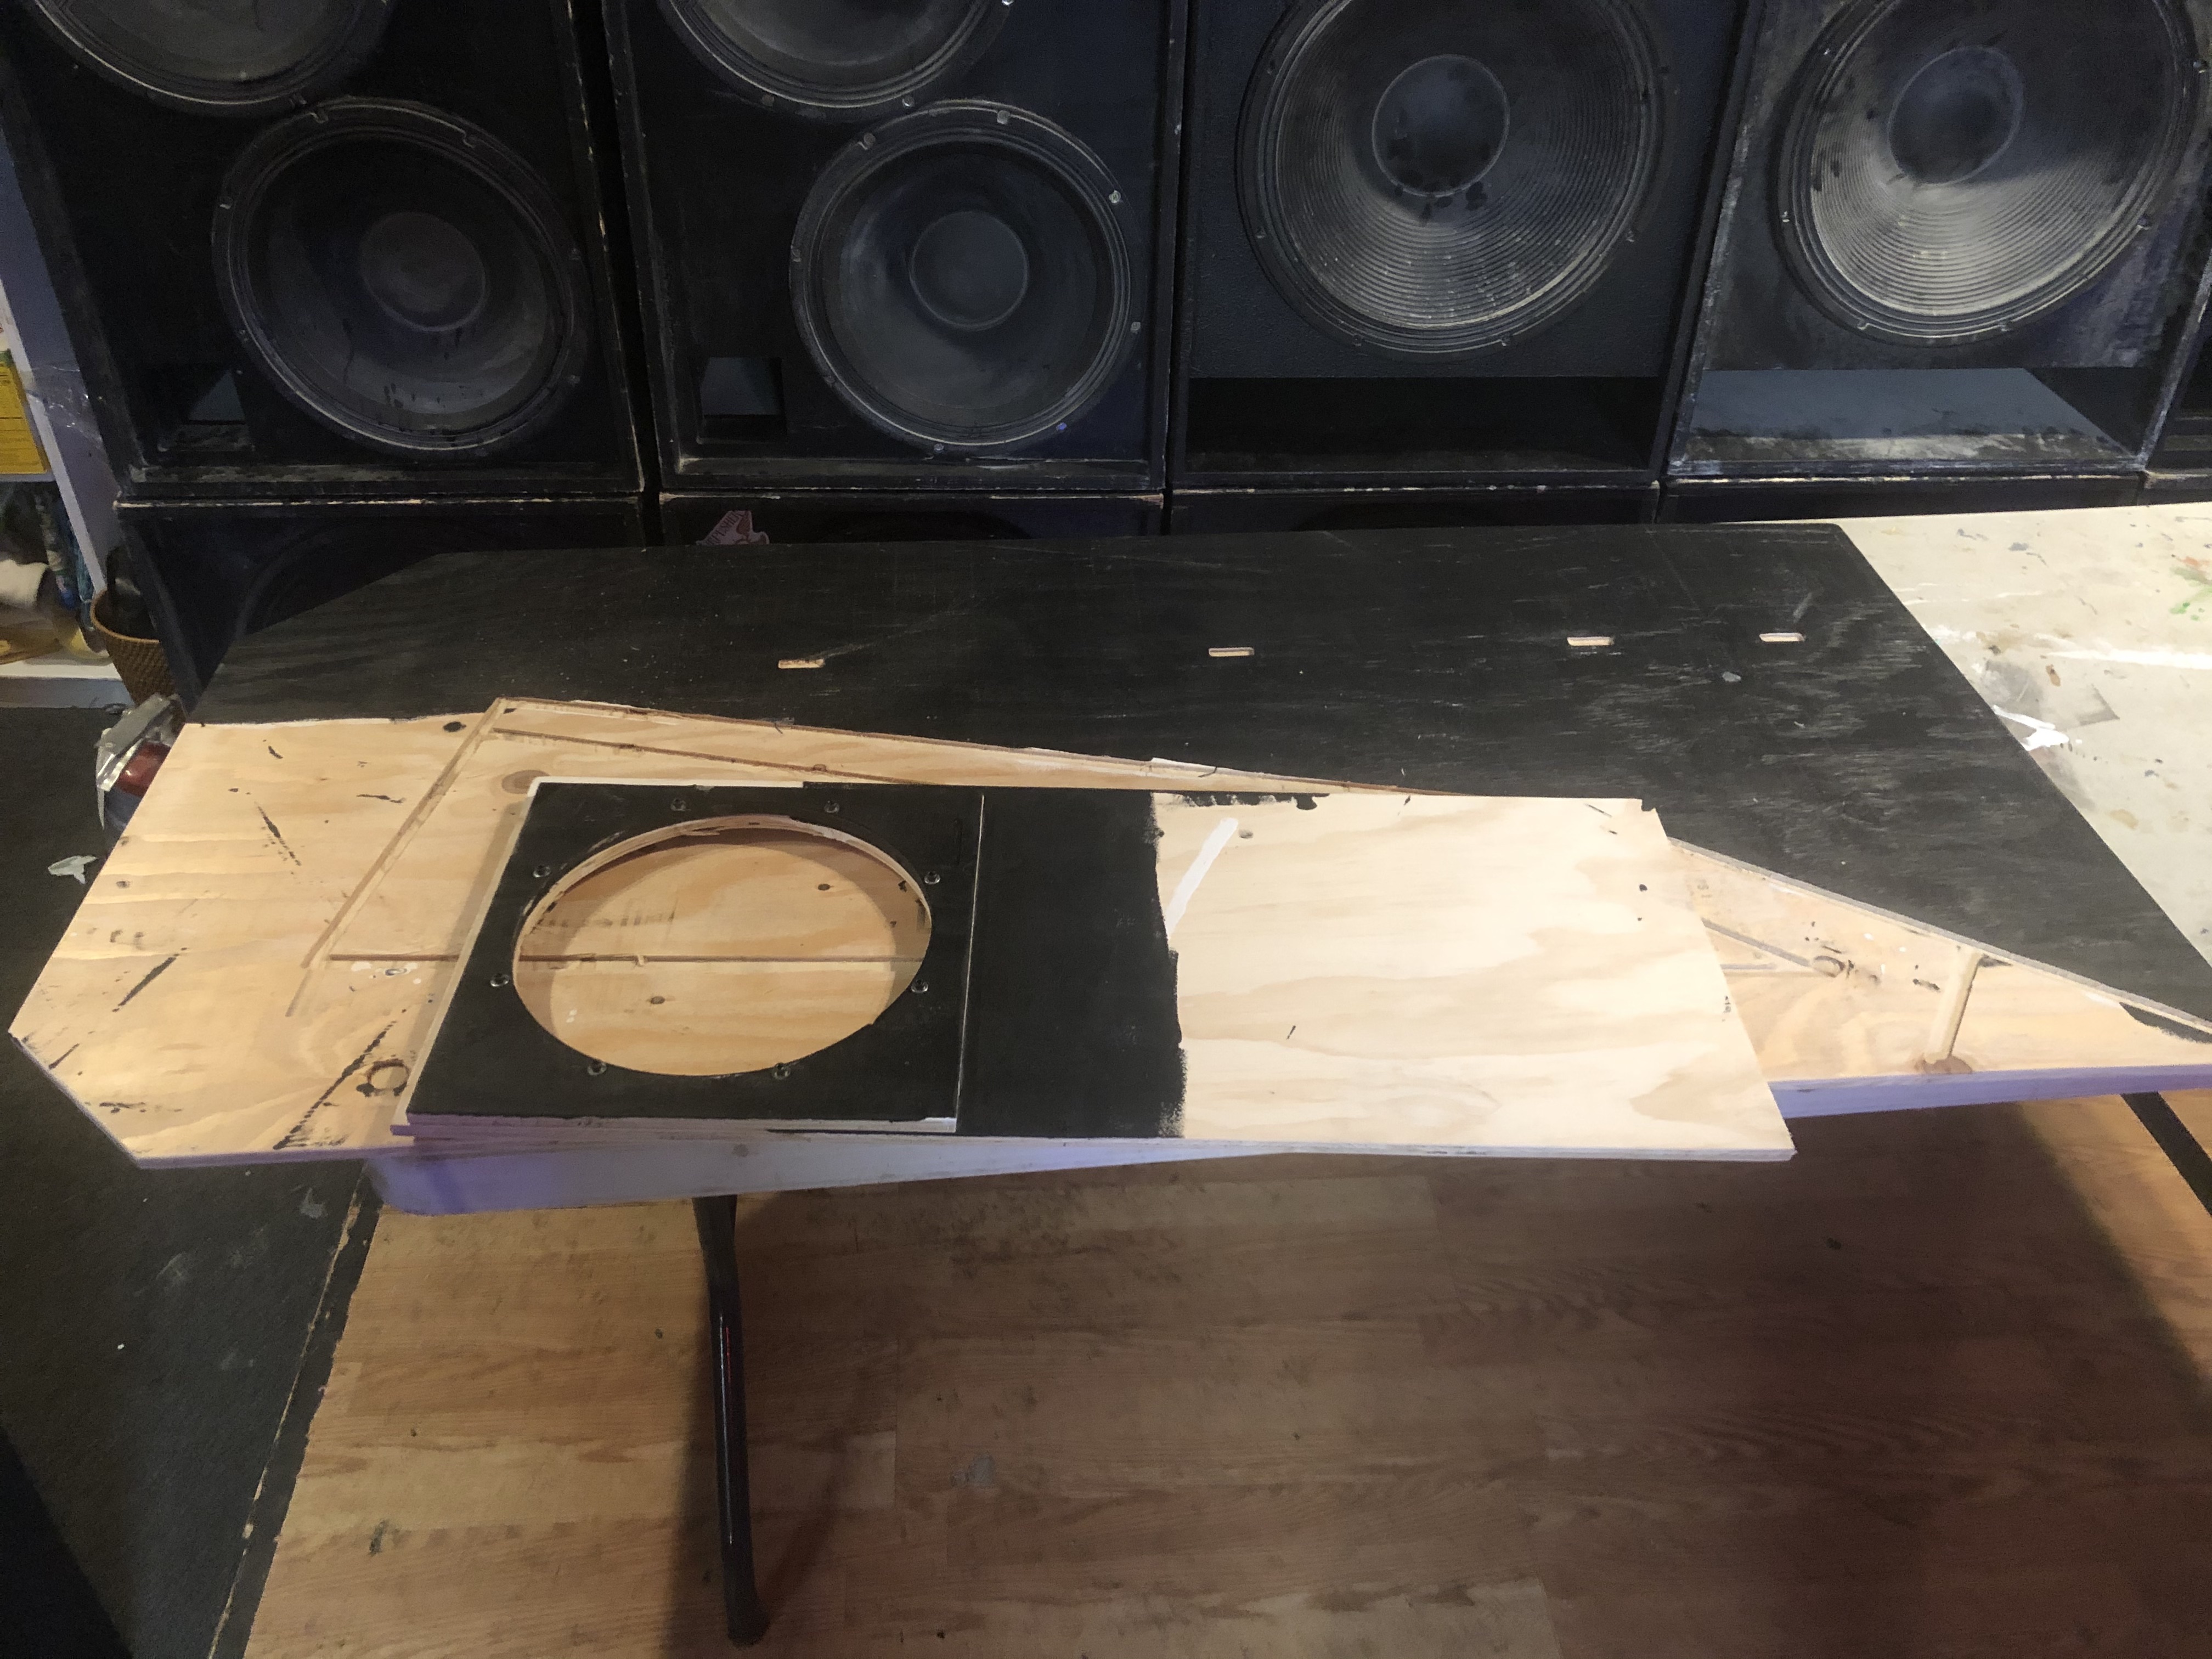
Step 4: Install threaded inserts
Install the threaded inserts into Part 3. It is easiest to install the inserts before the part is glued in.
Step 5: Attach the Baffle to Part 3.
The registration mark is on the top right of the Baffle. Make sure you orient the Baffle properly. Apply adhesive between Part 3 and the Baffle and attach the pieces by using the (8) 10-32 Socket Head Screws and (8) #10 Washers.
Step 6: Create angle on Part 1 and Part 3.
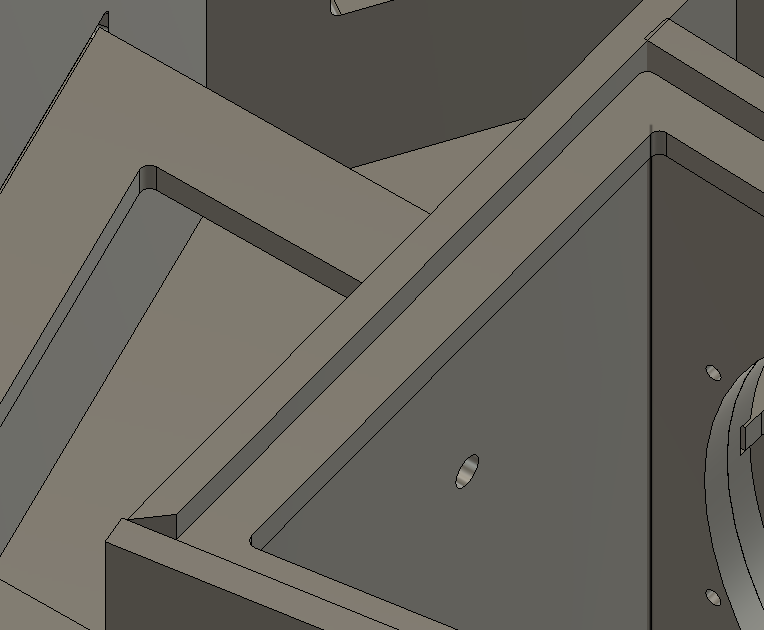
This is not strictly required as there is enough play in the design that you can skip this step, but it sure does feel good when you can get the parts to line up flush. Part 1 doesn’t need a super steep 45º angle (20-30º is fine) and Part 3 only requires a slight shave (5-10º). If you skip this step, the box will still seal, but again, its nicer if the parts slide together.
You might as well add the angle to Part 2, Part 4 and Part 7 while you are at it. Again, if you don’t have access to anything that will cut a 45º angle, you can skip this without any degradation in sound quality.
Yes? You ok? Just checking. So far this should all be easy and easy to follow. Check in with yourself because the next few steps can be challenging the first time through. Once you have made dozens of these cabinets, none of this will seem hard. But the first time through…
OK. Here we go… for realz.
Step 7: Install a few parts.
Start with Part 1. Make sure the Bottom is on the work surface. [This is not a joke. the Top and bottom are different. you need the Bottom on the Bottom. Don’t make this your first mistake as everything you do after this will be in being. Seriously… check.] Shove Part 1 all the way down the channel towards Part 6 and Part 12. Ensure that you do NOT have it shoved towards Part 2 and Part 8 as that will stop Part 2 from fitting into its channel (Ese Es No Bueno!).
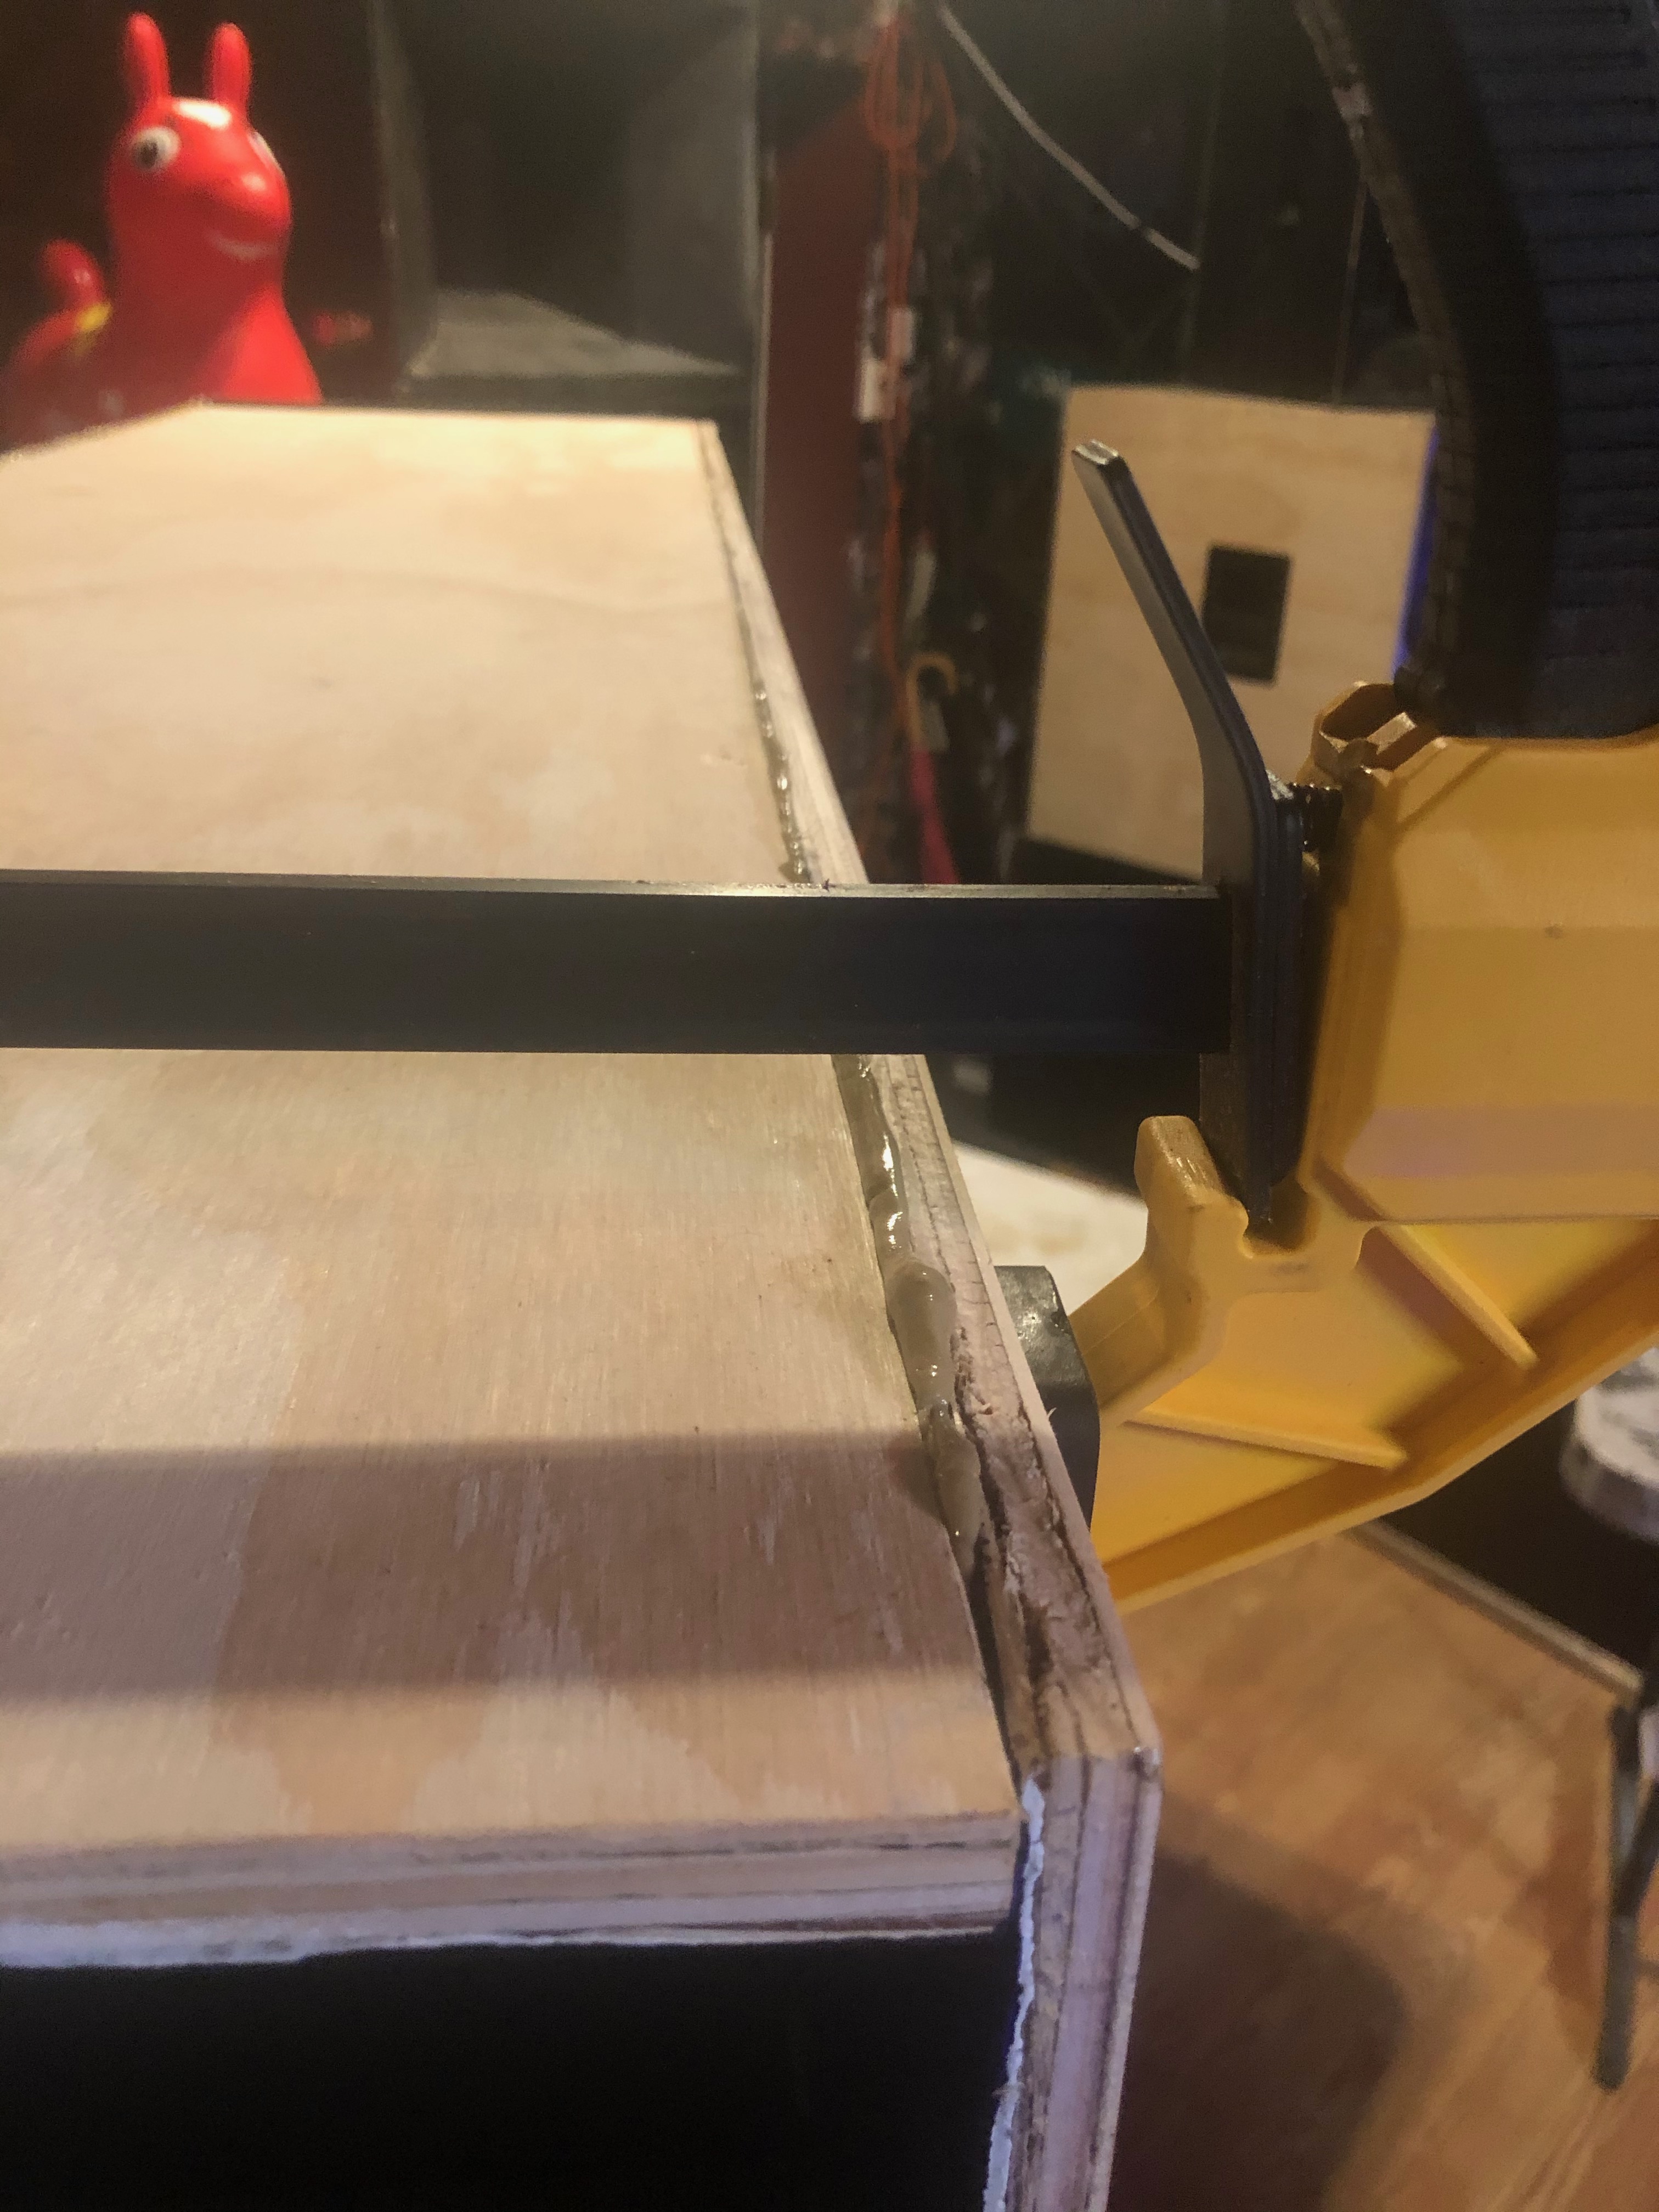
Use a speed square to ensure it is 90º from the Bottom. Use brad 3/4″ nails (1″ are ok but you have to have a bit more skill) and Loctite Premium Adhesive. Next install Part 3, 5 and then 4. You want to jam 5 snugly up to 3. This will help align all parts to be 90º from the Bottom. Once 4 is in place, you can install Part 2 and jiggle the parts so that everything is as snug as possible. Make sure there are no obvious gaps but do not worry too much of some of the edges are not exactly right. the adhesive expands and will seal up more holes.
The most important think to verify is that the parts are oriented properly, that they are fully inside their channels… and that you have applied adhesive to every single edge. Often folks forget to do the vertical edges. Take a look around. Spend a little but of thinking time just ensuring that you have your first structure properly in place.
Step 8: Install a few braces.
Install Braces 3-6, 2-8 and 1-10. You should be able to get the brad gun into the speaker cavity to drive a few brads into the braces. Do not worry about making them super secure as this step is only designed to hold them into place so that we can finish installing the inside structures. We will secure the braces shortly. Just get them so they don’t fall out.
We are also going to install the door-brace and the door-brace-support.

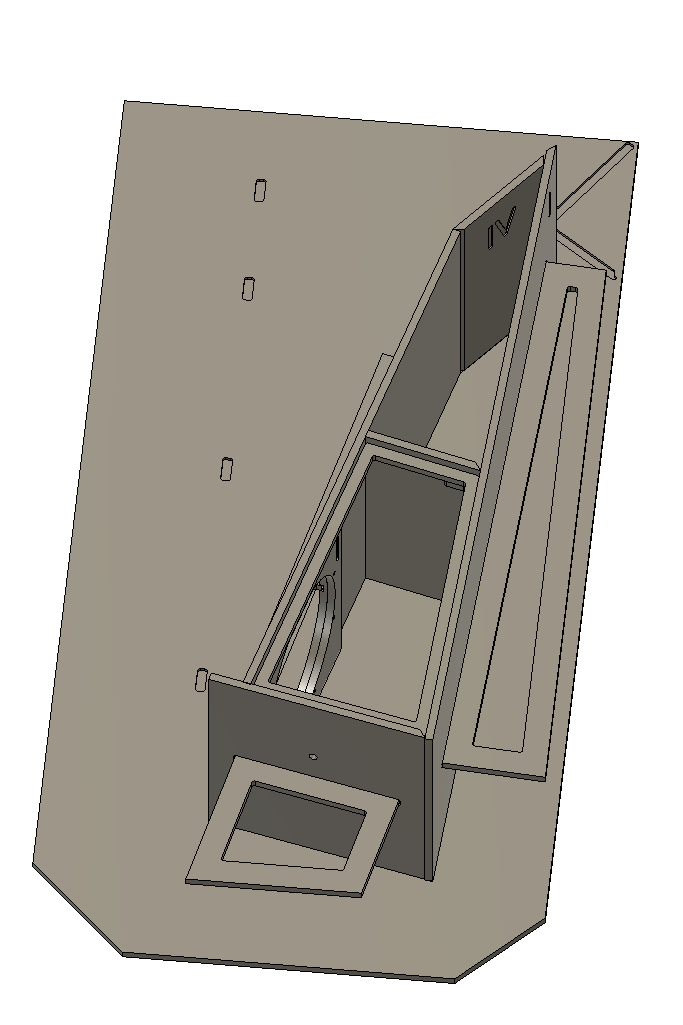
Step 9: Install Parts 6 and 7.
This is a critical step and will make the difference between a Tuba that works and one that leaks and sounds terrible. When installing Part 6 it is critical that you use a speed square (or any right angle device) to make sure that Part 6 is truly vertical. It should fit snug up to Brace 3-6 ad may even have a slight gap between them. This is according to design. What you want to focus on is making sure Part 6 is vertical. That is what matters. The adhesive and a few nicely positioned brads will keep its orientation.
If you mess this up, take the part out and do it again. I can not stress this enough: Part 6 must be vertical.
Now install Part 7. This must also be vertical. However, we will have the ability to adjust its angle in the next step so just get it in place and throw a few brads in from the bottom.
Step 10: This is the tricky step where you get to show off your finesse…
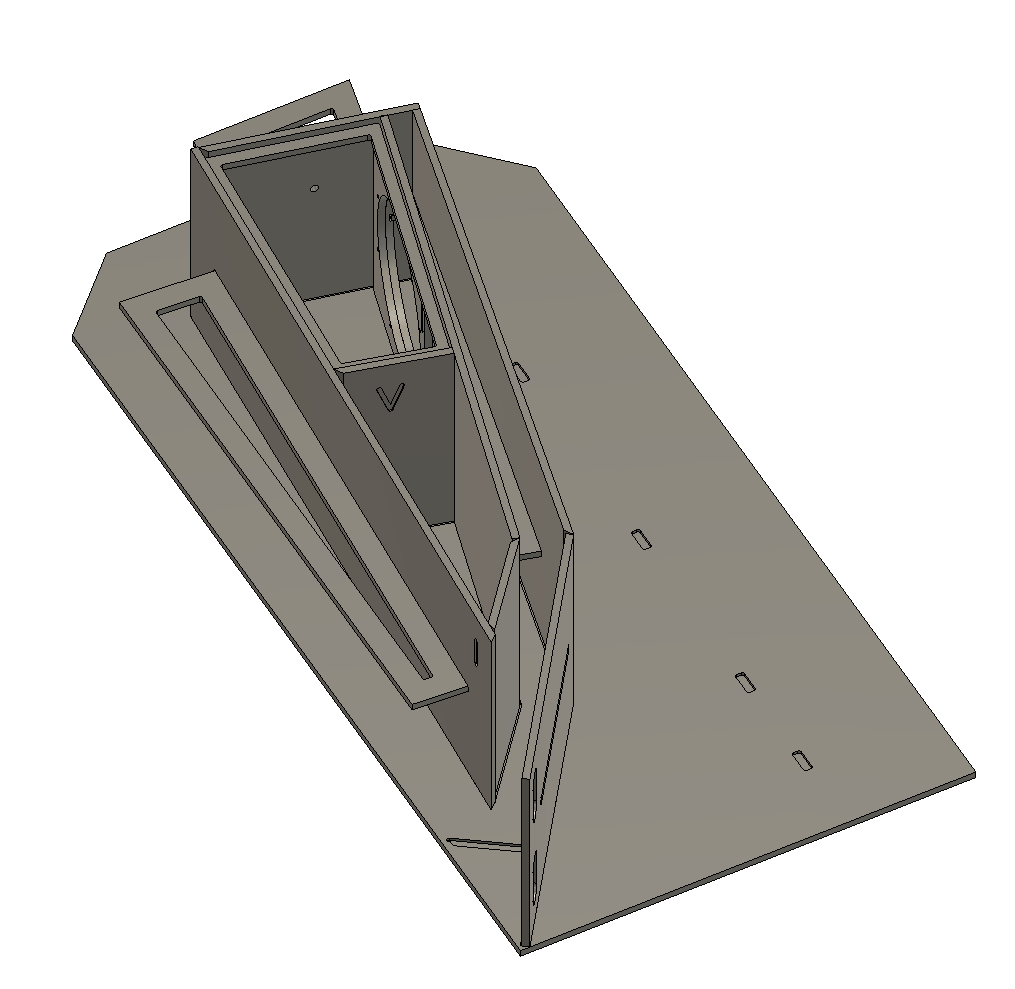
Now we are going to put on the Top. Yes, we are going to put adhesive over all of the exposed edges that will contact the Top. However, we will NOT be applying any brads. Why? Because we are using the Top as a guide to make sure the installed parts align with the Top part… but as you can see, we have lots of parts left to install. From here on out we will be finessing all the parts between the Top and the Bottom. We will be using brads up from the bottom to secure the parts but will not brad the top until all of the parts are in place.
Cool?
So… apply adhesive and the lay the Top on the parts we have already installed paying particular attention to the top channel for parts 4 and 6. This will be the last chance you get to effect their alignment. Please get it right.
Now seal off the first part of the sound channel by installing Part 9. I have found this is the most difficult step in the entire build. If it is easy for you, great. If you can’t quite get it, you can fire a few brads from the Top into Part 6 so that the Top doesn’t keep coming up when you push Part 9 into place.
This sounds more tricky than it is. Jut take your time and breathe. There is no advantage to rushing this step. Actually, you can set all your tools down and let the adhesive set for an hour as that will stop the top from coming up at all. But for those who do not wish to wait, you can keep moving forward so long as your parts are all lined up in their channels.
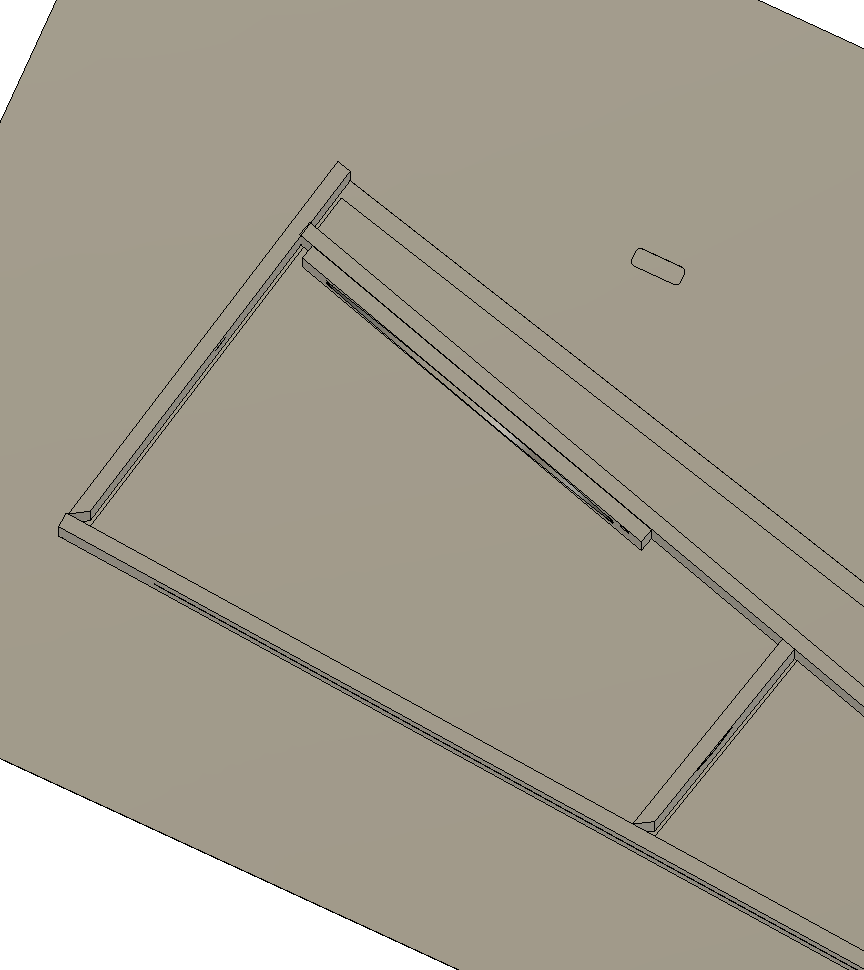
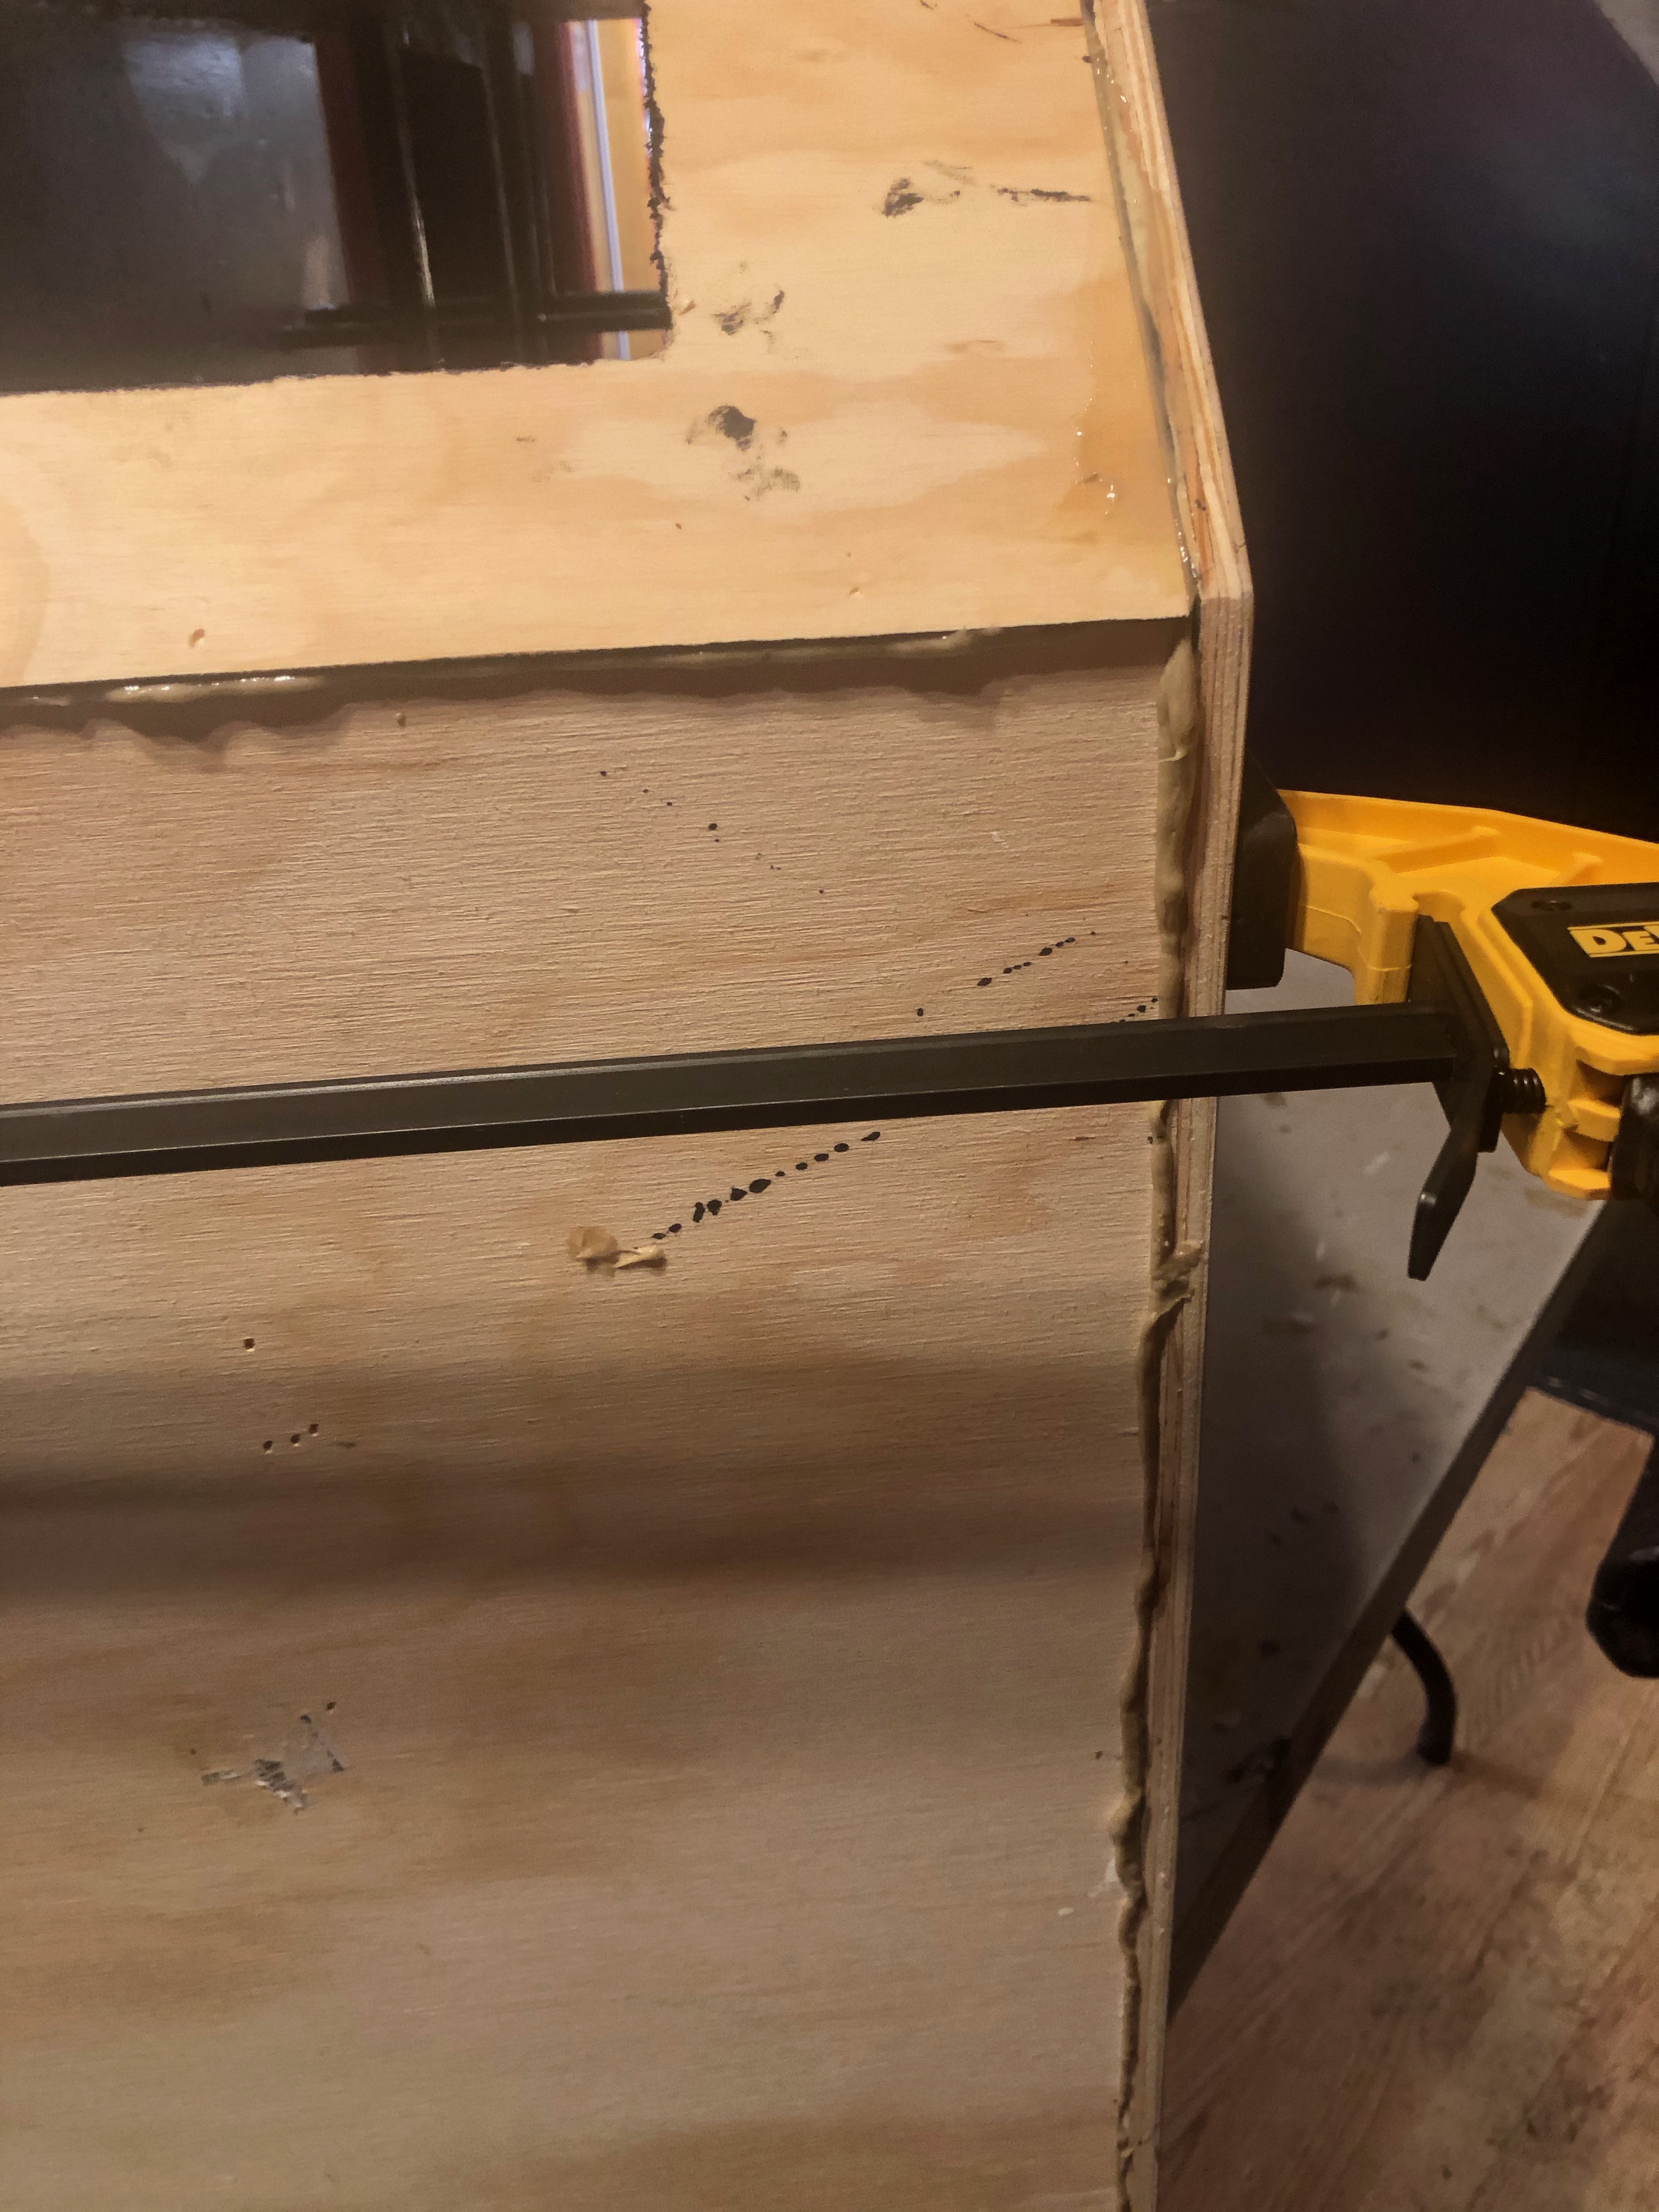
Step 11: Go around in order and install the outer walls except Part 12.
Start with Part 8, move on to 11, then 10 and then 13. These are all pretty easy. Make sure to apply adhesive to the braces along the way and fire some brads into the braces for good measure.
Having said that, you will see that the wings of Parts 11 and 13 stick out. No bueno.

If you have the skills, shave with a band saw or a sliding chop saw. However, this is very little wood and I generally advise people to simply sand these off once your box is together. (That’s also why I am pointing this out after I instructed you to install them.) Whatever your preference, please make sure that Parts 11 and 13 and nice a snug. Extra adhesive and brads can be lavished on Part 11 as you can install casters and roll the cabinet around on here.
Step 12: Take a break and wire up the box.
You’ve done the hardest parts now so take a break and give yourself a nice pat on the back.
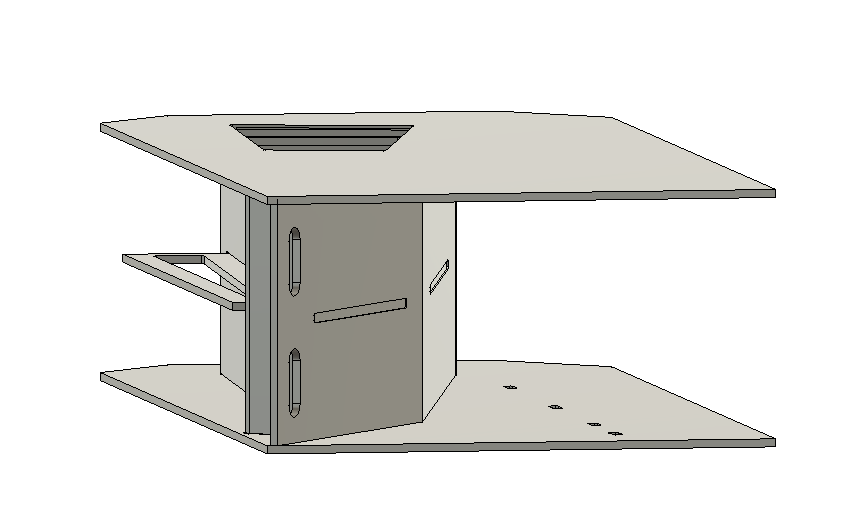
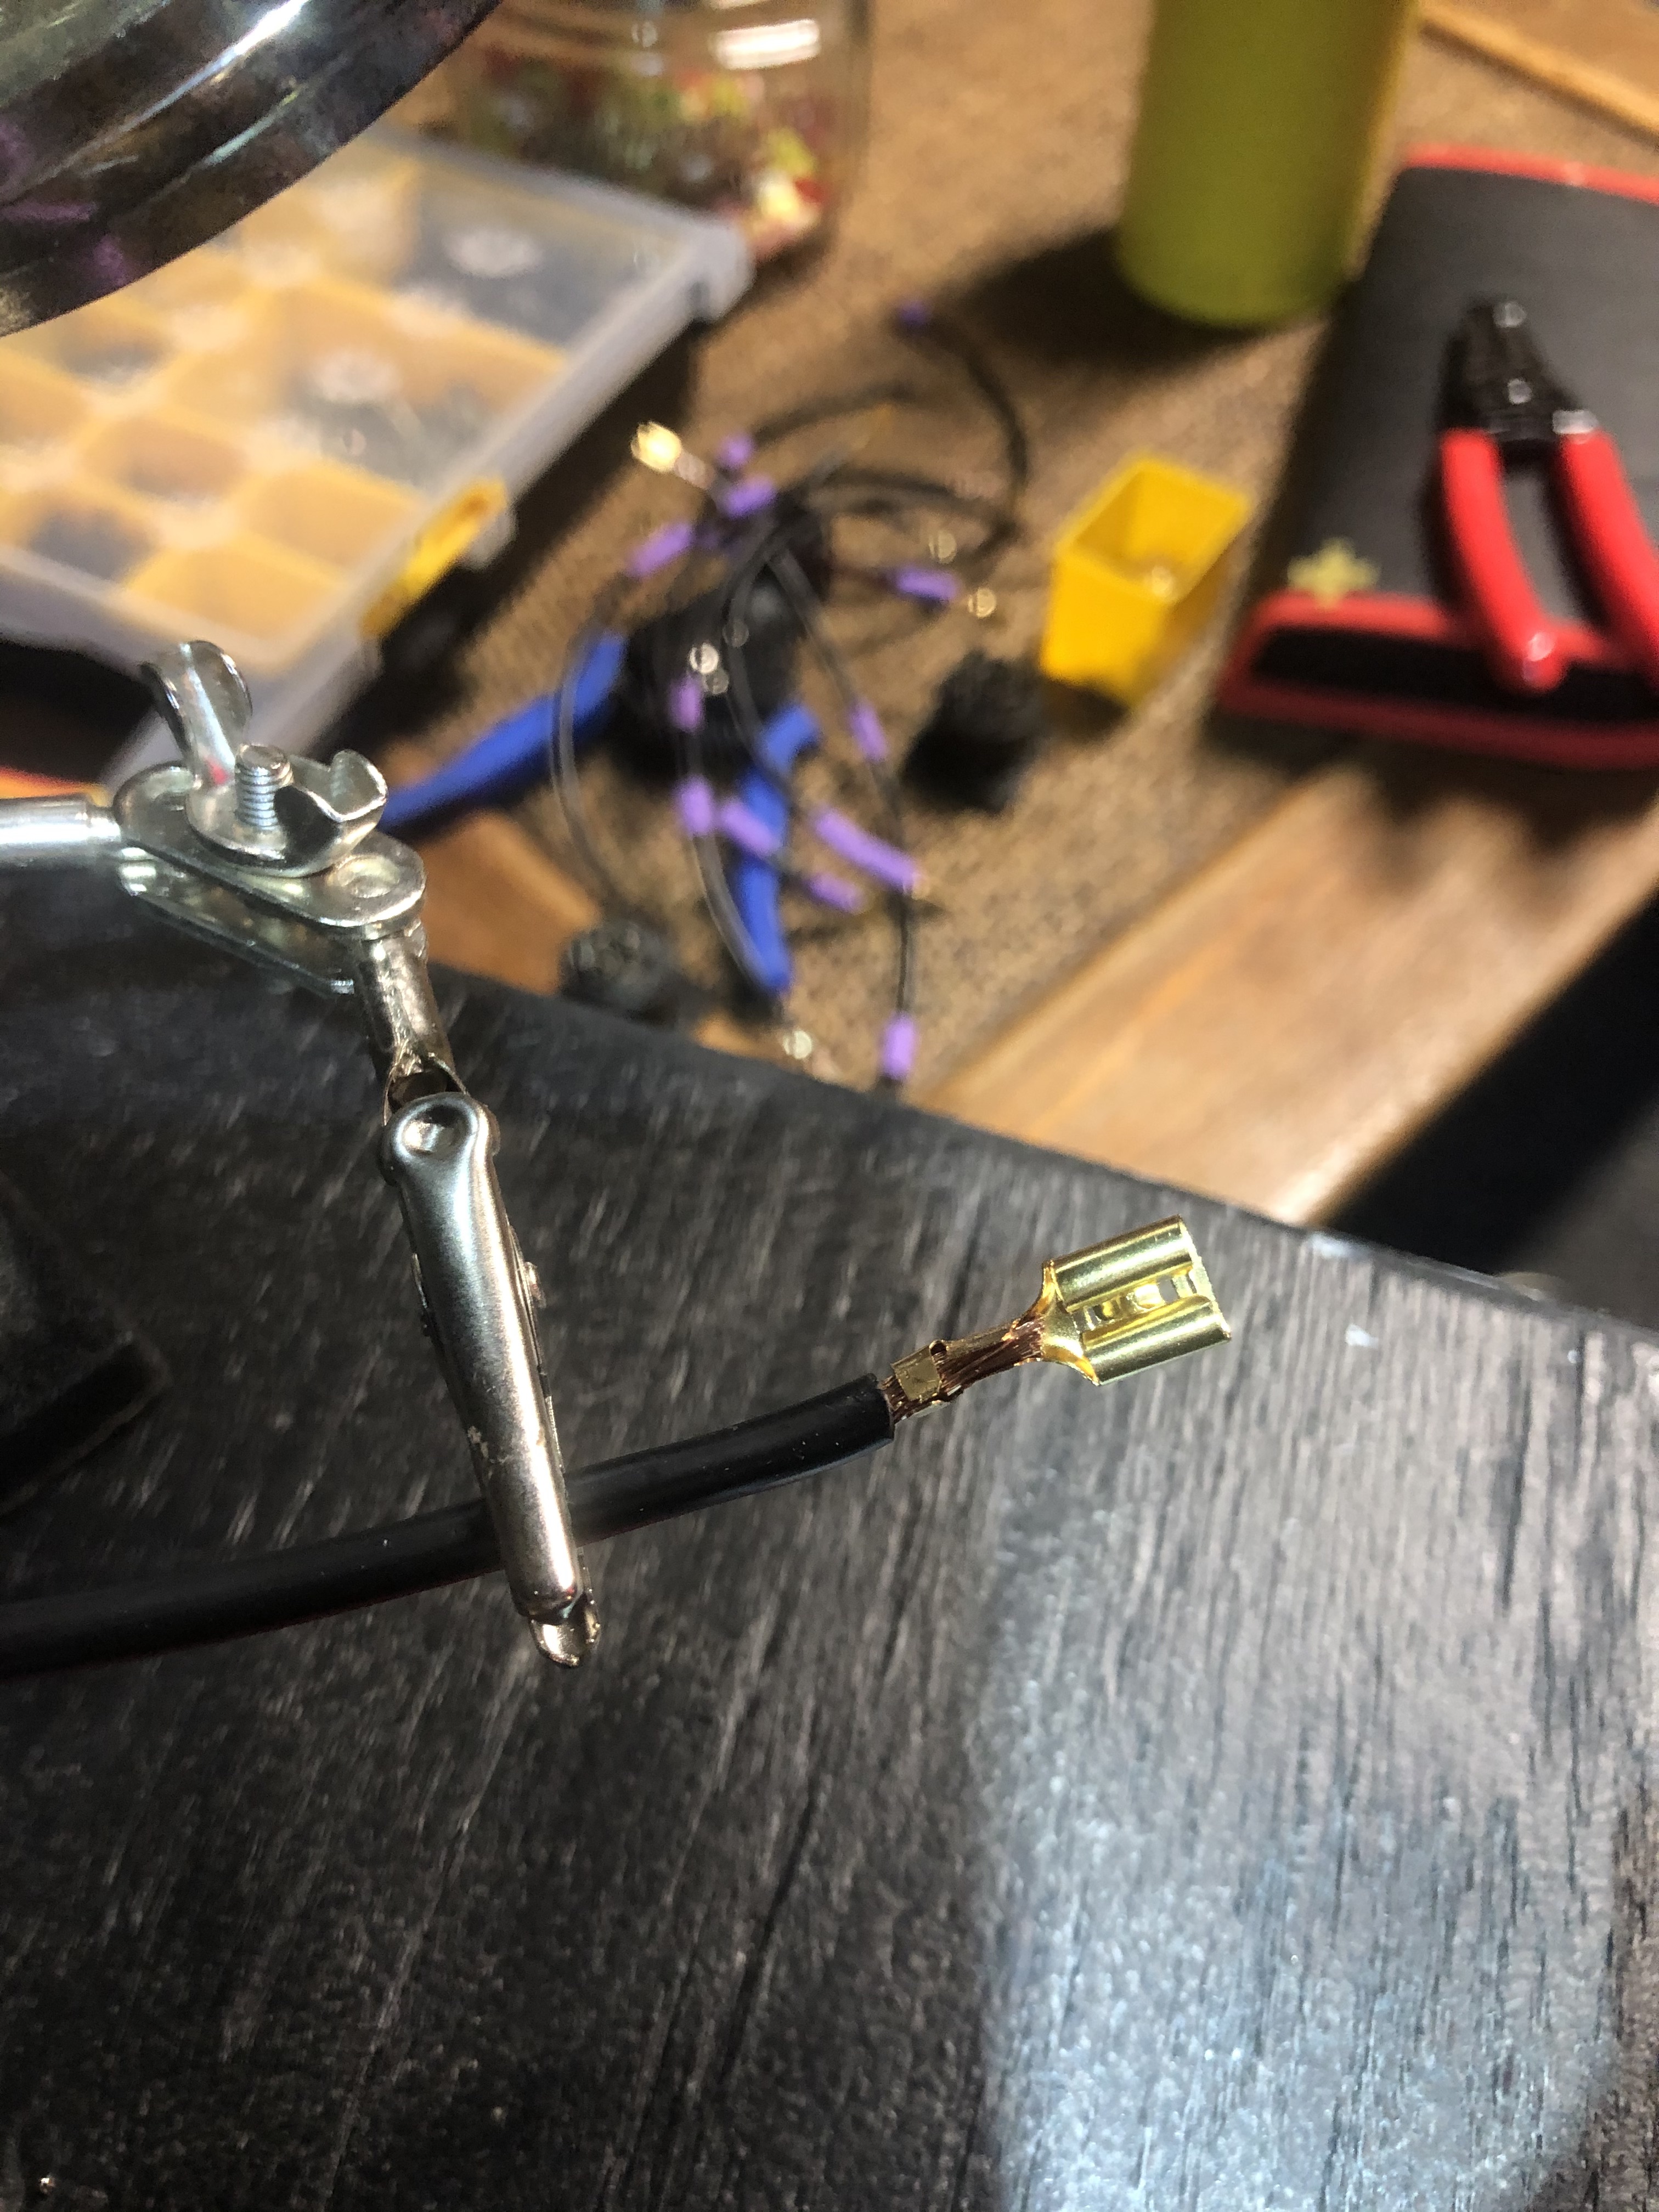
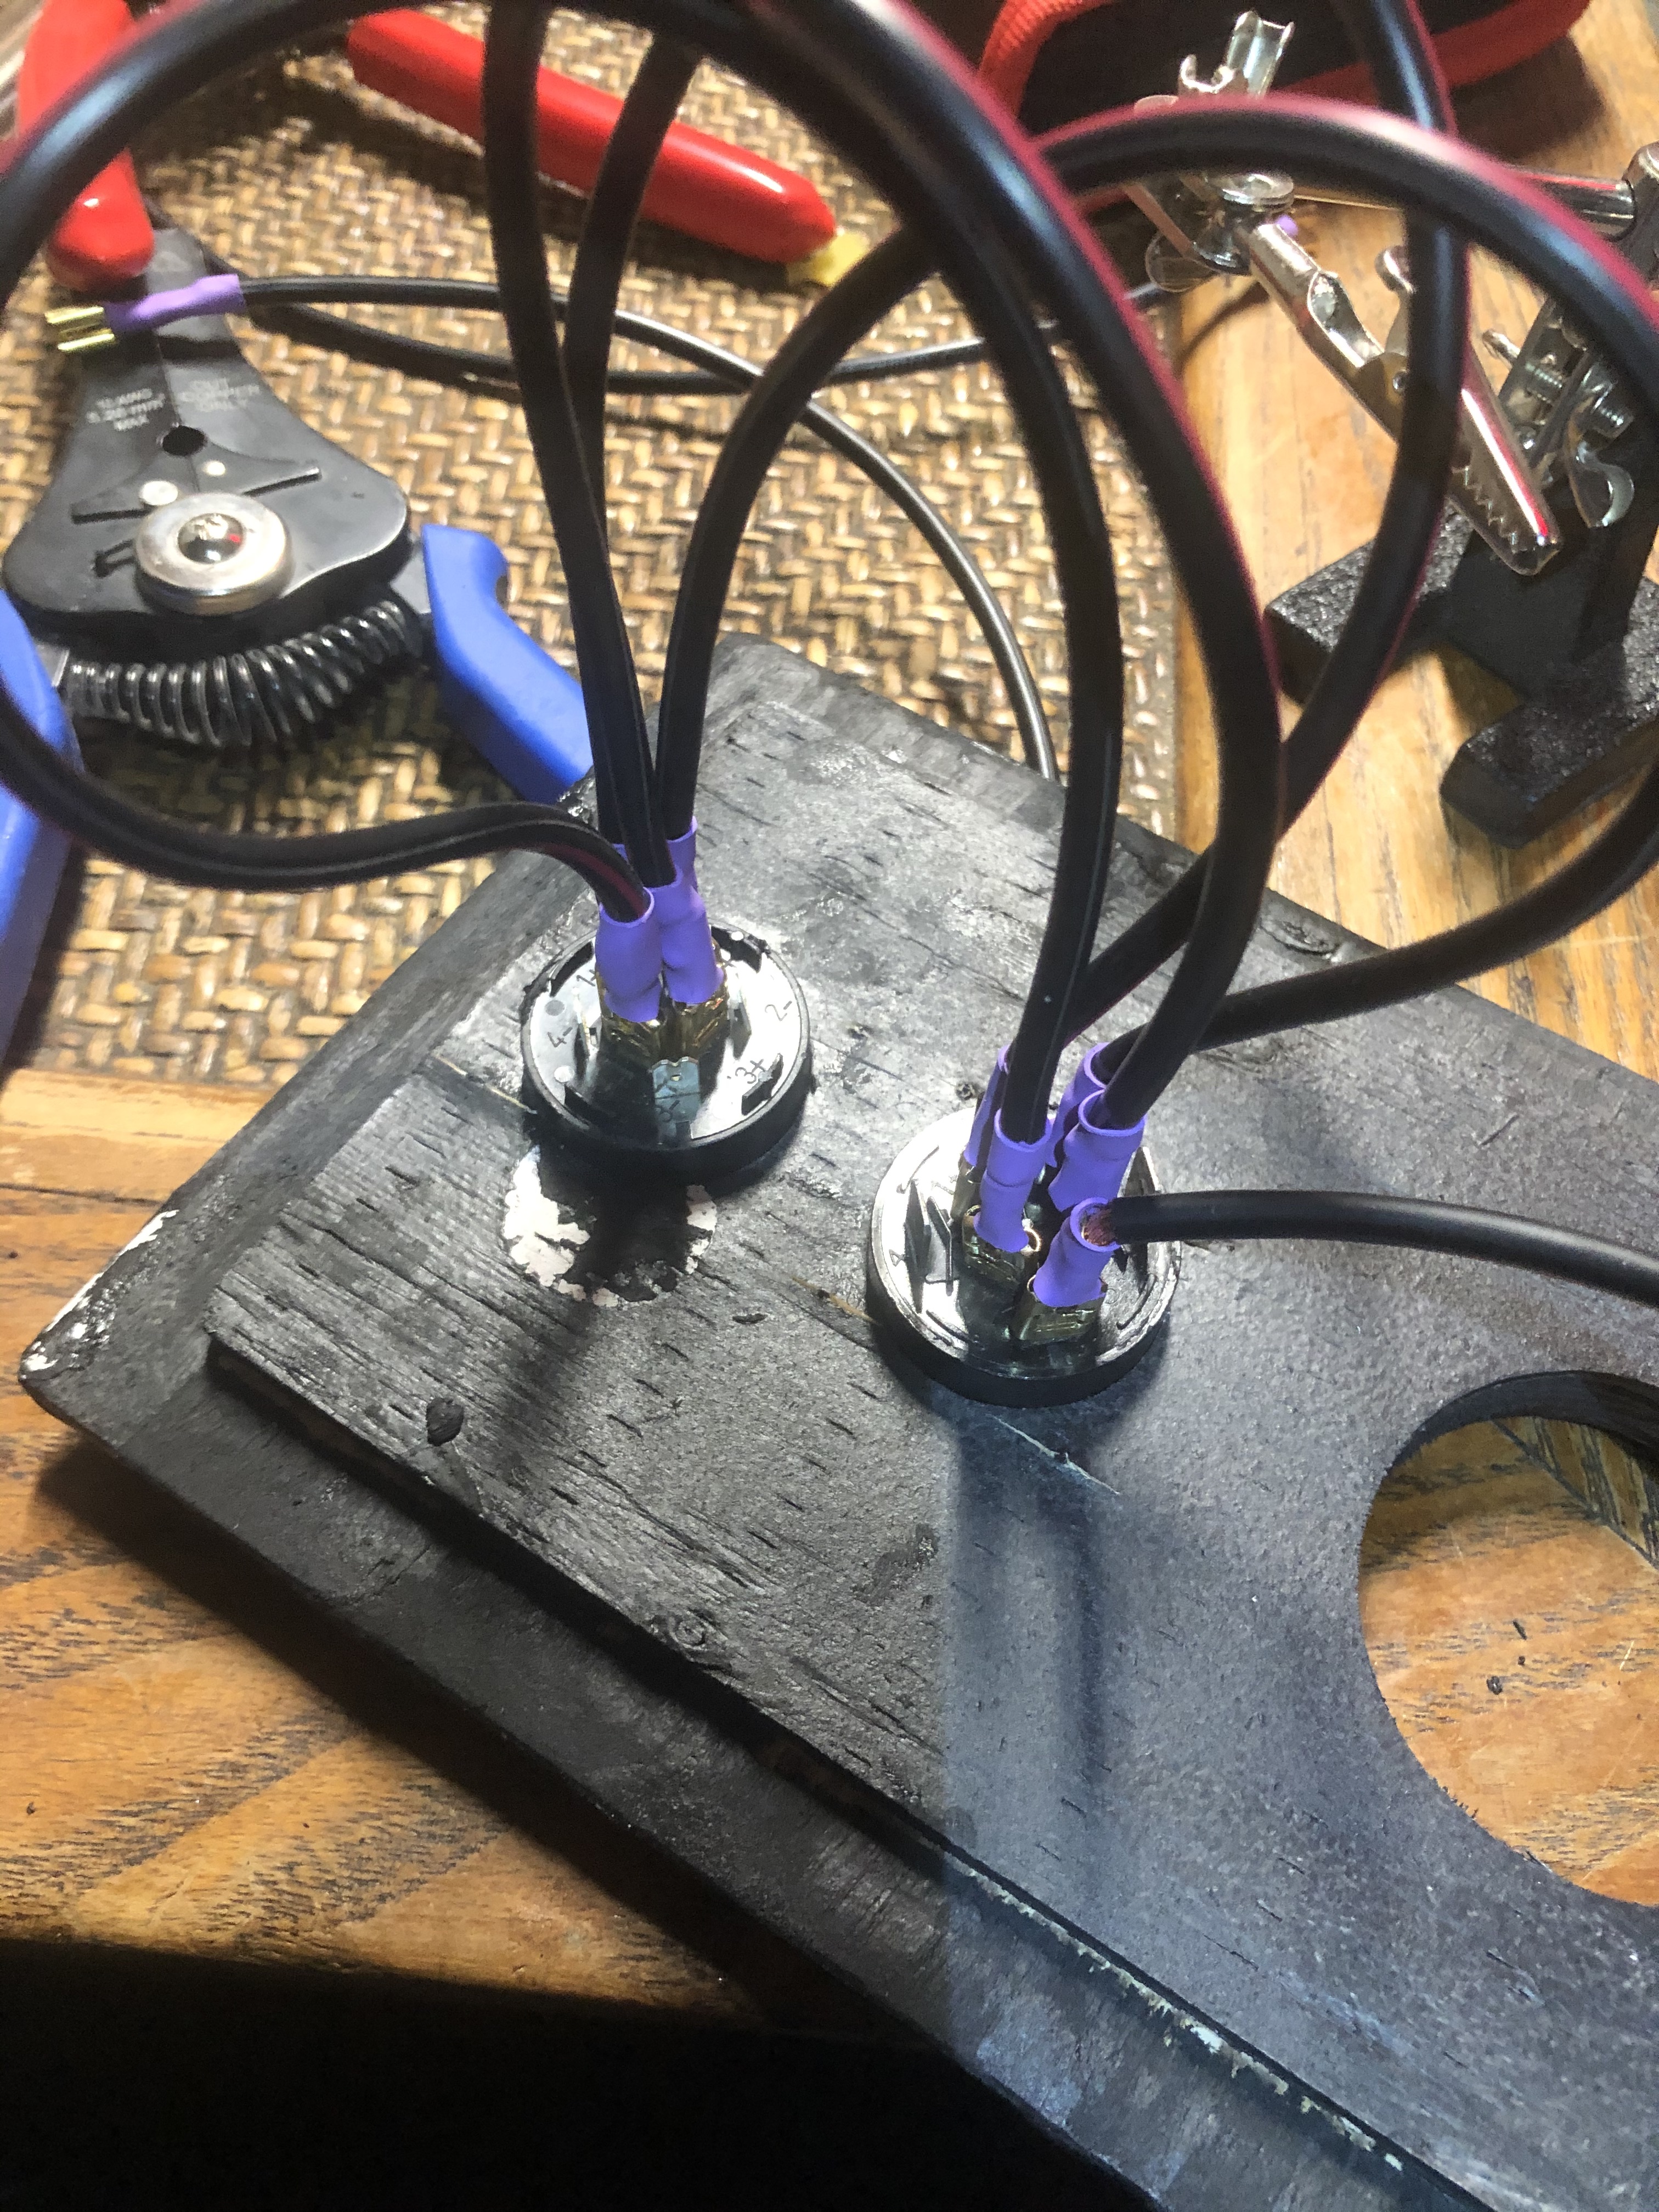
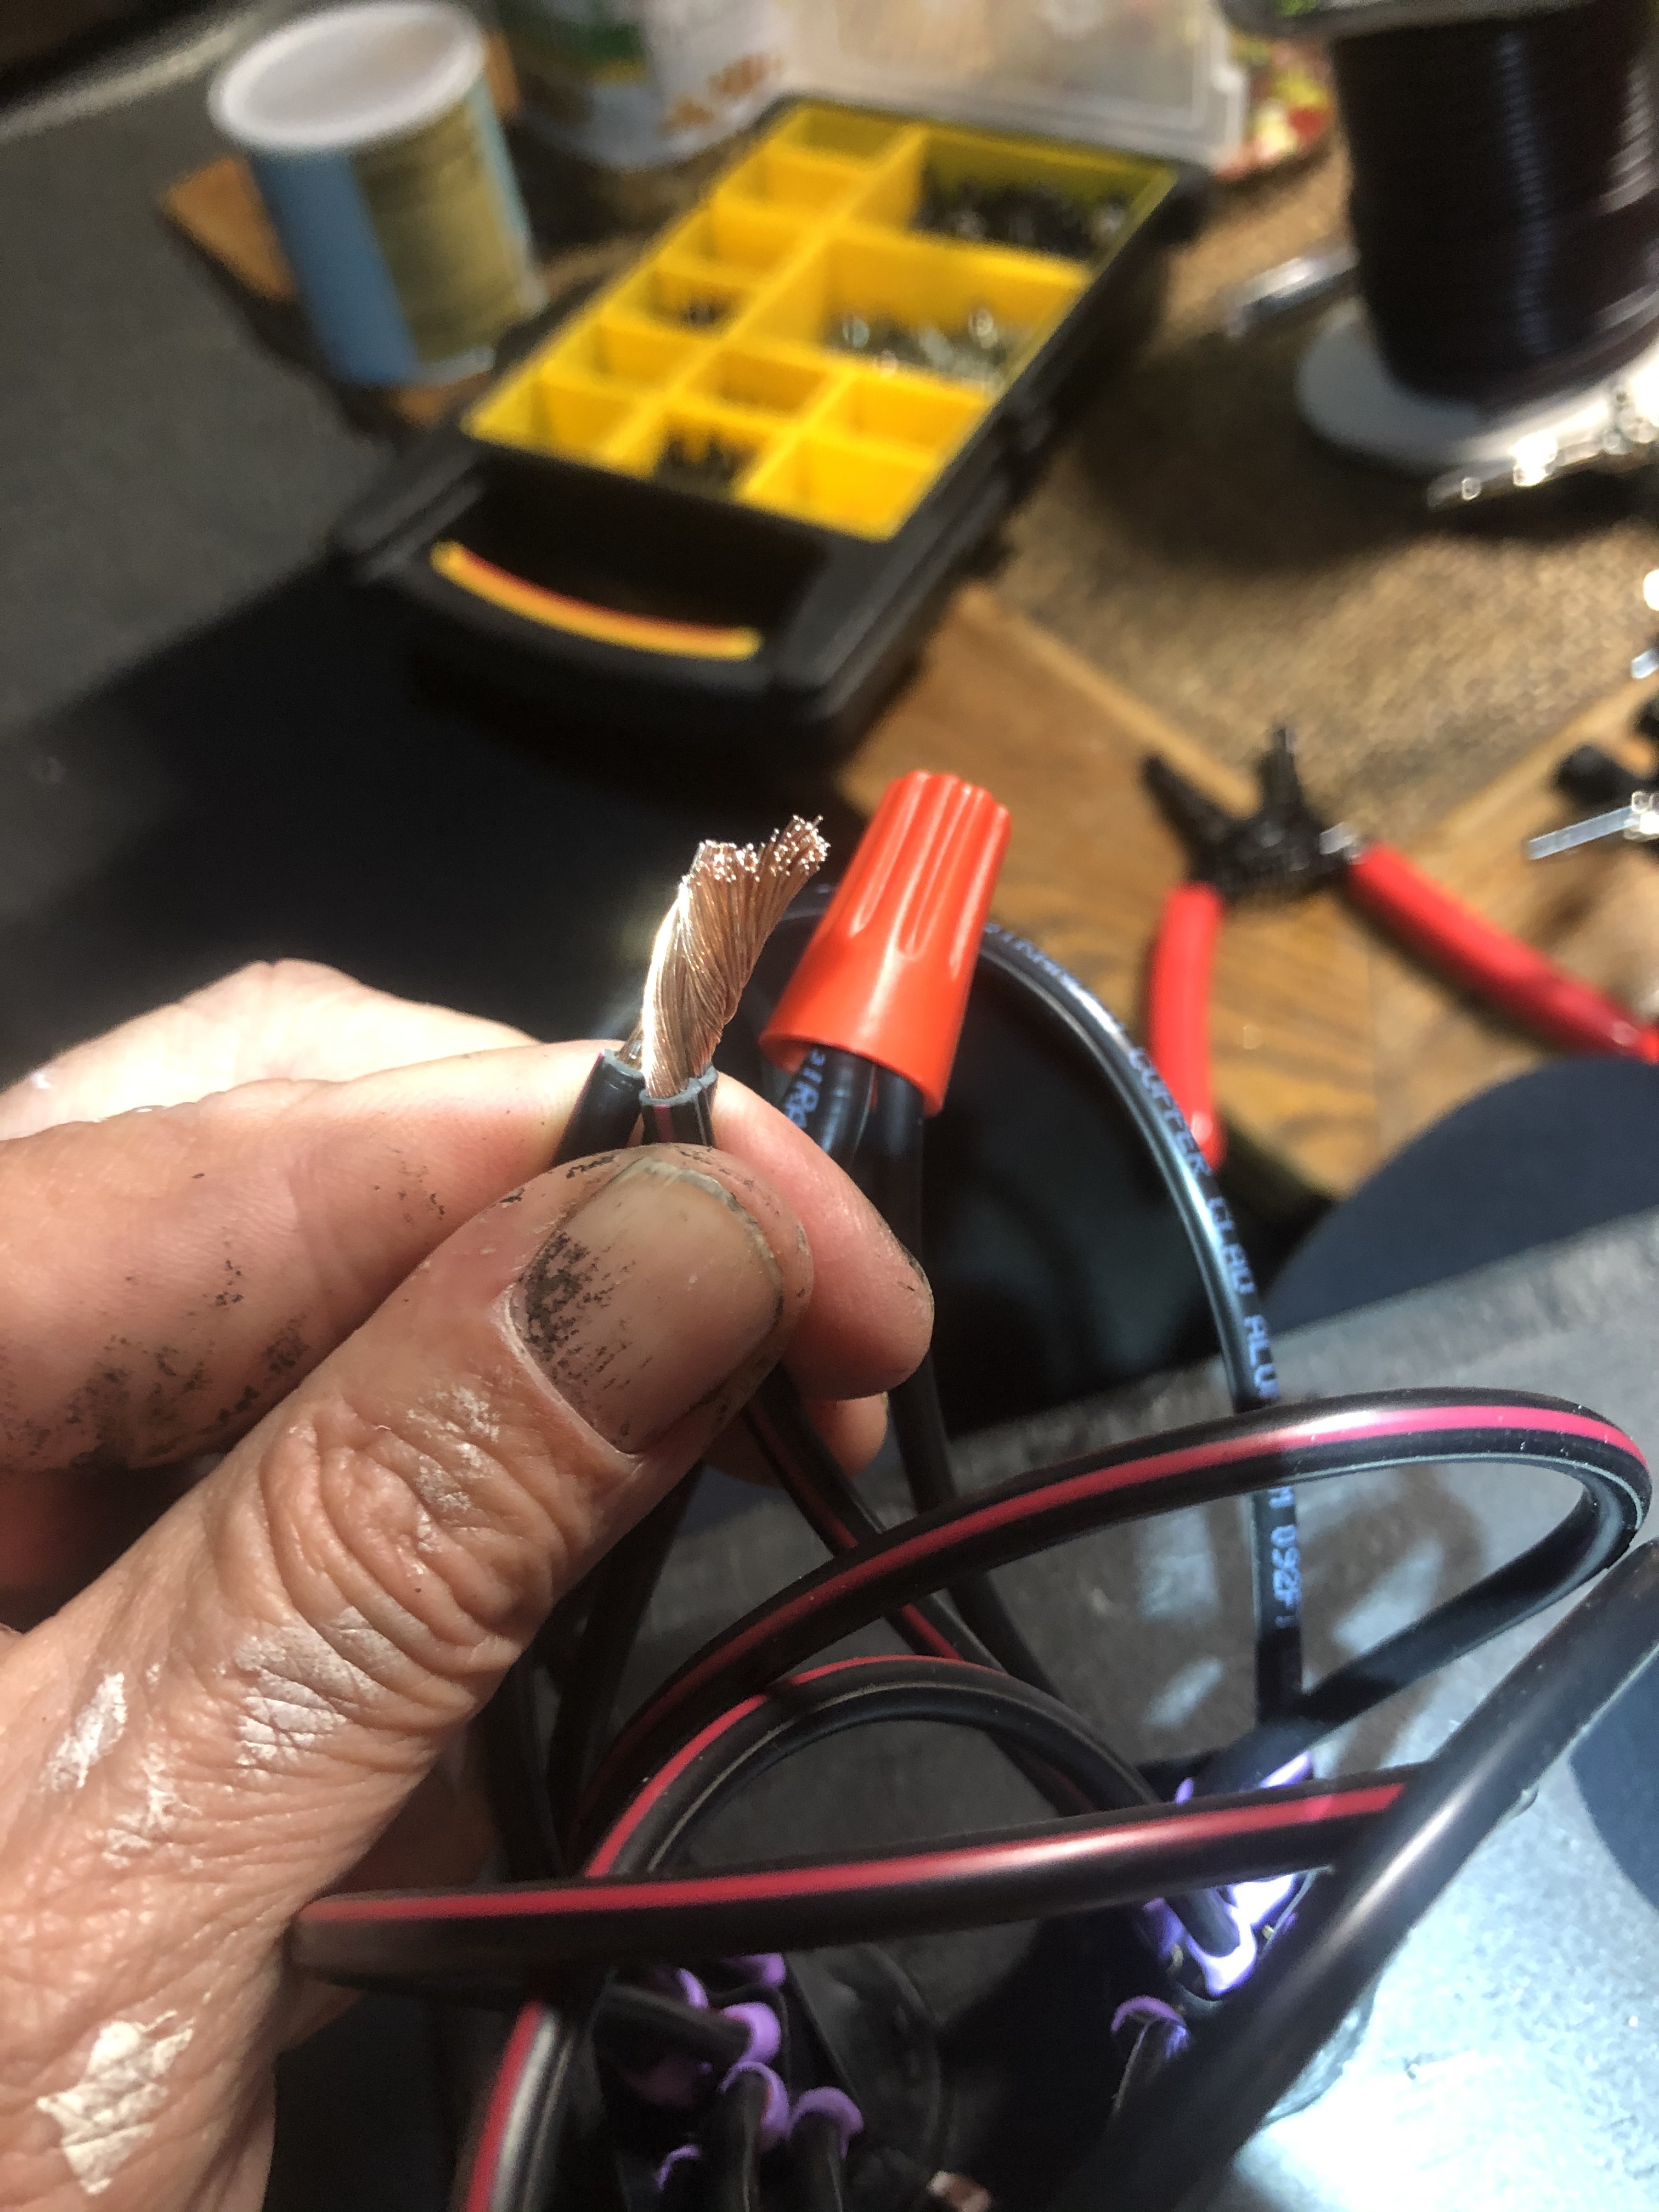
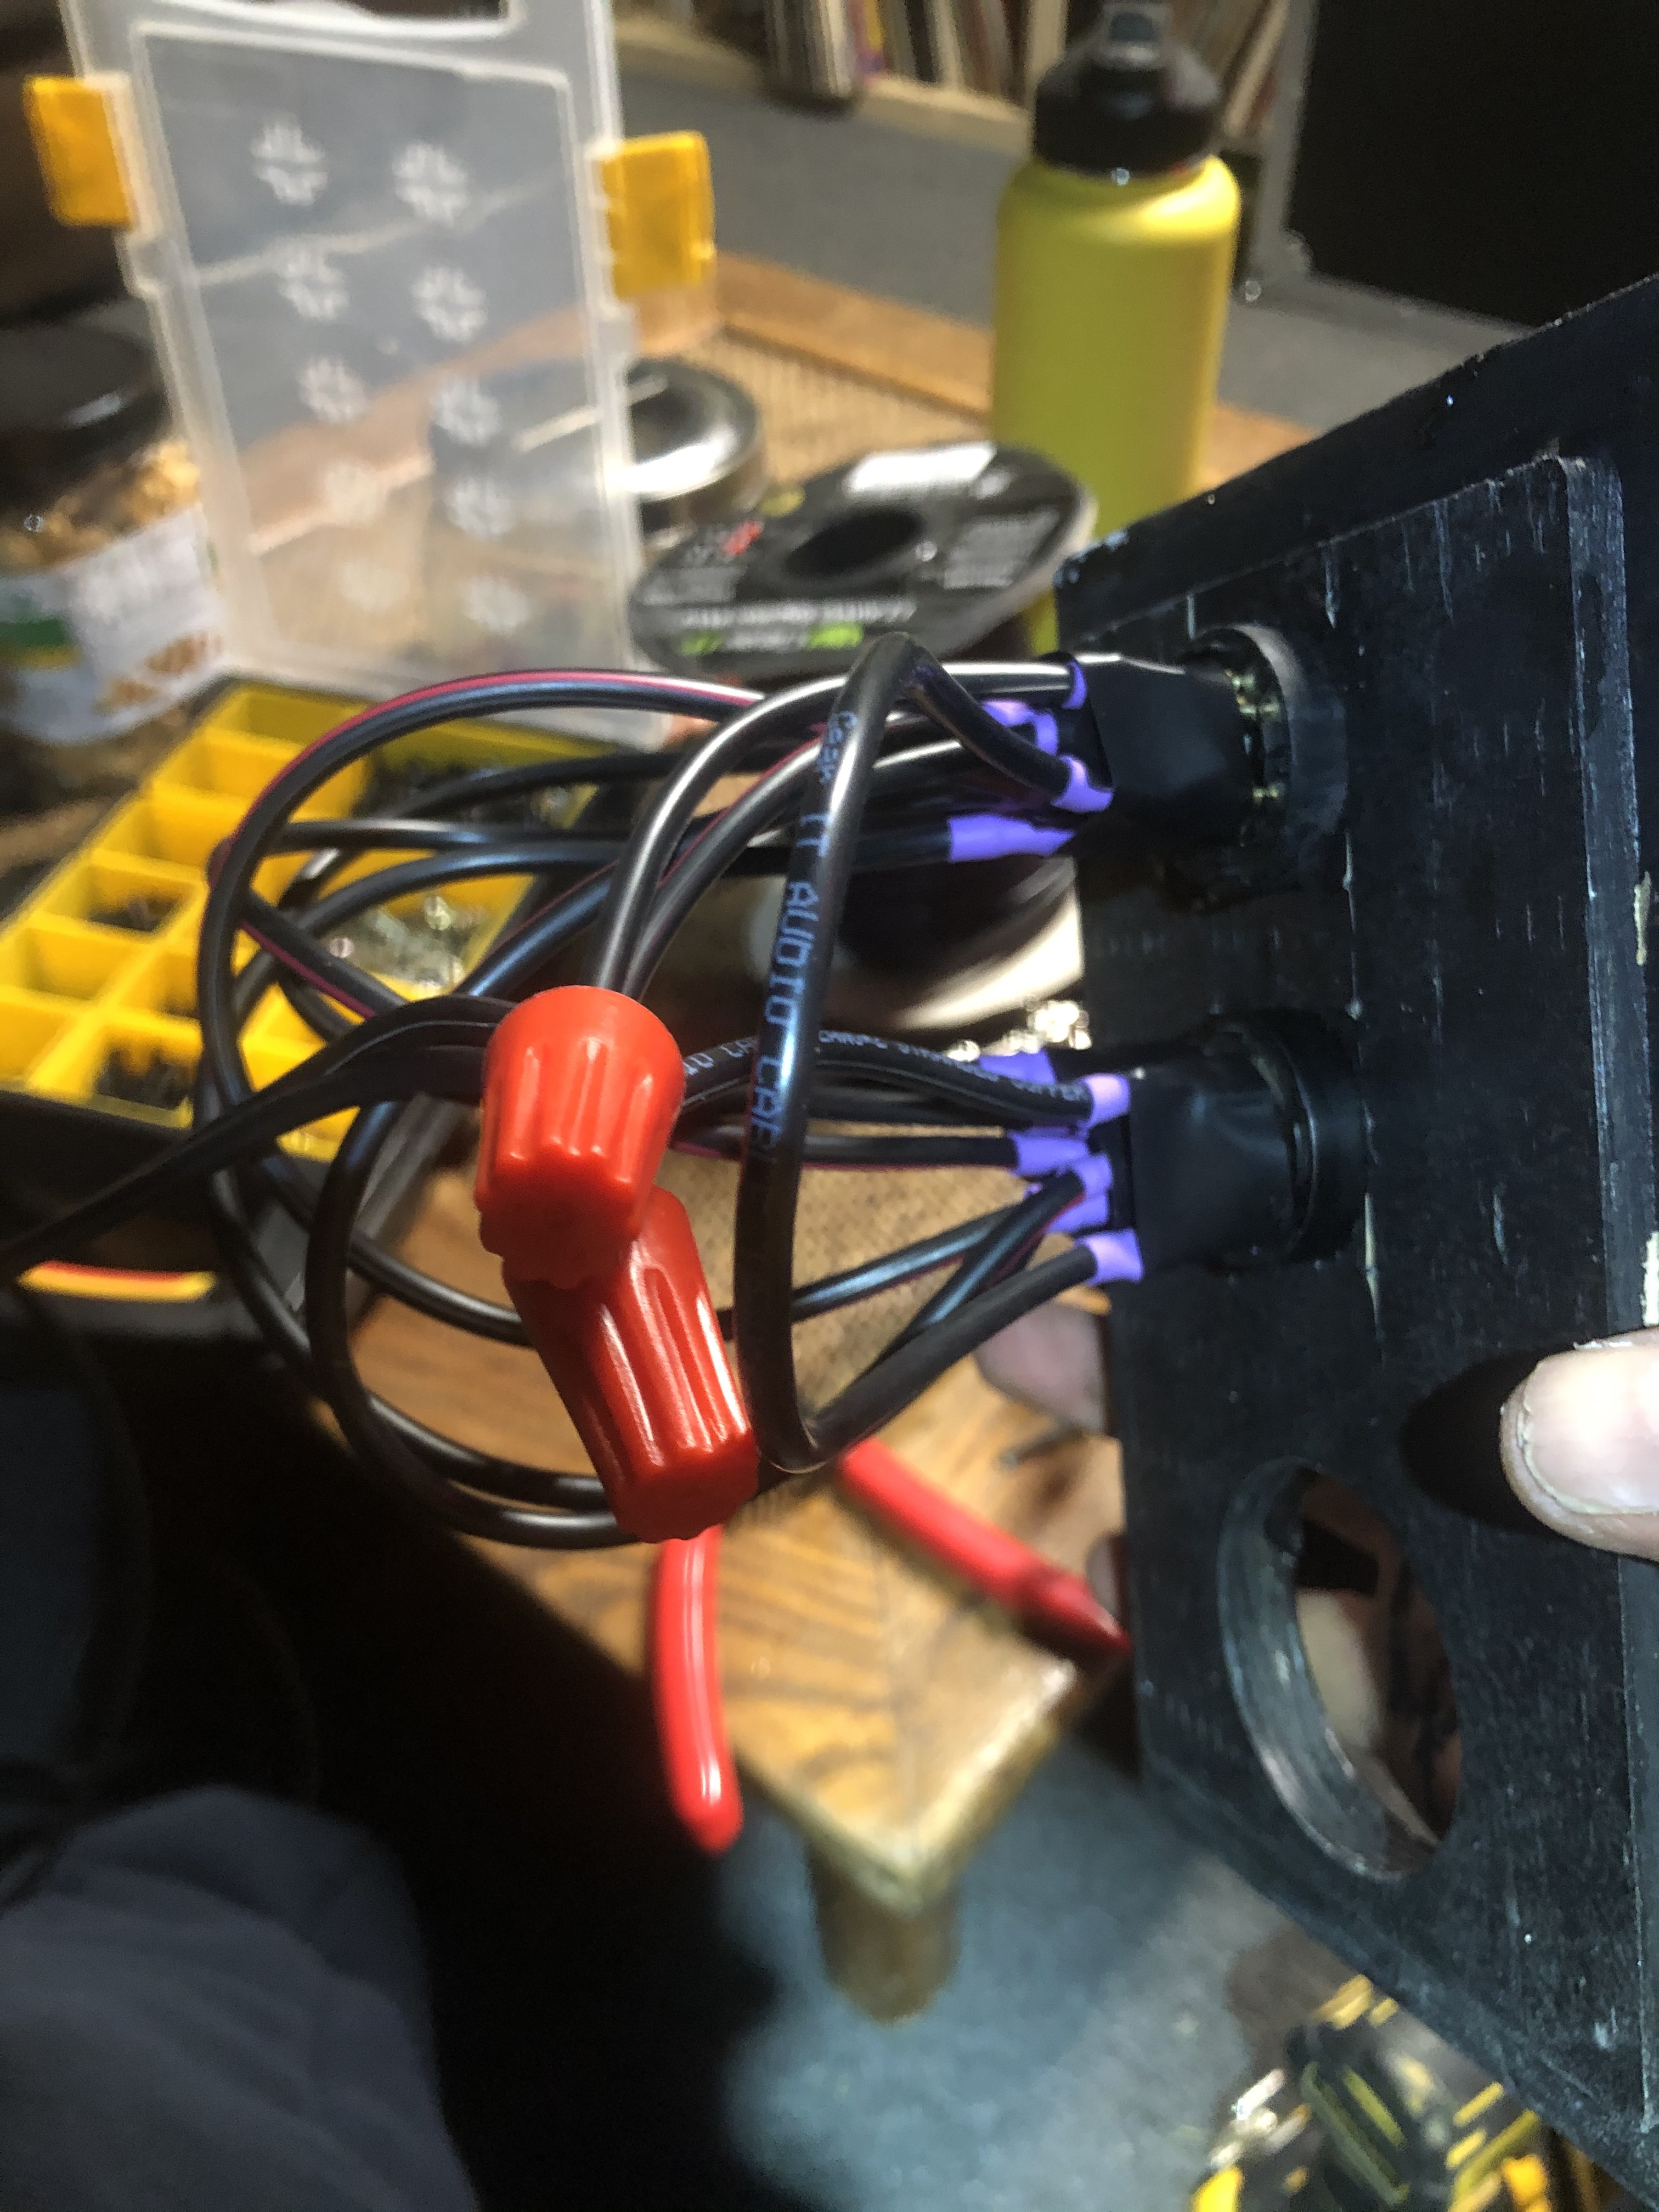
From here, we have to move over to wiring. I have designed a jack plate to fit into part 13 which makes wiring a breeze. At any time you can take the jack plate off and rewire the box with your preferred inputs. We use NL8 pass-throughs using 1-/1+ for the bass and a bare-wire cup. (I cover our wiring scheme in another post.)
Run a single speaker wire from the jack plate through the hole in Part 1. Make sure to leave about a foot of extra wire in the driver compartment.
DO NOT GLUE THE JACK PLATE!!
Just use screws to hold it into place. If you ever need to adjust the wiring, you have access to the internals of the speaker via the jack plate and driver door. Please do not mess up your access by gluing the jack plate in. It is supposed to be removable – just like the driver door.
Step 13: Install the last braces and Part 12.
You know what to do.
Clean up the wings on parts 11 and 13.
Step 14: Finishing work.
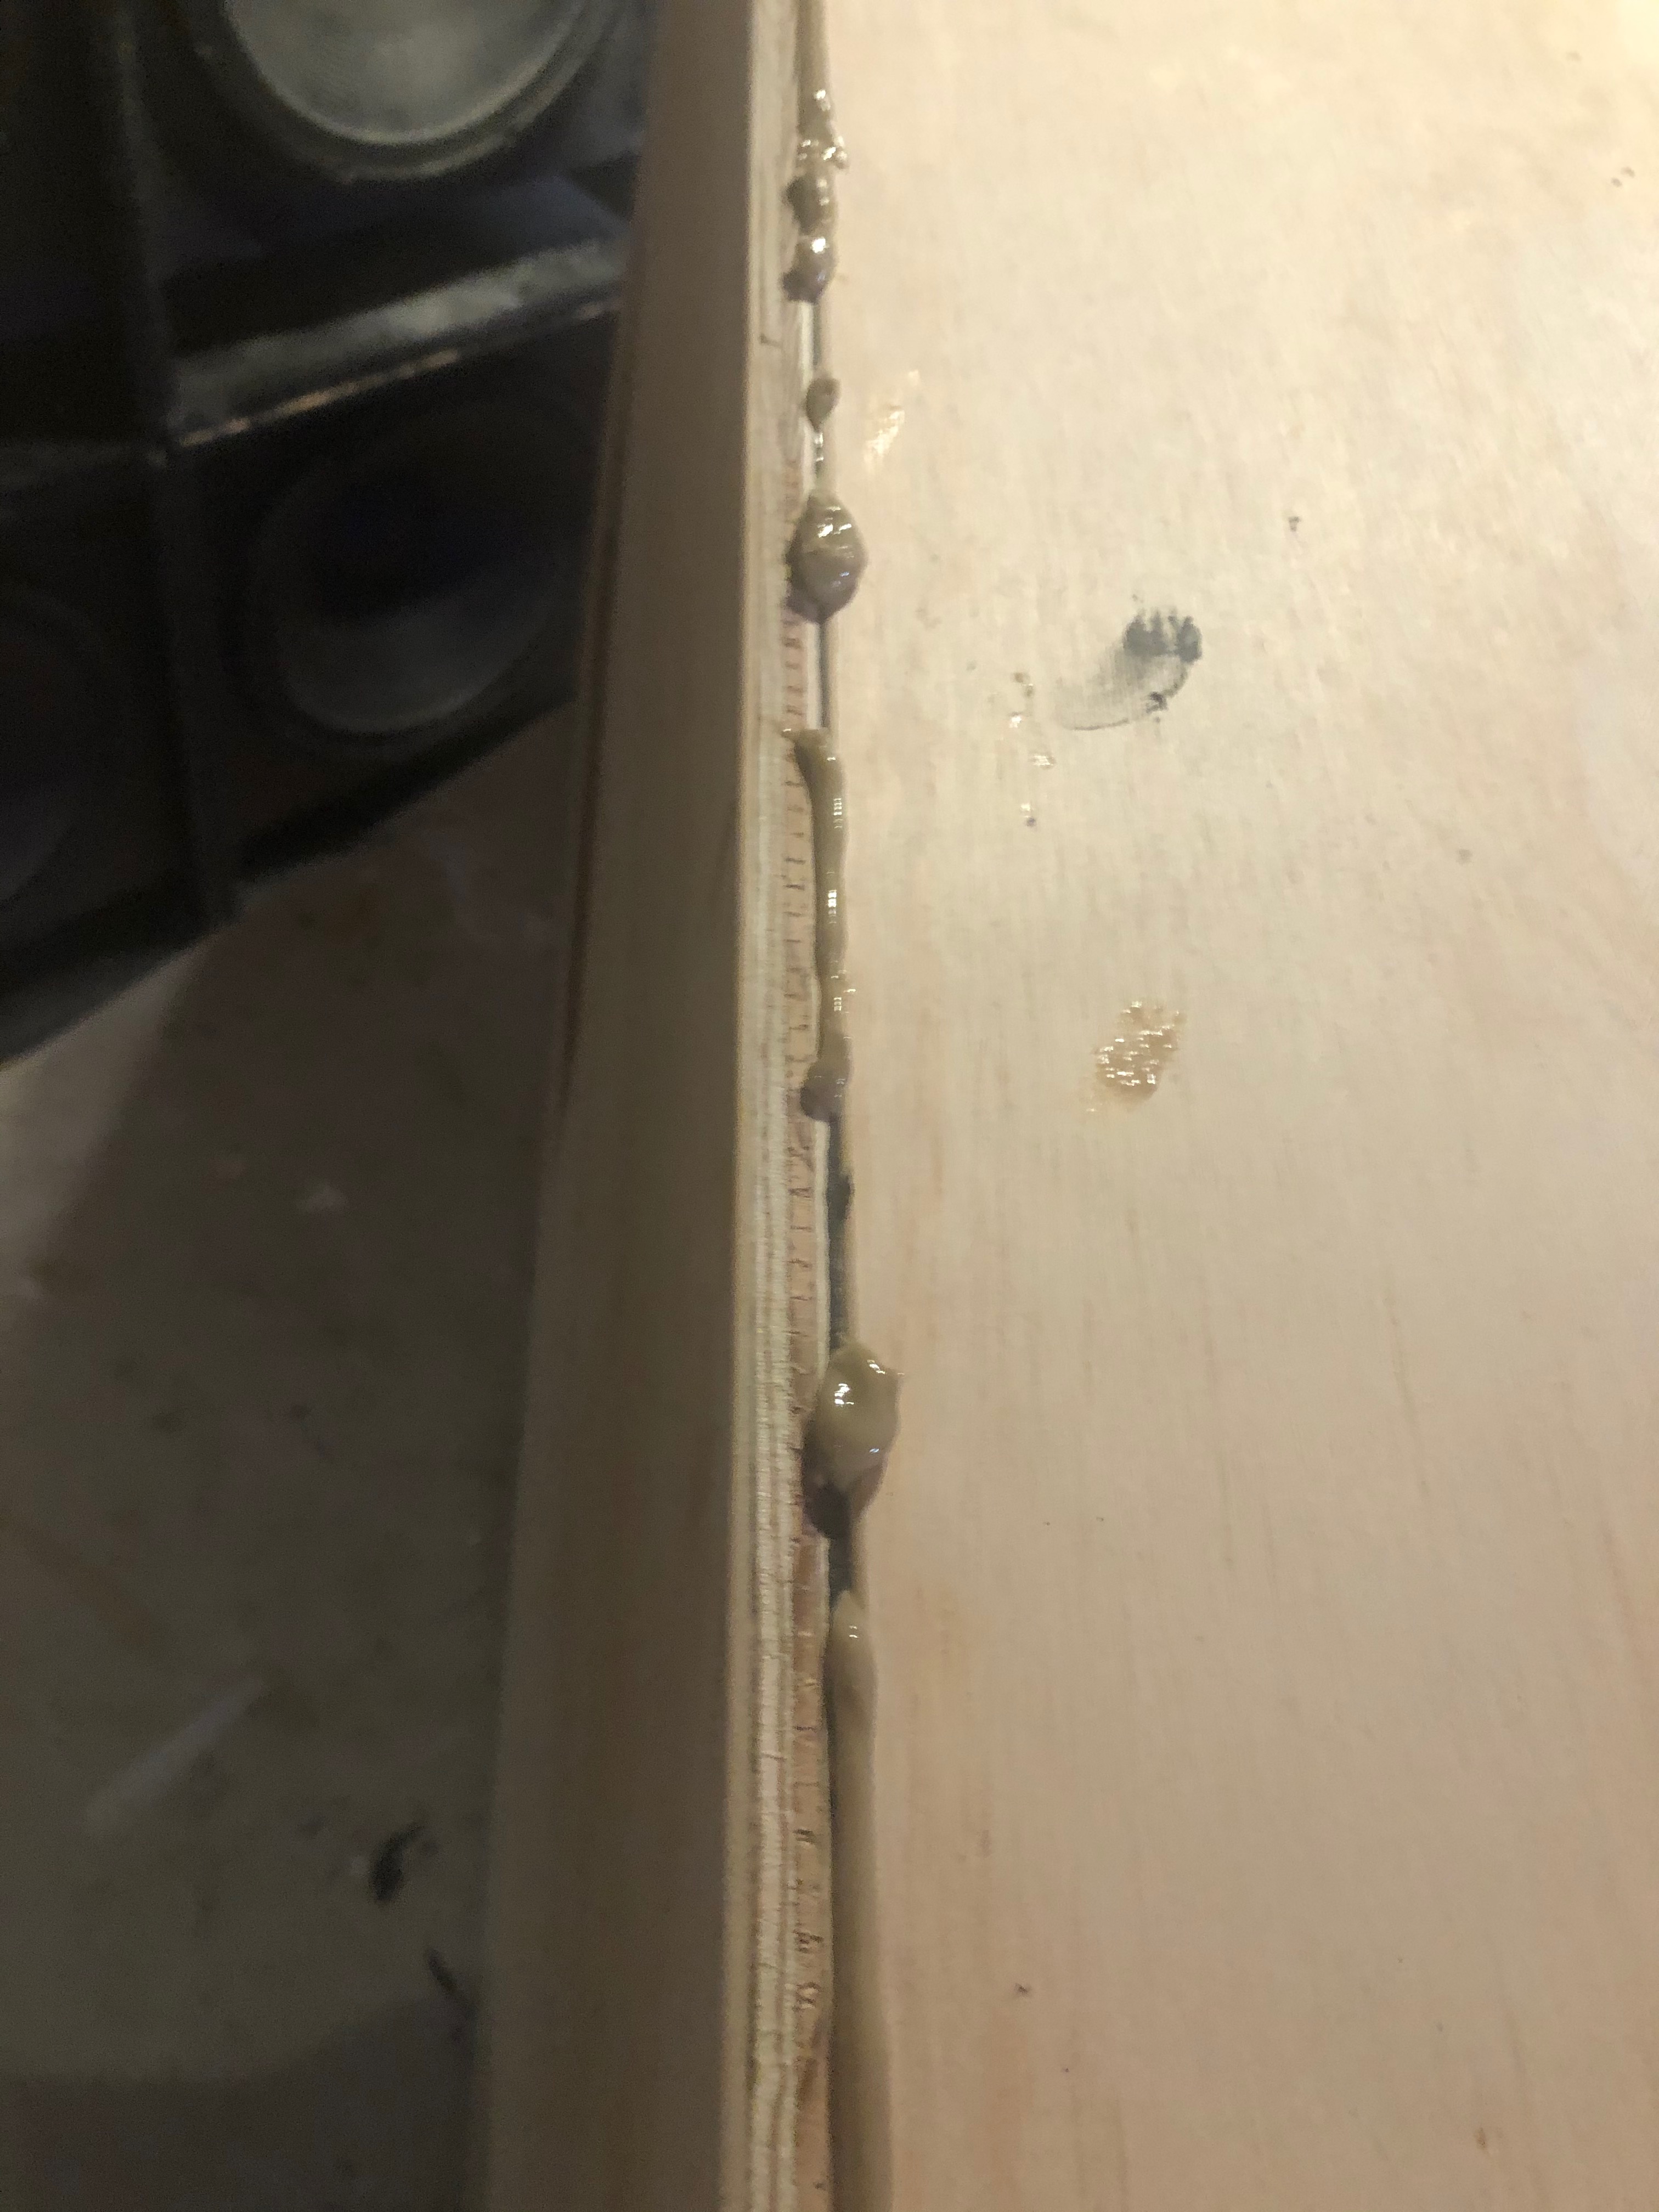
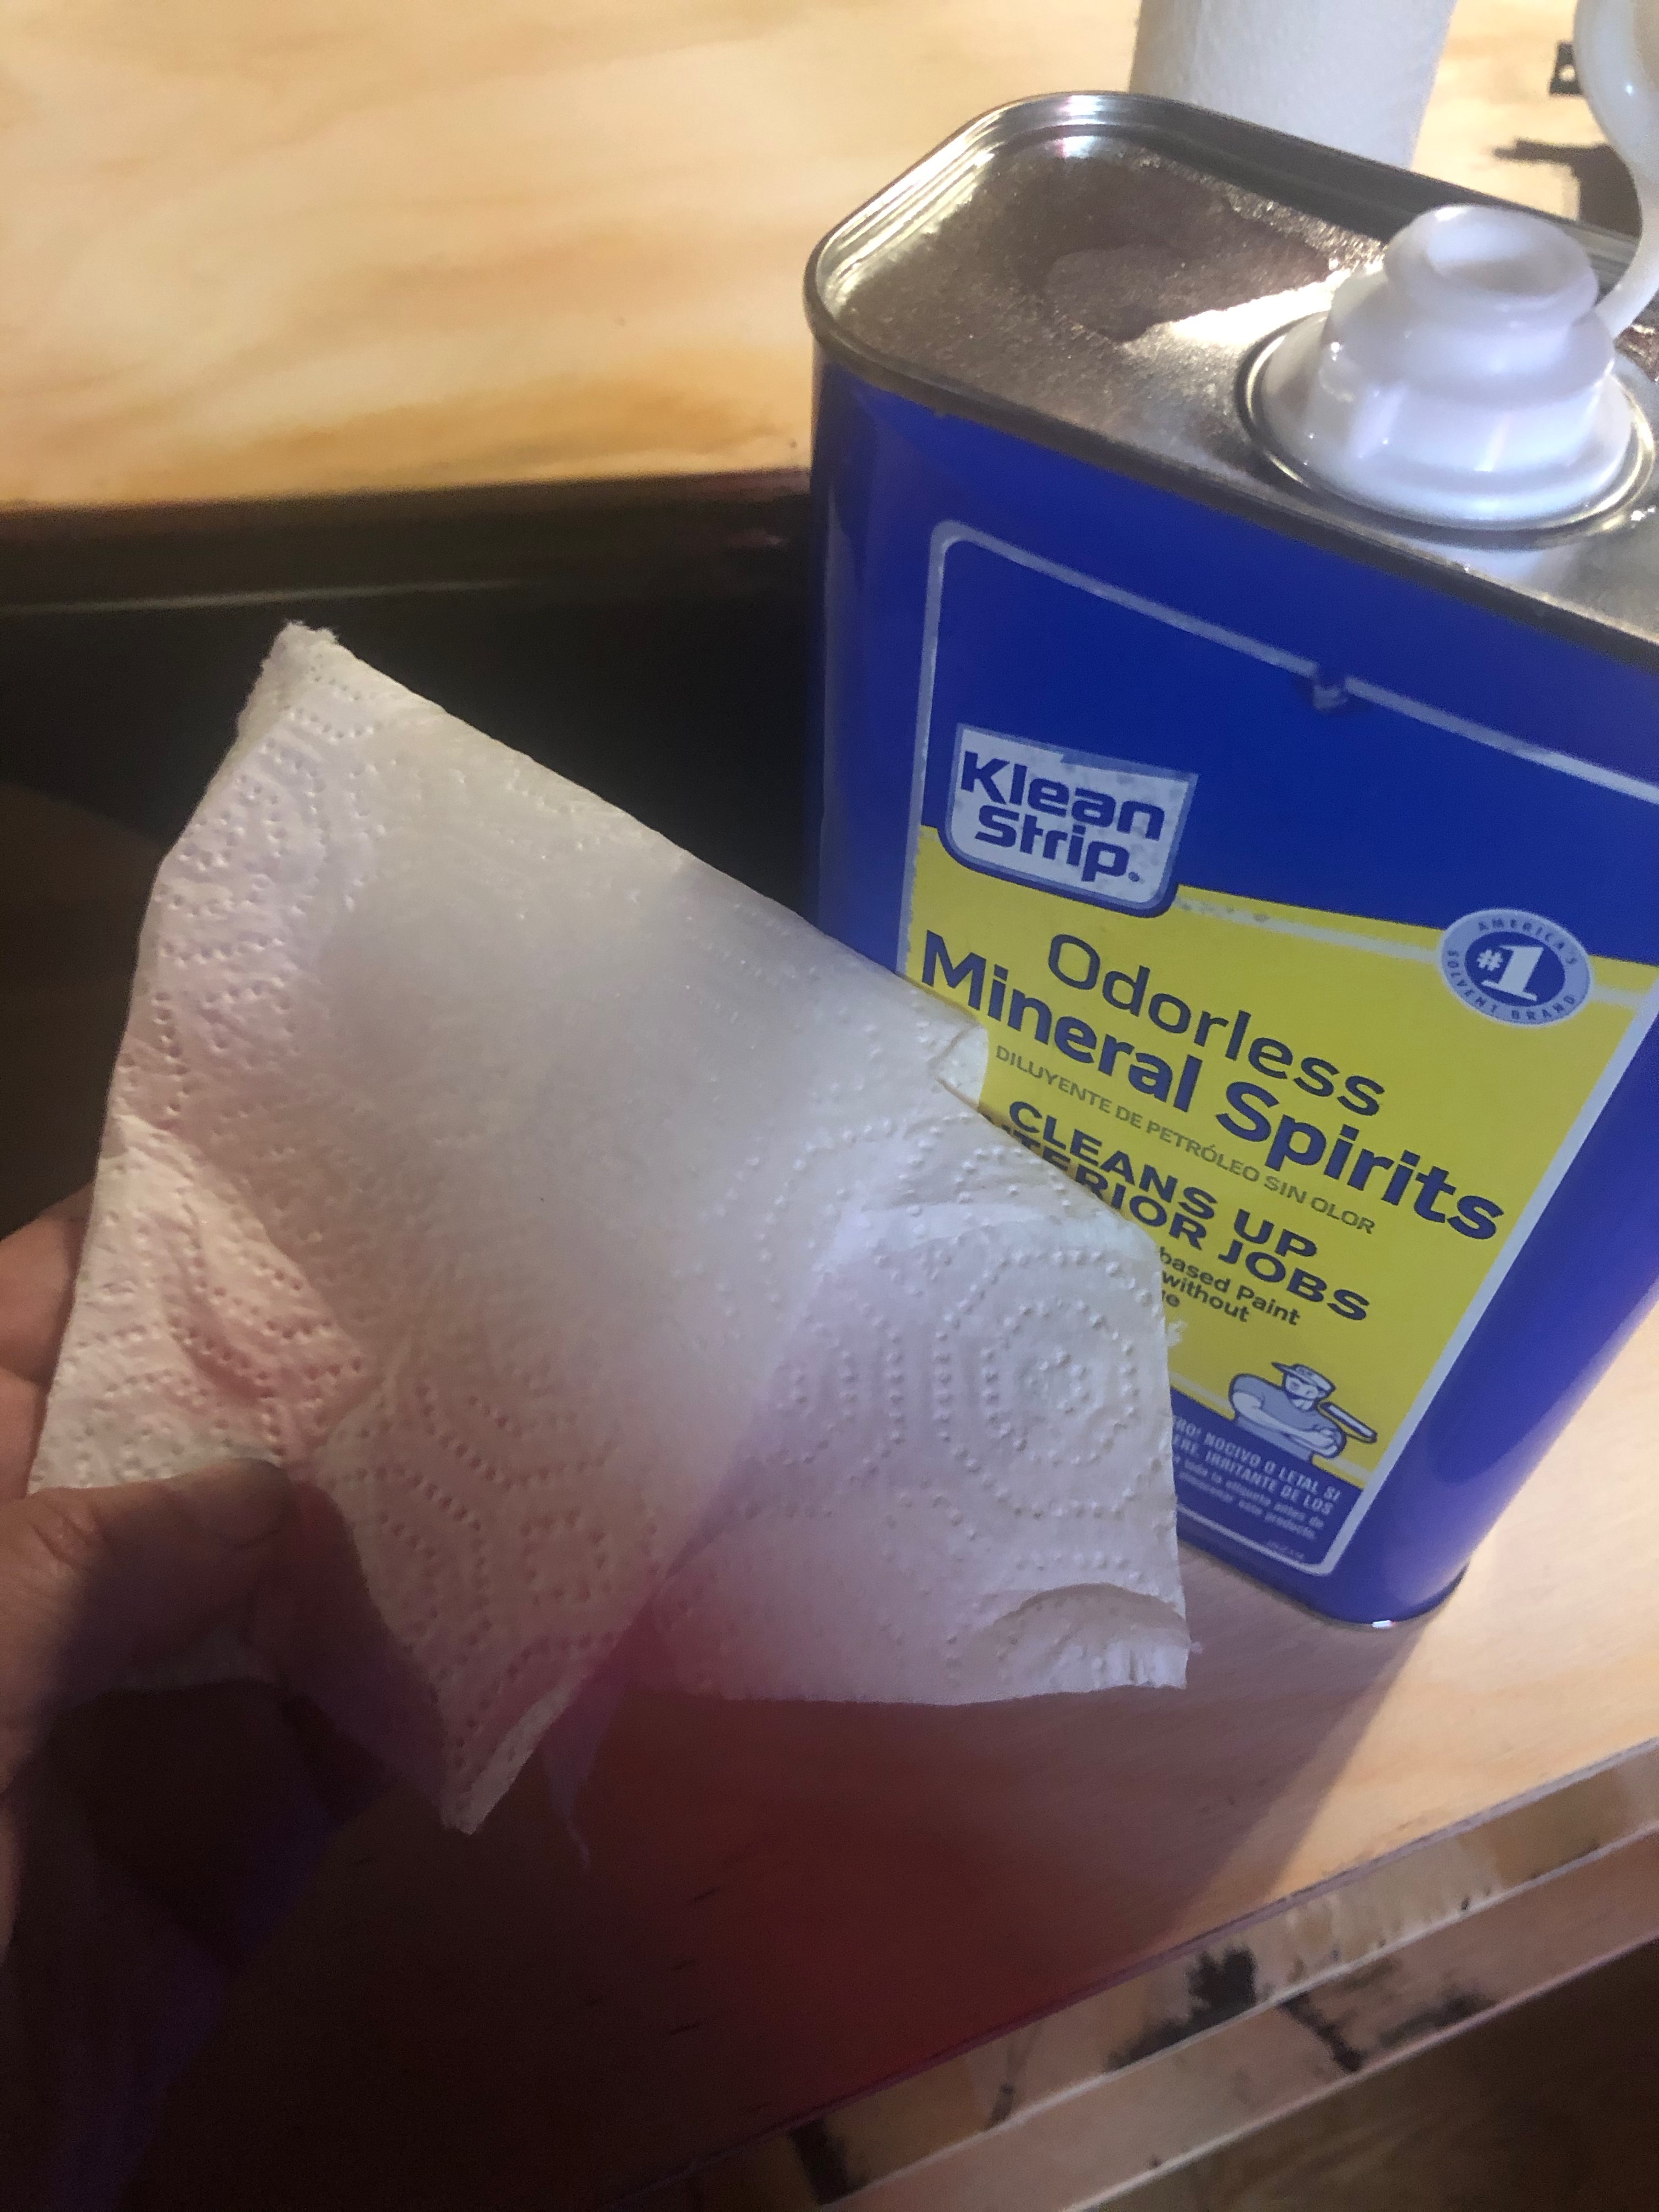
Excess adhesive can be chiseled off rather easily. You can clean wet adhesive with Mineral Spirits.
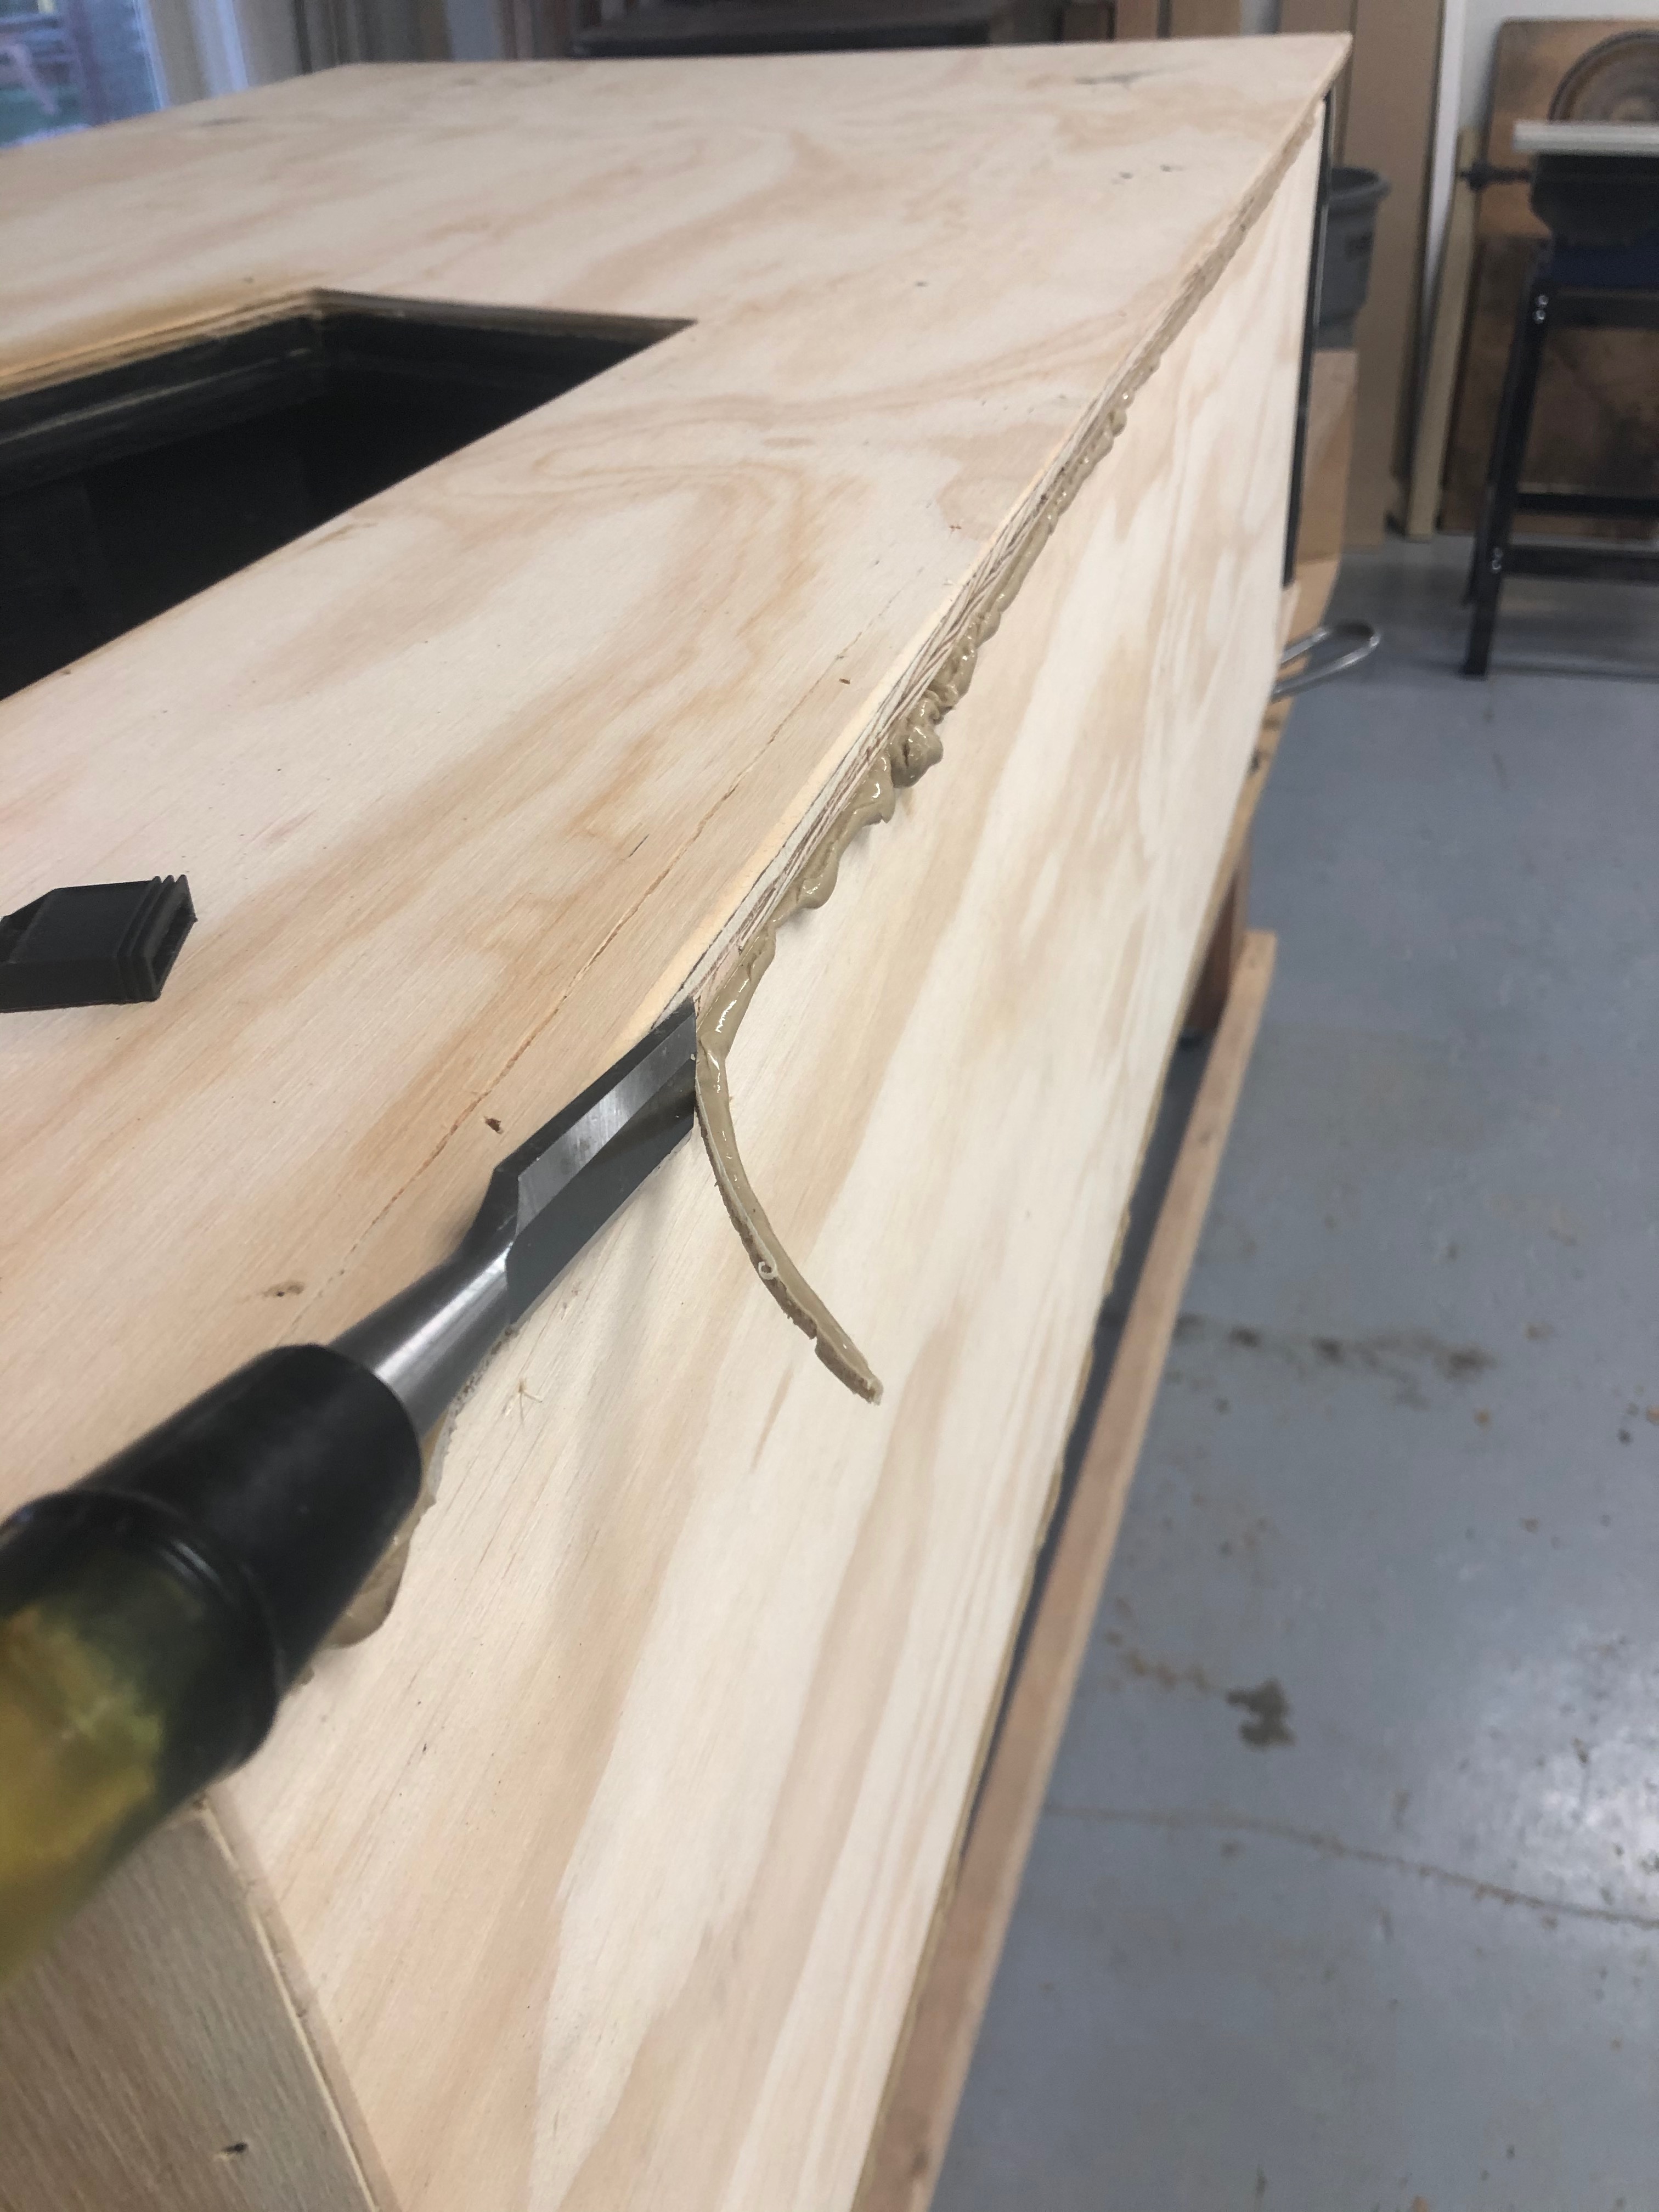
We always take a trim router and go over all of the edges with a 3/4″ roundover. It give the box a nice professional look. The more time you spend on external imperfections before you paint, the happier you will be. Make sure to use a healthy mouth of wood putty, let it dry and then sand the finish nice and smooth.
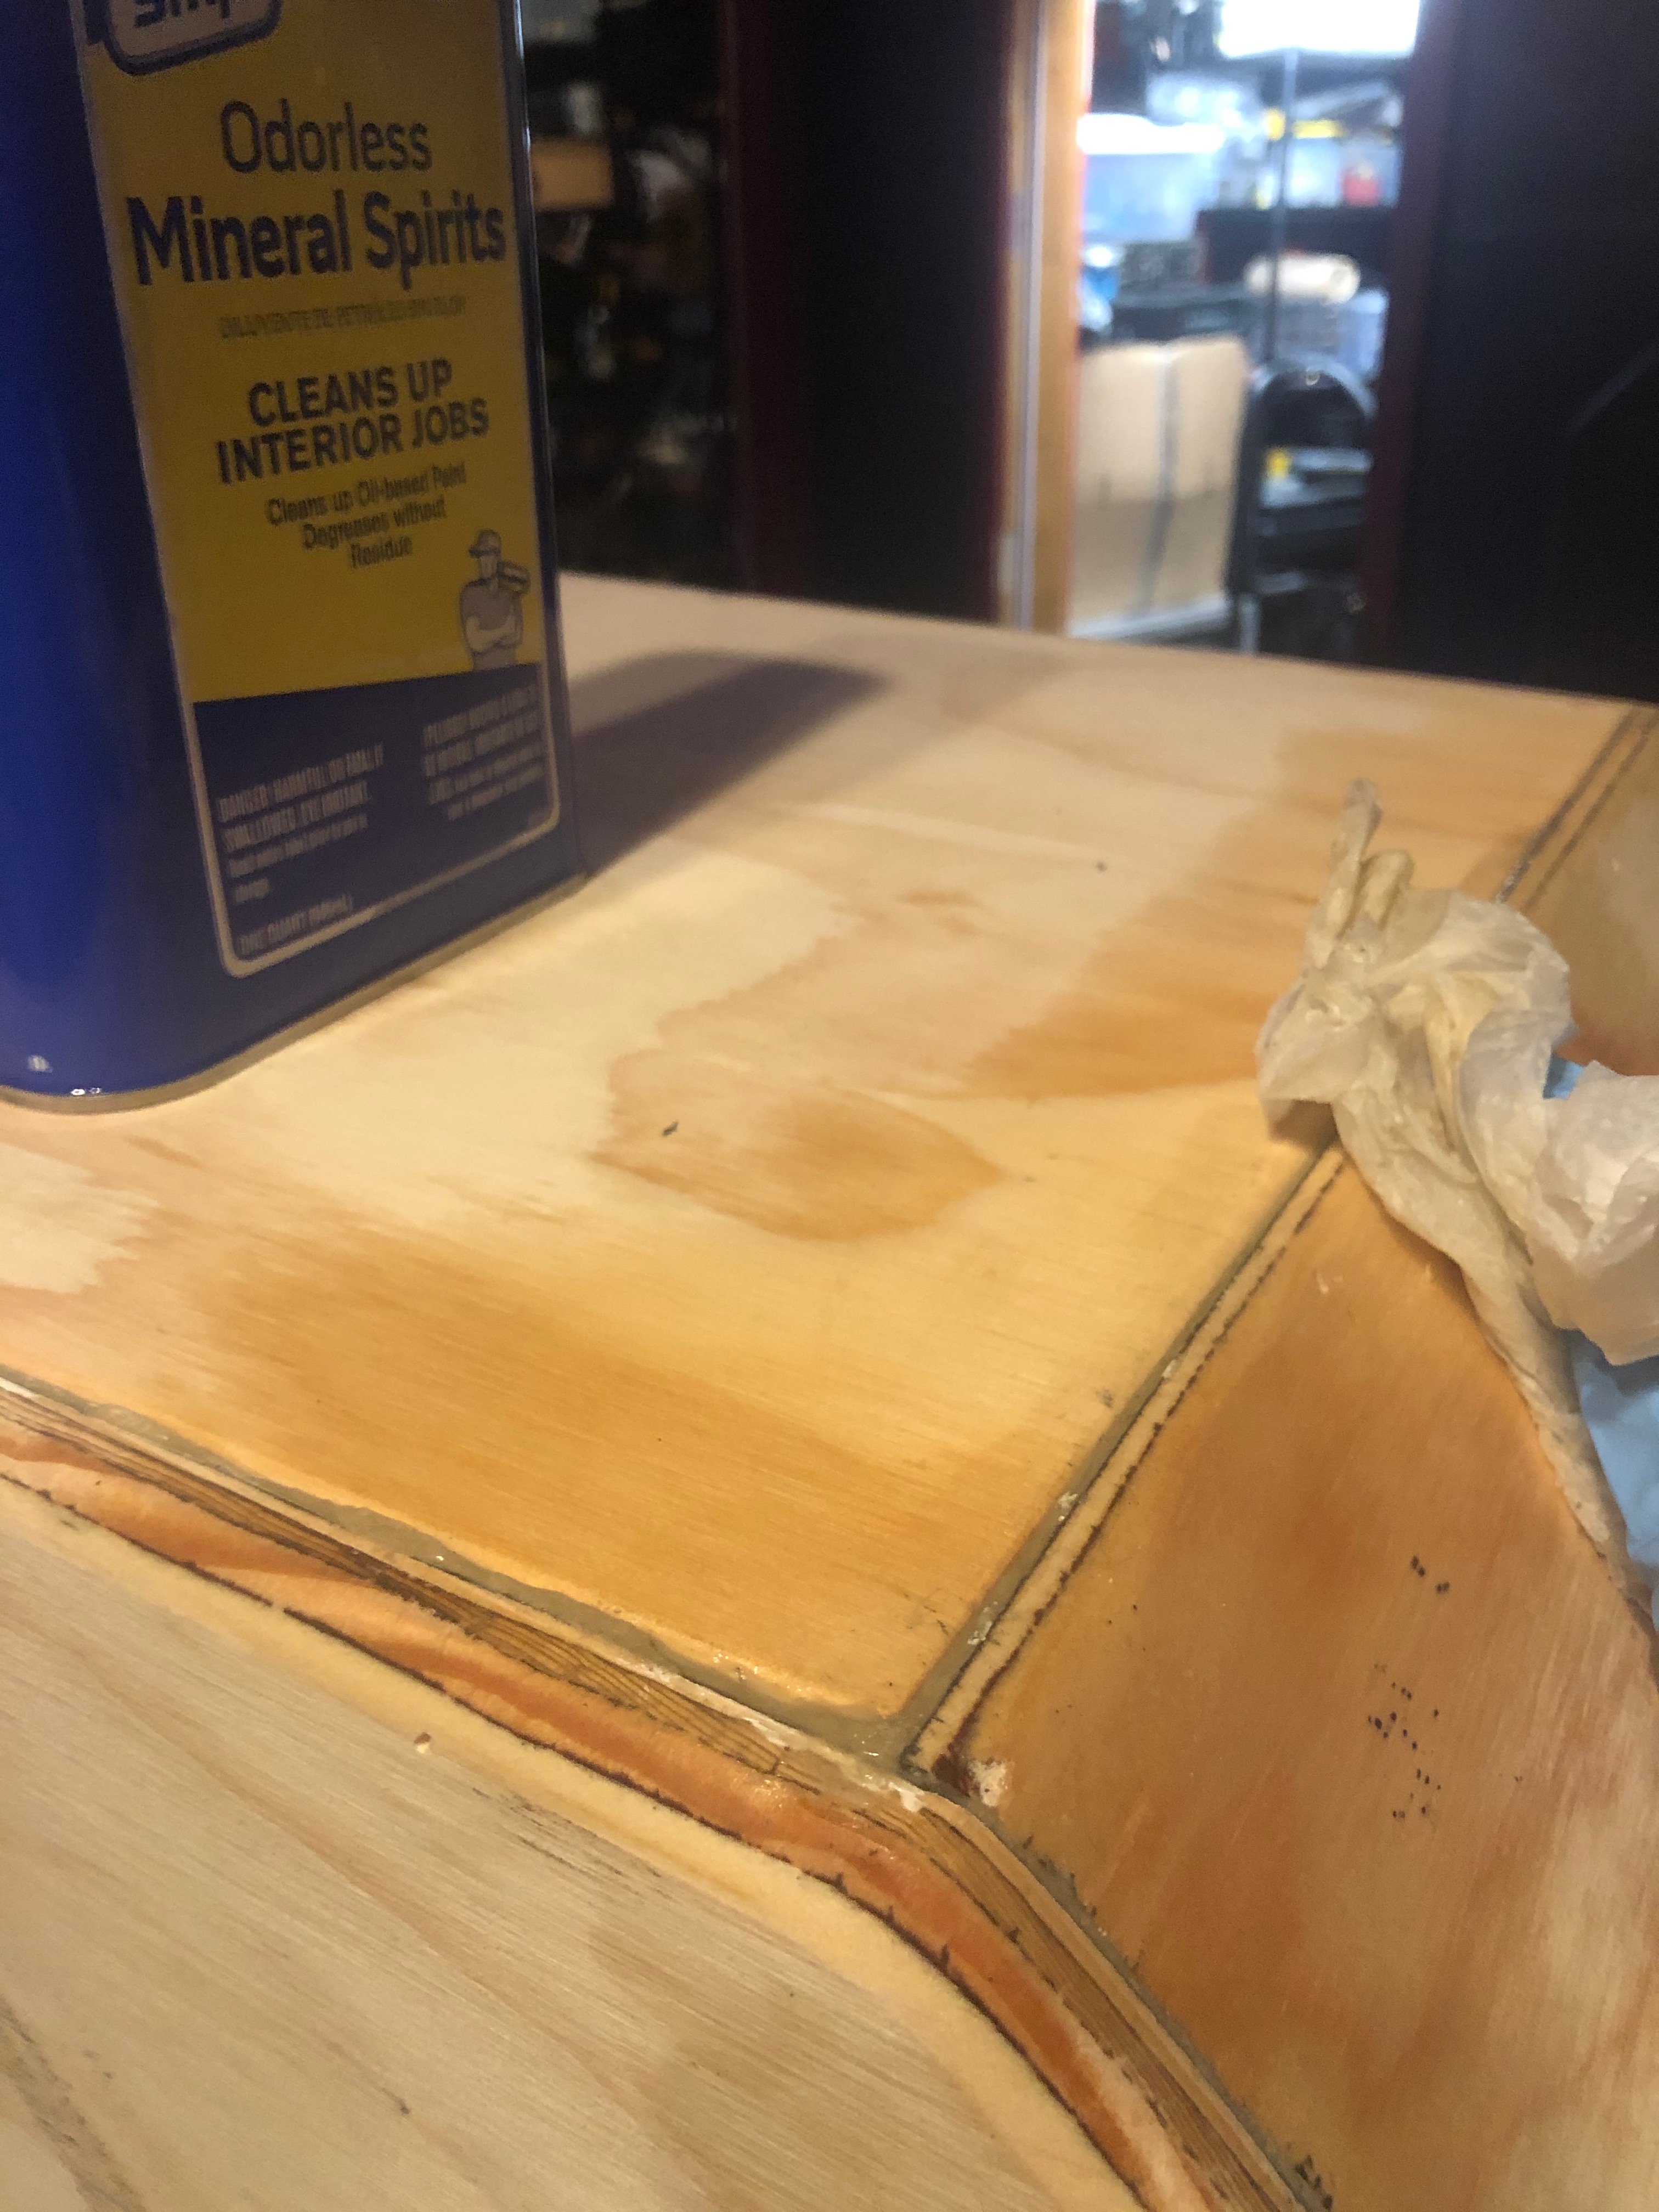
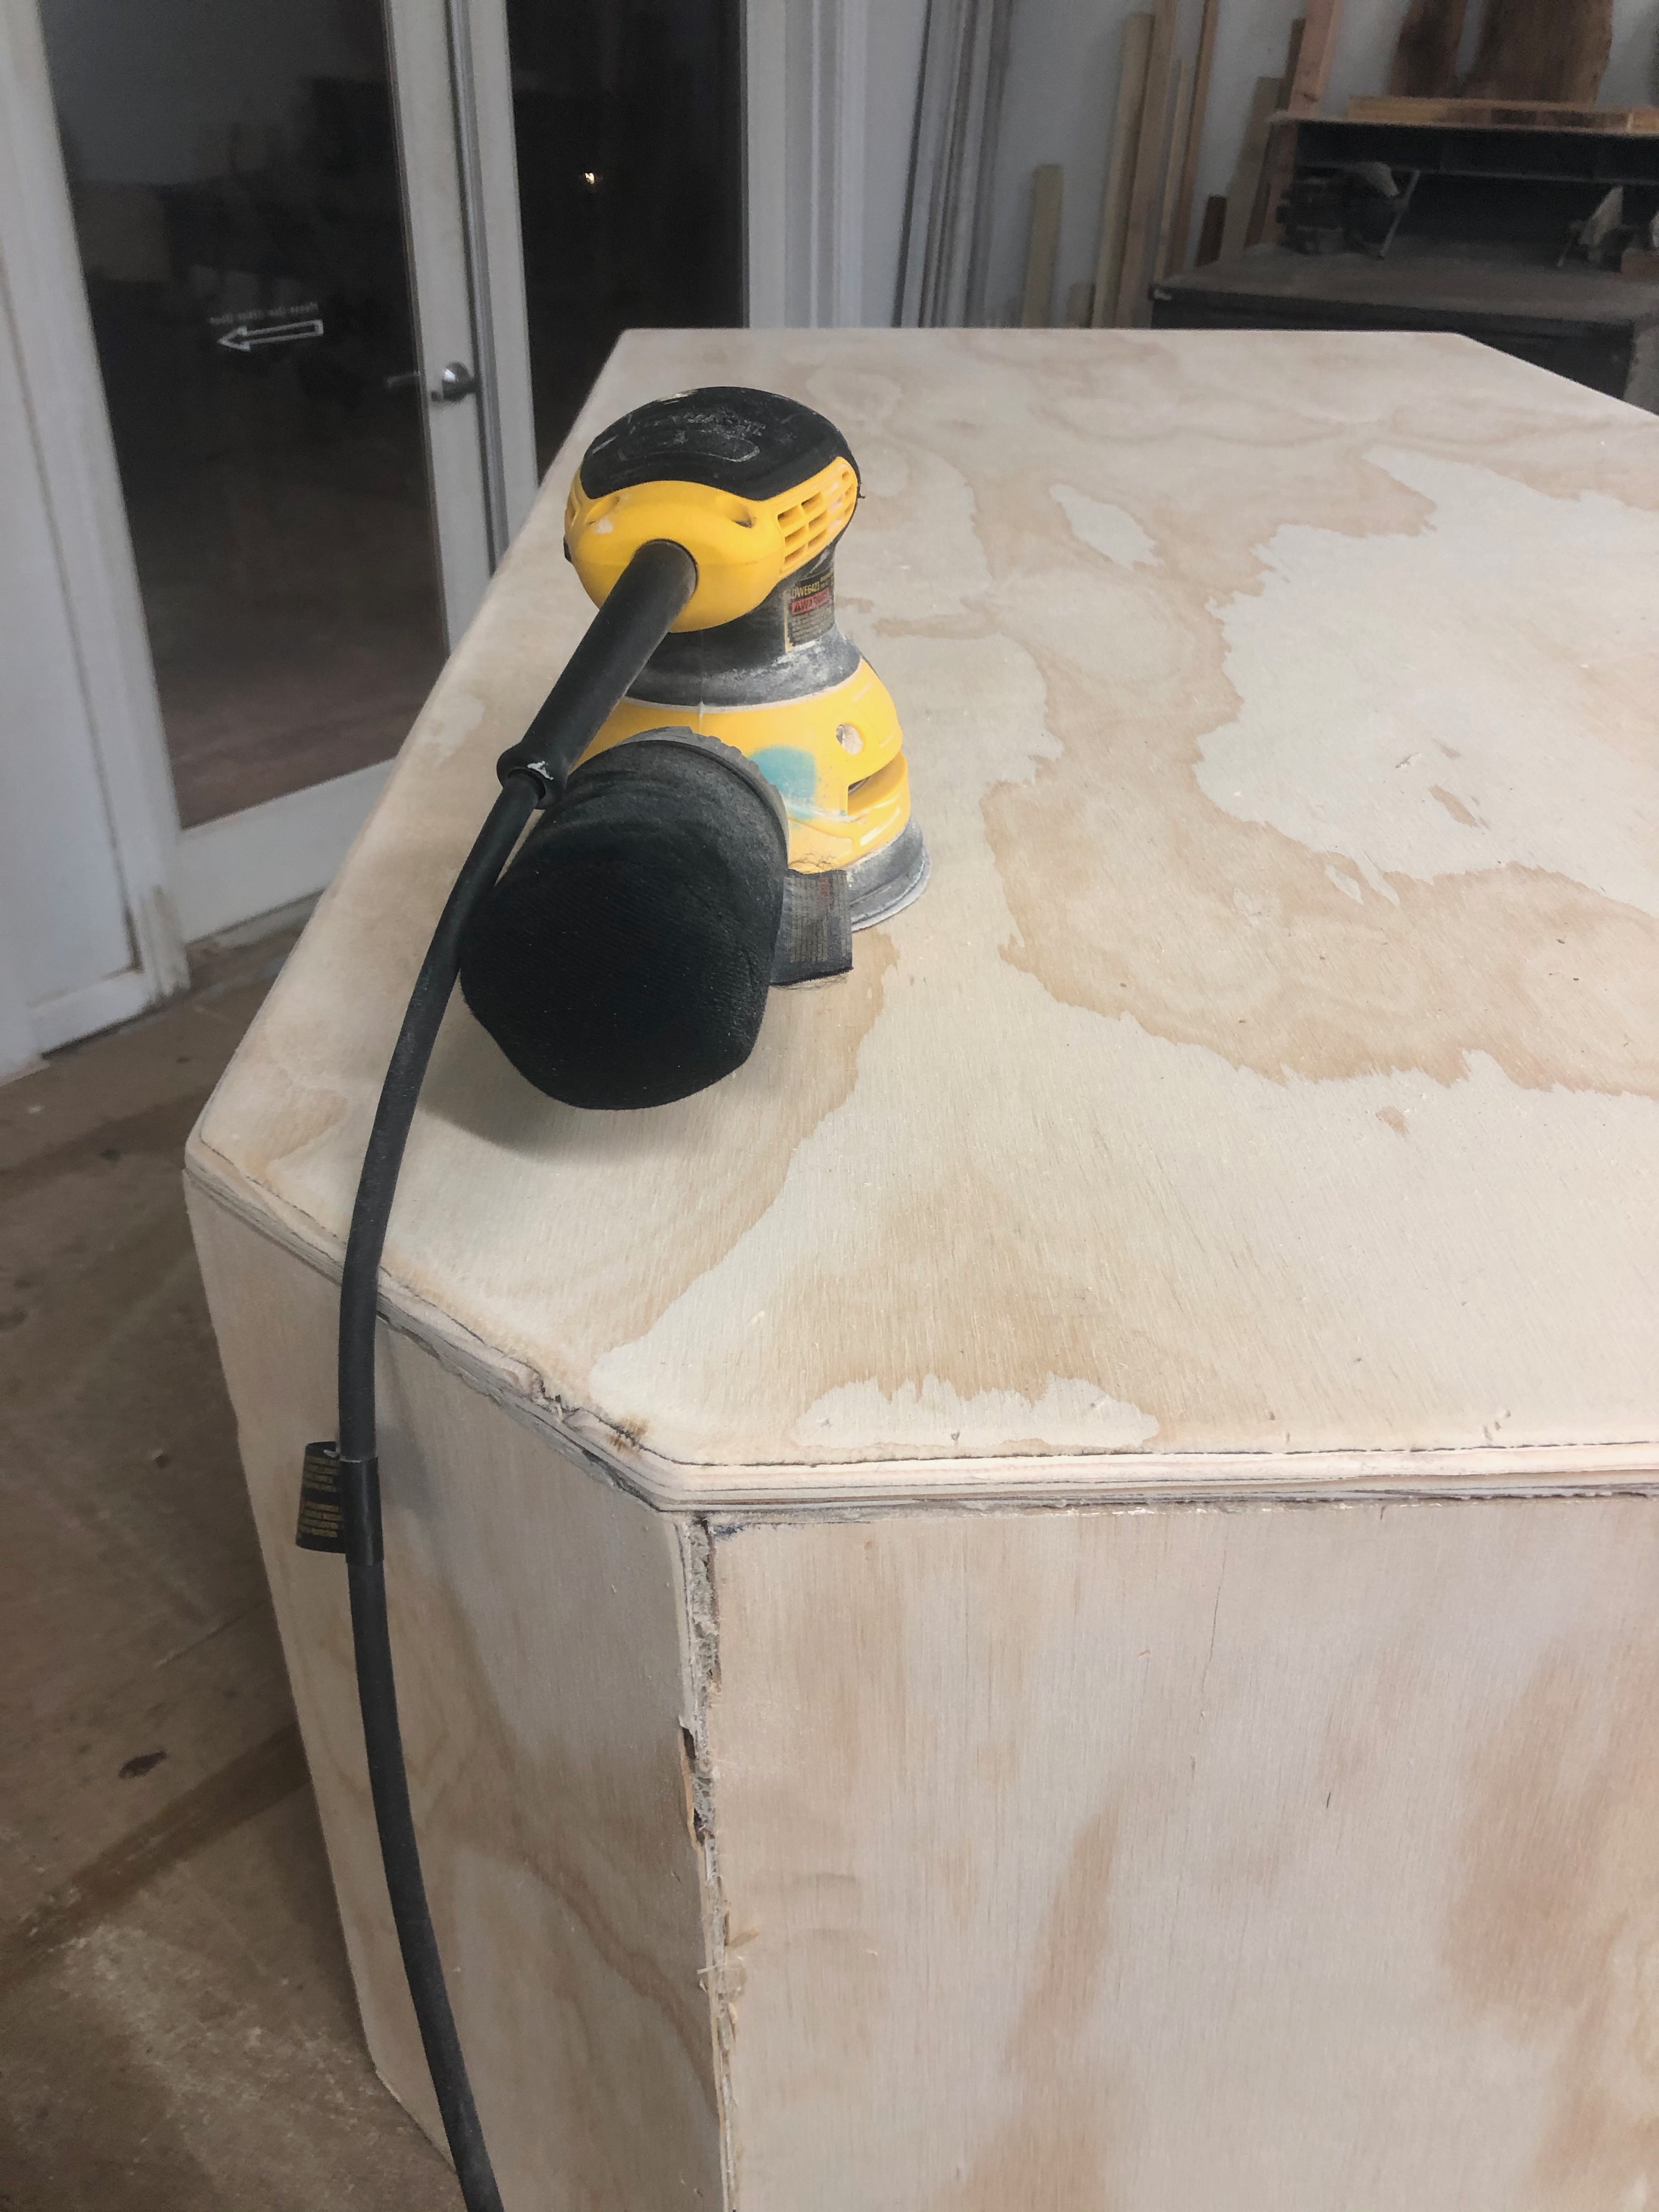
Apply primer and do one last final sanding job.
We >>HIGHLY<< recommend Duratex for a great “Touring” look. We have found this casting to be super strong and it is super easy to spot paint over any nicks or scratches. It’s expensive but worth it. You can save money by applying a layer of primer (as stated above [hint hint]).
Step 15: Install the driver.
Wire up the driver, attach it to the cabinet with bolts and close the door. I also run a band of light weather stripping around the top of the door brace for an extra strong seal.
Step 16: (Optional) Install casters onto Part 11.
Step 17: Test!!
Make sure to “burn” a new driver in at low volume for 3-7 hours before turning it up. Don’t skip this step as you can easily blow a new driver if you run too much power through it and force it to flex before it has had a chance to “warm up”.
With bass sounds coming out of your box, walk around with your cheek near all of the cracks and make sure no air is leaking out. It is vitally important that this box is sealed. Wait until the drivers are “burned” in before you turn the volume way up. You will not be able to test if the parts 10 and 12 are sealed until you turn the volume way up. If you used the right adhesive, your cabinet should be air tight. If it is not, please apply extra adhesive to the wood near any gaps.
—